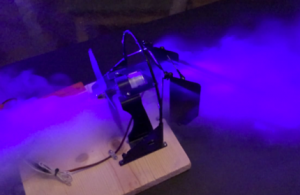
SuperFan is powerful wind generation system created with VR simulations and games in mind. It adds an impressive amount of immersion, especially when combined with rollercoaster and racing simulations.


Here’s a short video a dual SuperFan setup with Assetto Corsa:
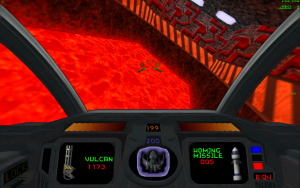
And here’s a video of one of the first rides in NoLimits 2:
Background
I’ve always been interested in VR and immersion, especially immersion beyond what a VR headset can provide. Even back in the 90’s when I was playing Descent 2 on my Virtual IO I-Glasses I couldn’t help but wish I could feel the heat coming off the lava.

Fast forward to 2014. I received my DK2 and once again I found myself wishing for more immersion than the display alone could provide. Playing primarily racing games and stumbling onto NoLimits 2 left me wanting to feel the rush of wind in my face. I thought about building something custom, but before I did that I thought it’d be good to see if anyone else had beat me to it. That’s when I found the Petal and I was really excited!

Unfortunately the Petal didn’t make its Kickstarter goal. Some of the backers said that the team had overcomplicated things by supporting directional wind (which backers said would only direct wind away from the player). Other backers said one fan wasn’t enough. They wanted the option to add more fans over time. I agreed, so I set off to build my own wind system that would address both concerns.
Hardware

The project I ended up creating is capable of moving a column of air more than 4’ feet wide at speeds of up to 18 MPH. That may not sound like much but in a climate controlled setting, especially with a VR headset on, these speeds feel more like 31 – 38 MPH which are near-gale speeds. It’s enough wind to blow the fan backwards off the table if it’s not weighed down.
My approach has two separately addressable channels so directional wind is still an option, and both channels can be directed at the user instead of away. Finally, it’s expandable. A single controller can easily drive 4 high-current fans. This means it can move a column of air almost 8’ wide if the fans are sitting next to each other or generate almost 96 cubic feet of wind when stacked in a 2 x 2 cluster. It’s even possible to drive multiple controllers from the same PC, which would allow for unlimited expansion.
I want to say up front that cost wasn’t a primary focus in my build because I tend to approach projects with a Tim “The Tool Man” Taylor mentality. I went way overboard. I wanted wind and a lot of it, and I wasn’t trying to build something for mass production. TONS of savings can be had by using cheaper components or leaving features off altogether. For example, using cheap PC case fans can dramatically reduce cost by allowing the use of cheaper wiring, a cheaper controller and a much cheaper power supply. On a shoestring budget, a SuperFan can easily be built for under $100 bucks.
Below are two parts lists. The first one is my actual build and the second is a theoretical list for a much cheaper but still effective version.
Crazy Build
Cheap Build
Controller Code and Protocol
NOTE: If you use one of the reference implementations on GitHub you don’t need to understand the protocol and you can skip the rest of this section.
The SuperFan project is really all about controlling one or more fans from a PC. The Software and Future Proofing section below explains how to interface with existing games, but first we need the controller to “speak” a protocol that the software understands.
The software we will be using, SimTools, is very flexible. It can handle almost any protocol but for simplicity and speed I have defined a lightweight protocol that I recommend. The protocol and reference implementation for the T’Rex controller can be found on github.com/jbienz/SuperFan. For completeness I’ll document the protocol here as well.
Protocol
The recommended protocol for SuperFan controllers starts with a connection at 115200/8-N-1 (115200 kbps, 8 data bits, no parity bit, 1 stop bit). The protocol is a simple 6-byte protocol in the following format:
[Start] [Command] [Param1] [Param2] [Param3] [Param4]
[Start]– The beginning of a command packet. (0x0F)[Command]– The command to perform.[Param1]– The first parameter for the command.[Param2]– The second parameter for the command.[Param3]– The third parameter for the command.[Param4]– The fourth parameter for the command.
Commands
Startup
Informs the controller that a session is starting. The controller may or may not do anything in response to this command. Simulators should send this command when starting a game.
- Command: ‘1’ (ASCII 0x31)
- Param1: Ignored
- Param2: Ignored
- Param3: Ignored
- Param4: Ignored
Speed
Sets absolute speed for up to four motors. The recommended placement of fans is #1 Front Left, #2 Front Right, #3 Rear Right and #4 Rear Left
- Command: ‘S’ (ASCII 0x53)
- Param1: Motor 1 speed (0-255)
- Param2: Motor 2 speed (0-255)
- Param3: Motor 3 speed (0-255)
- Param4: Motor 4 speed (0-255)
Logging (Optional)
- Sets the log level of the controller (for diagnostic purposes)
- Command: ‘L’ (ASCII 0x4C)
- Param1: Log level (0 = None, 1 = Error, 2 = Warn, 3 = Info, 4 = Debug)
- Param2: Ignored
- Param3: Ignored
- Param4: Ignored
Shutdown
Informs the controller that a session is ending. Usually the controller responds to this command by setting all motors to speed 0. Simulators should send this command when exiting from the game.
- Command: ‘0’ (ASCII 0x30)
- Param1: Ignored
- Param2: Ignored
- Param3: Ignored
- Param4: Ignored
Example Packets
Signal a new session and prepare to receive speed data
// [Start] | [1] Startup | [00] | [00] | [00] | [00]
0x0F 0x31 0x00 0x00 0x00 0x00       // Realterm
<15><49><0><0><0><0>                // SimTools
Set motor 1 speed to 12%, motor 2 speed to 50%, motor 3 speed to 80% and motor 4 speed to 25%
// [Start] | ['S'] | [21]  | [127] | [204] | [64]  // (21 / 255 = 12%) (127 / 255 = 50%) (204 / 255 = 80%) (64 / 255 = 25%)
0x0F 0x53 0x15 0x7F 0xCC 0x40       // Realterm
<15><83><21><127><204><64>          // SimTools
Enable logging (DEBUG level)
[Start] | ['L'] | [4]  | [0] | [0] | [0]
0x0F 0x4C 0x04 0x00 0x00 0x00       // Realterm
<15><76><4><0><0><0>                // SimTools
End the session and stop all motors
// [Start] | ['0'] Shutdown | [00] | [00] | [00] | [00]
0x0F 0x30 0x00 0x00 0x00 0x00       // Realterm
<15><48><0><0><0><0>                // SimTools
The Build
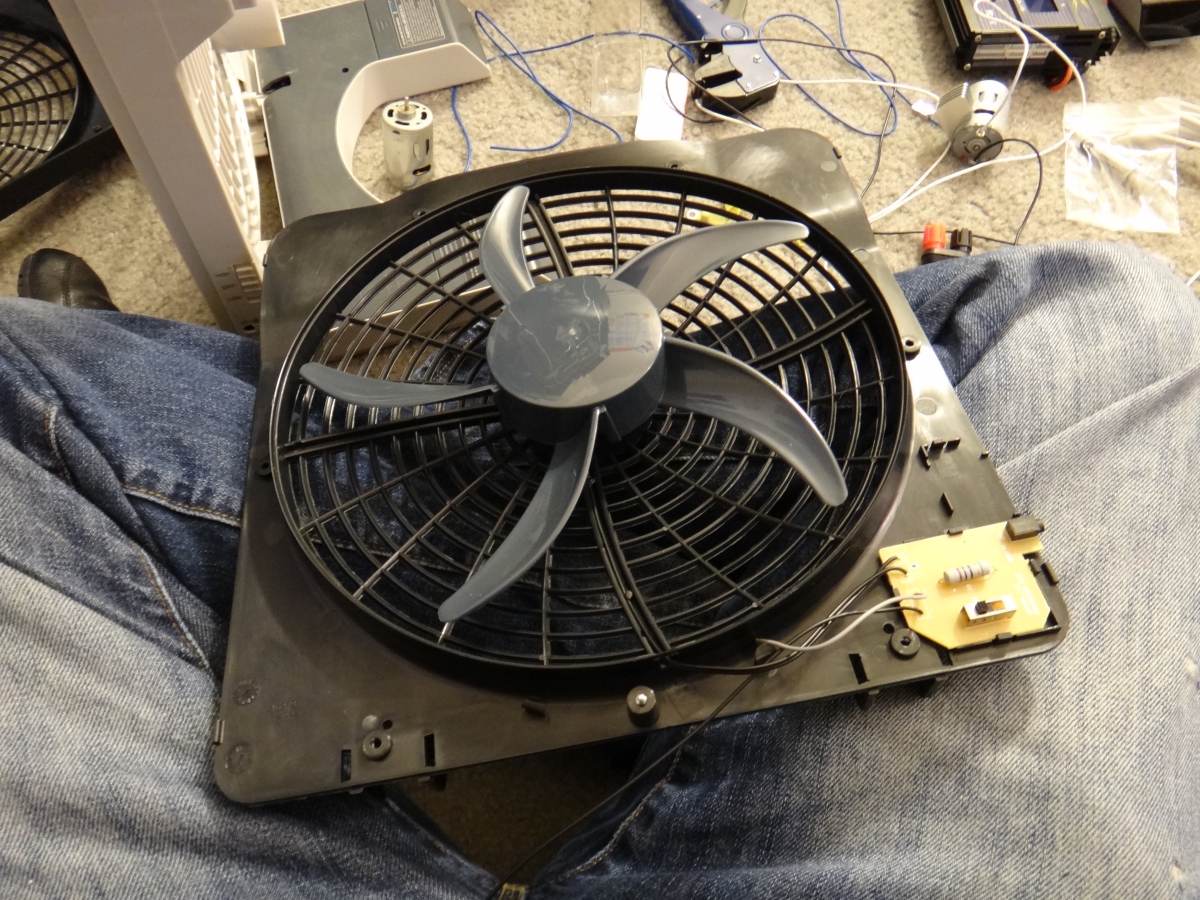
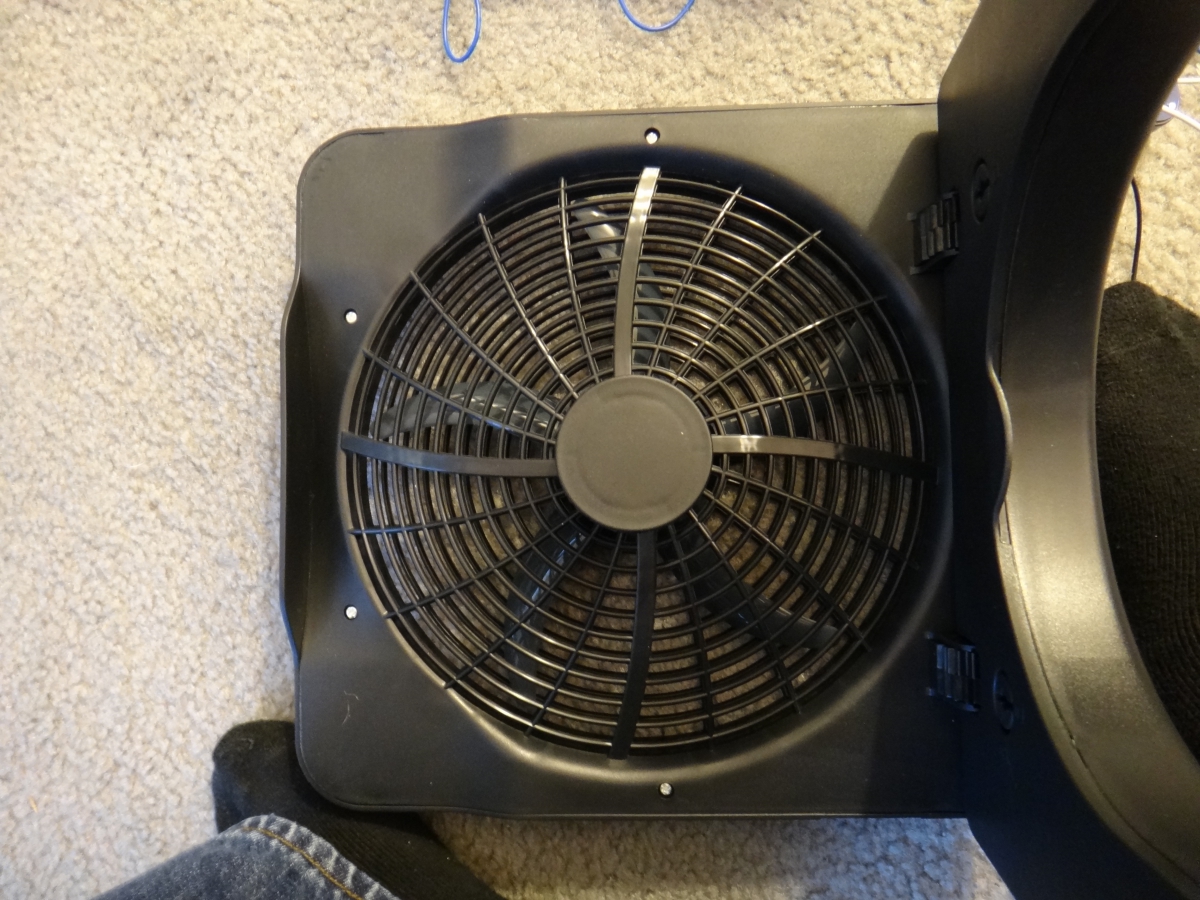
Fan Housing and Motor
The fist thing I wanted to take care of was making sure I had a solid housing for the fan. I didn’t just want 20,000 RPM blades spinning in mid air unprotected. I have children and pets! 🙂

I chose to use the body and blades from an O2 Cool fan. It was cheap ($20) and it held the motors well with almost no modification. The fan is easy to disassemble but there is a particular order to it.

We start by opening up the base where the batteries are inserted, then we unscrew the plastic piece that applies pressure to the retention “gear” snaping the fan head to various angles.

Next, using a flathead screwdriver we separate the base from the upper fan body right at the “gear hinge” area. It’s not shown in this picture but now is also a good time to cut the power wire going to the fan head and to remove all of the battery springs and spacers from the base. We won’t need them again.

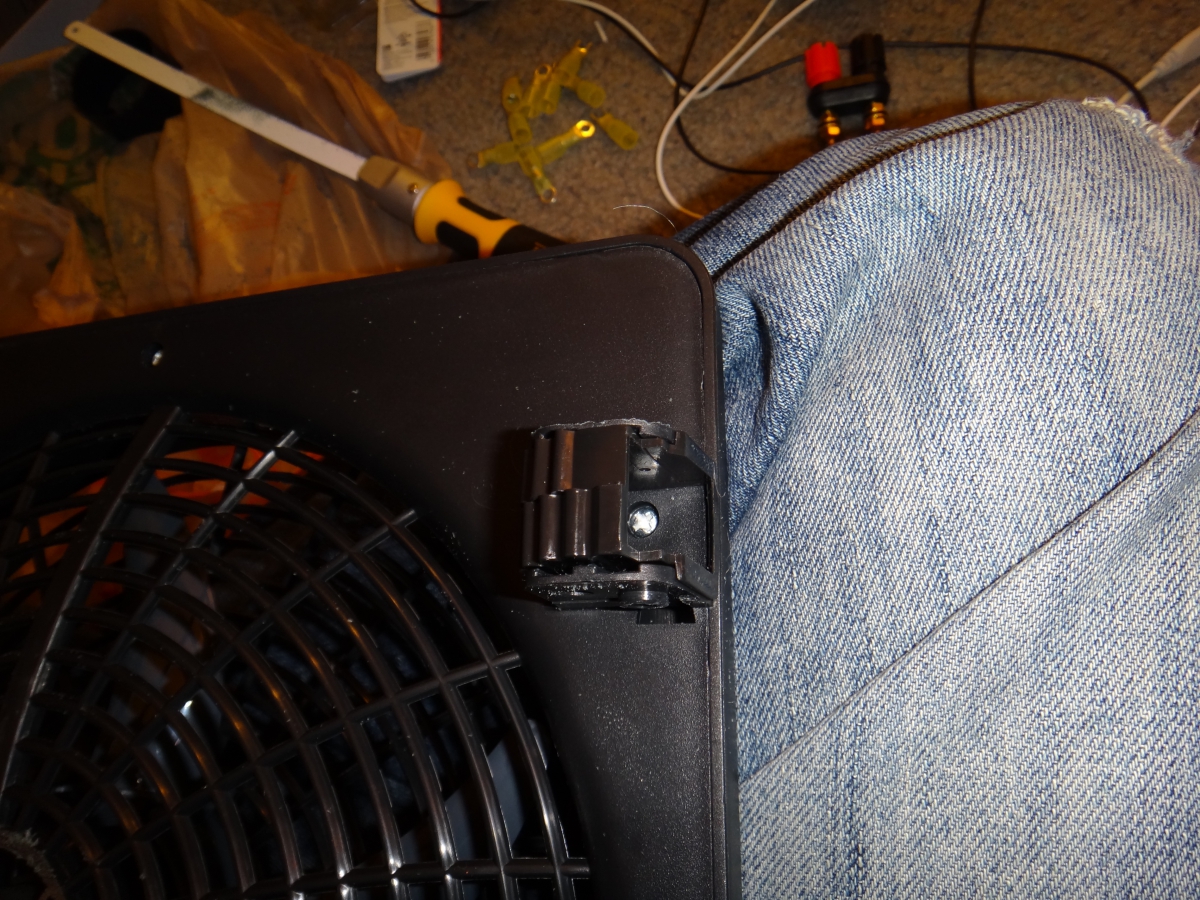
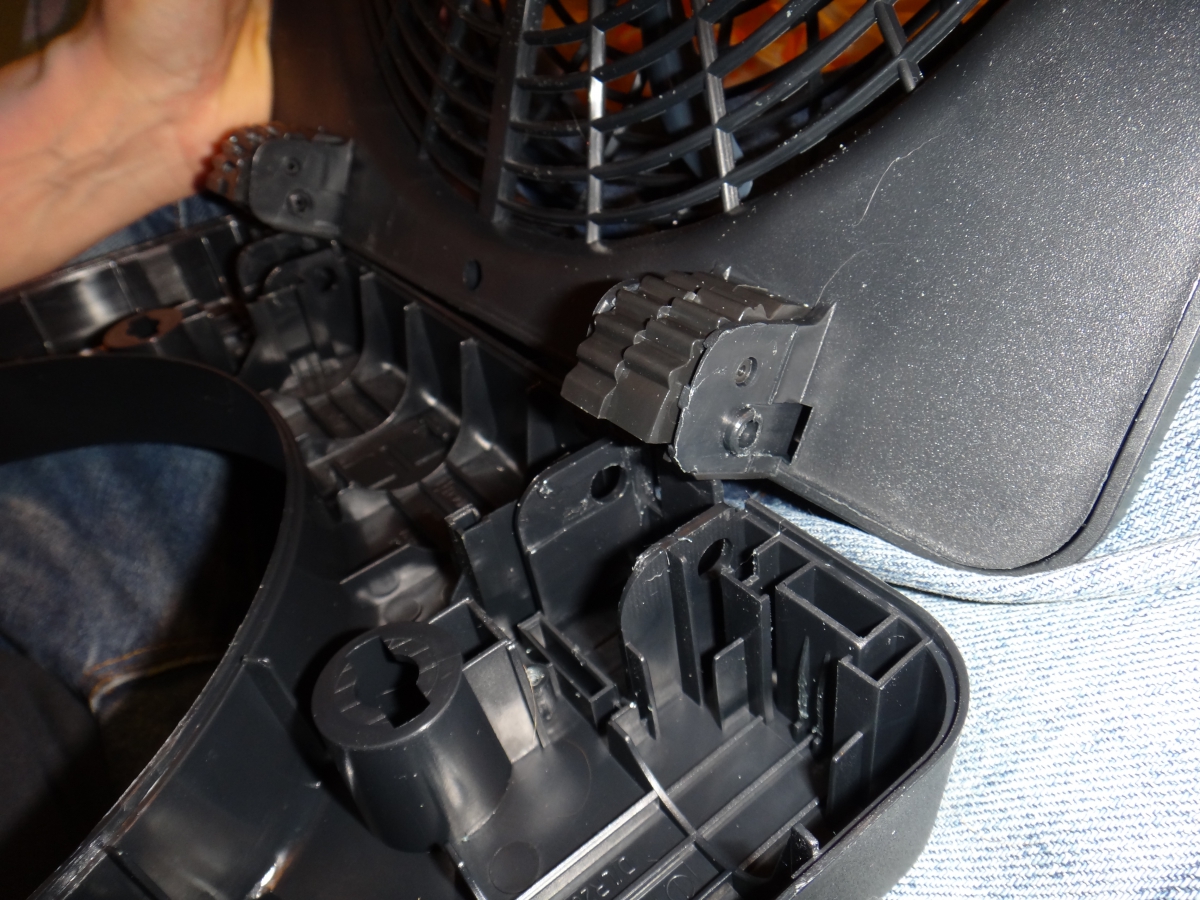
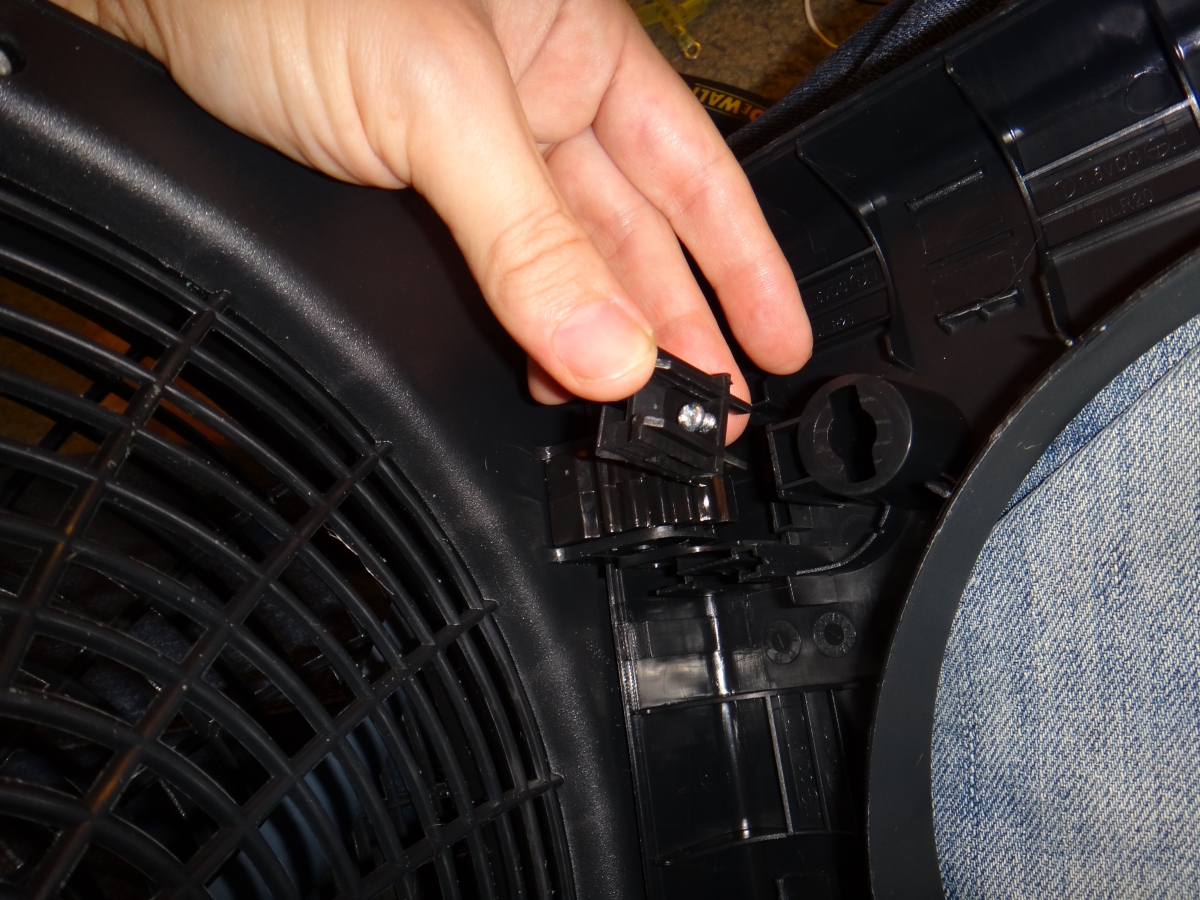
Now most of the screws needed to open the fan head are easily accessible, but two of them are hidden behind the “gear”. Using a flathead screwdriver, pop the gear out of the slot just like we did in the base then remove all screws.
Important Note: I recommend leaving the three screws along the bottom edge of the fan out during reassembly. This will allow you to open the head back up again later if necessary without having to disassemble the base.

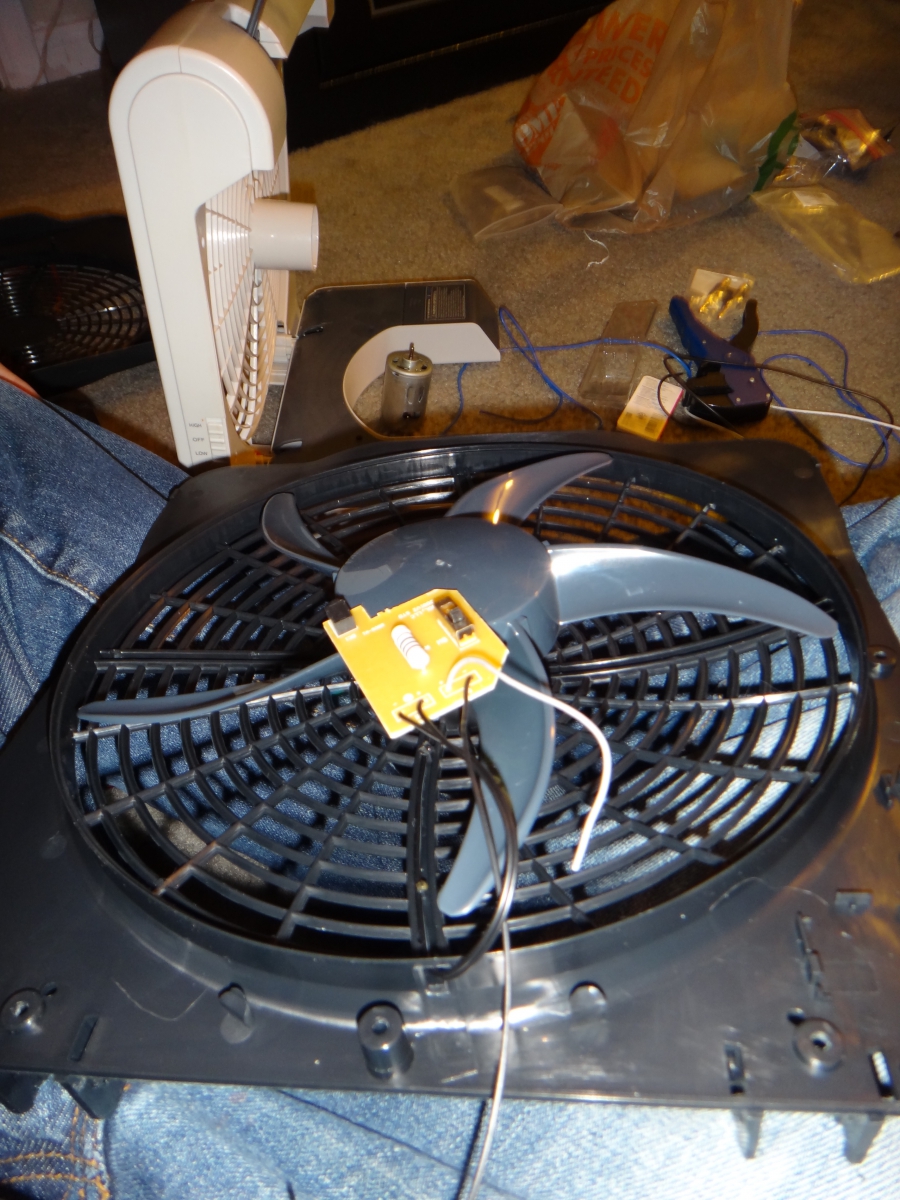
Once inside the fan head, remove the fan blades by carefully pulling the blade assembly directly up and away from the motor. It will require some force but the blade assembly will slip off of the motor shaft.

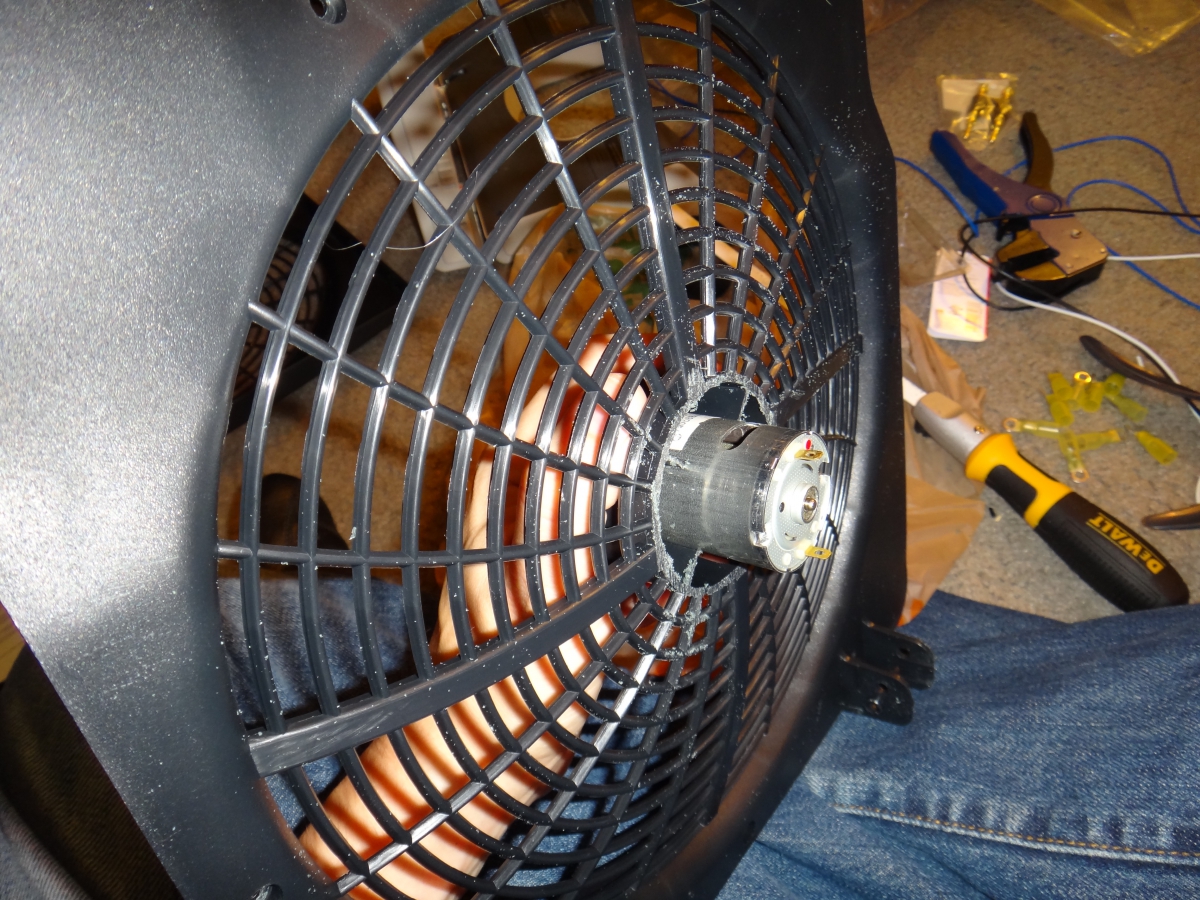
Underneath the blade assembly you will see two plastic tabs (top and bottom) and two screws (left and right). Squeeze the two tabs inward to remove the back plate off of the motor housing. Unscrew the two screws and remove the motor. Set the two screws aside as we’ll need them for the new motor.

Now is a good time to remove any remaining wire from the fan head as well as the small circuit board with switch and power connector.

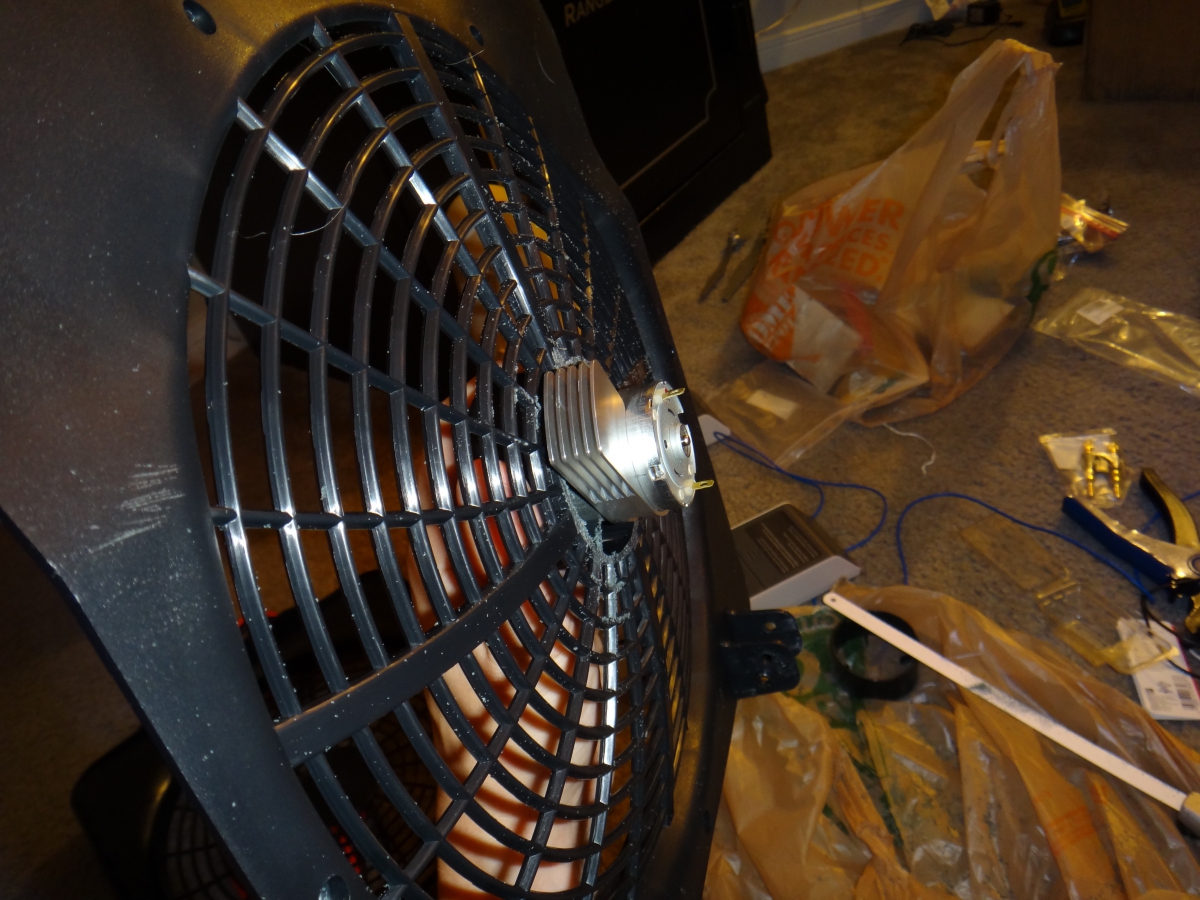
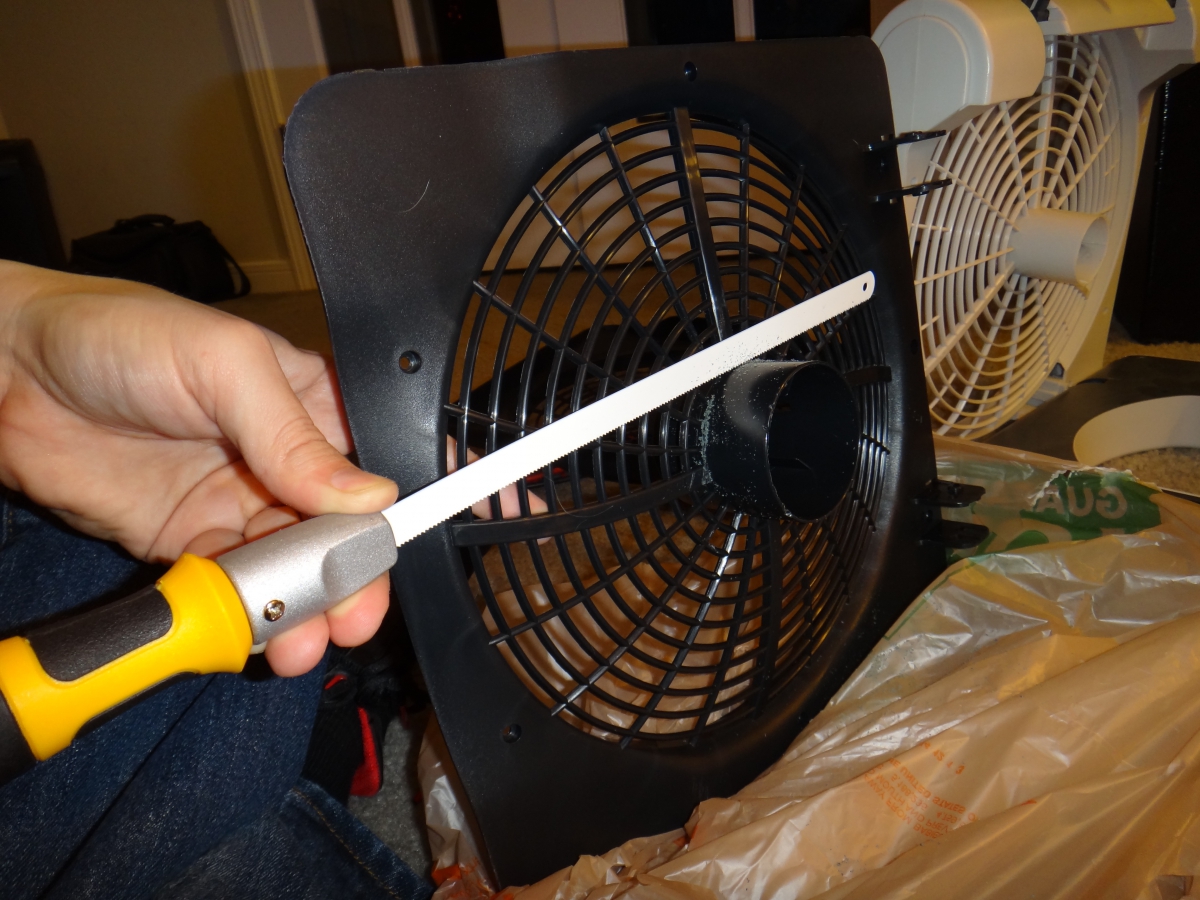
Next, using a small hacksaw cut off the outside portion of the motor housing cylinder. Make sure to remove the outside of the housing on the back of the fan head, not the inside portion where the screws and tabs are. We need to remove this portion of the tube to give the motor more breathing room and to allow us to attach the heatsink.

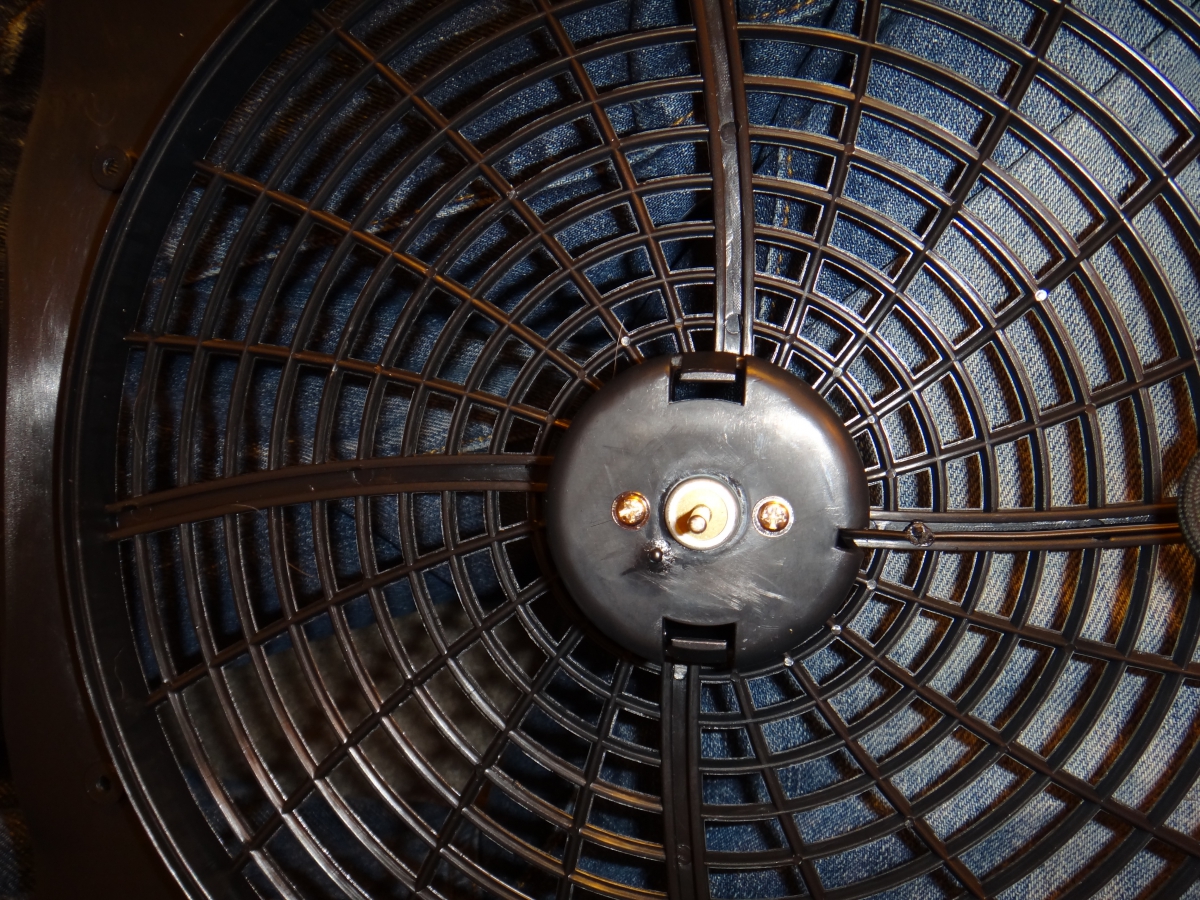
Using the original screws, mount the new motor into the motor housing cylinder.

Reassemble the fan head by following the directions above in reverse order. Once the fan head is reassembled, apply some thermal compound to the heatsink and snap it into the motor being careful not to cover up either of the two ventilation holes. I recommend applying some Locktight Red or Blue to the corners if the heatsink where it touches the motor. This will keep the heatsink from rotating over time and accidentally covering up the ventilation holes. If you do this, be sure the contact areas of the motor are clean using rubbing alcohol or the Locktight won’t stick.
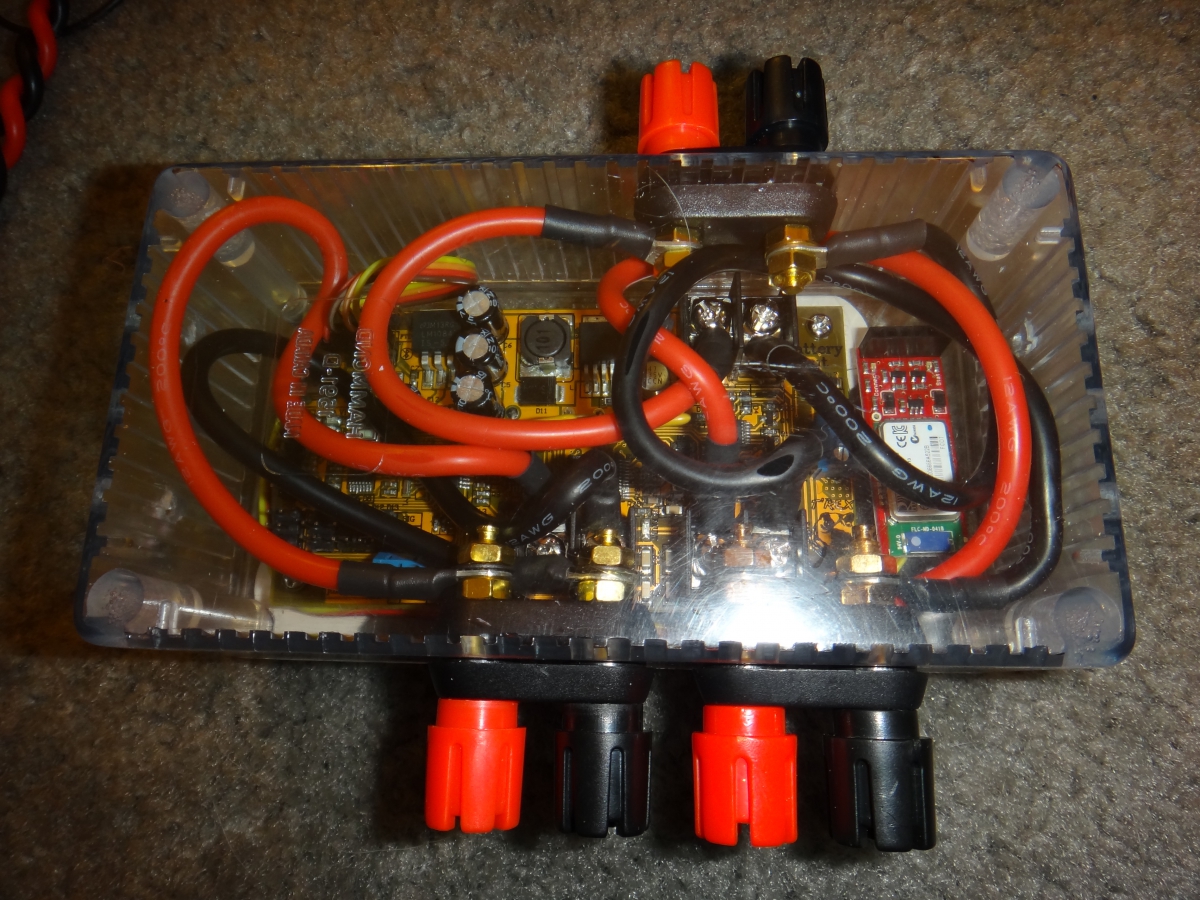
Controller Enclosure
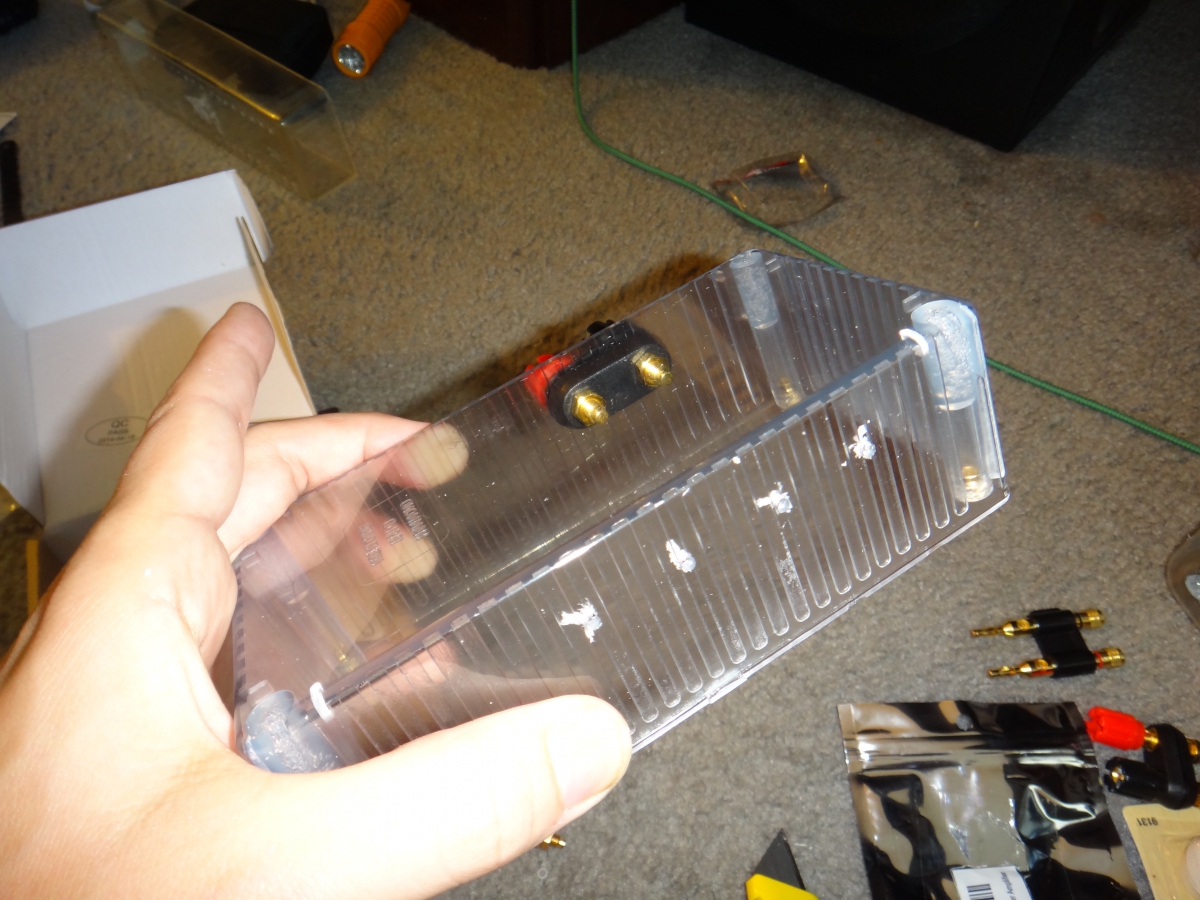
After the fans were built I shifted my focus to the controller. I wanted the controller to be protected, not just sitting in a cardboard box. I was also getting pretty proud of what I’d built so far so I wanted to put all of the circuitry in a transparent case so I could show it off.
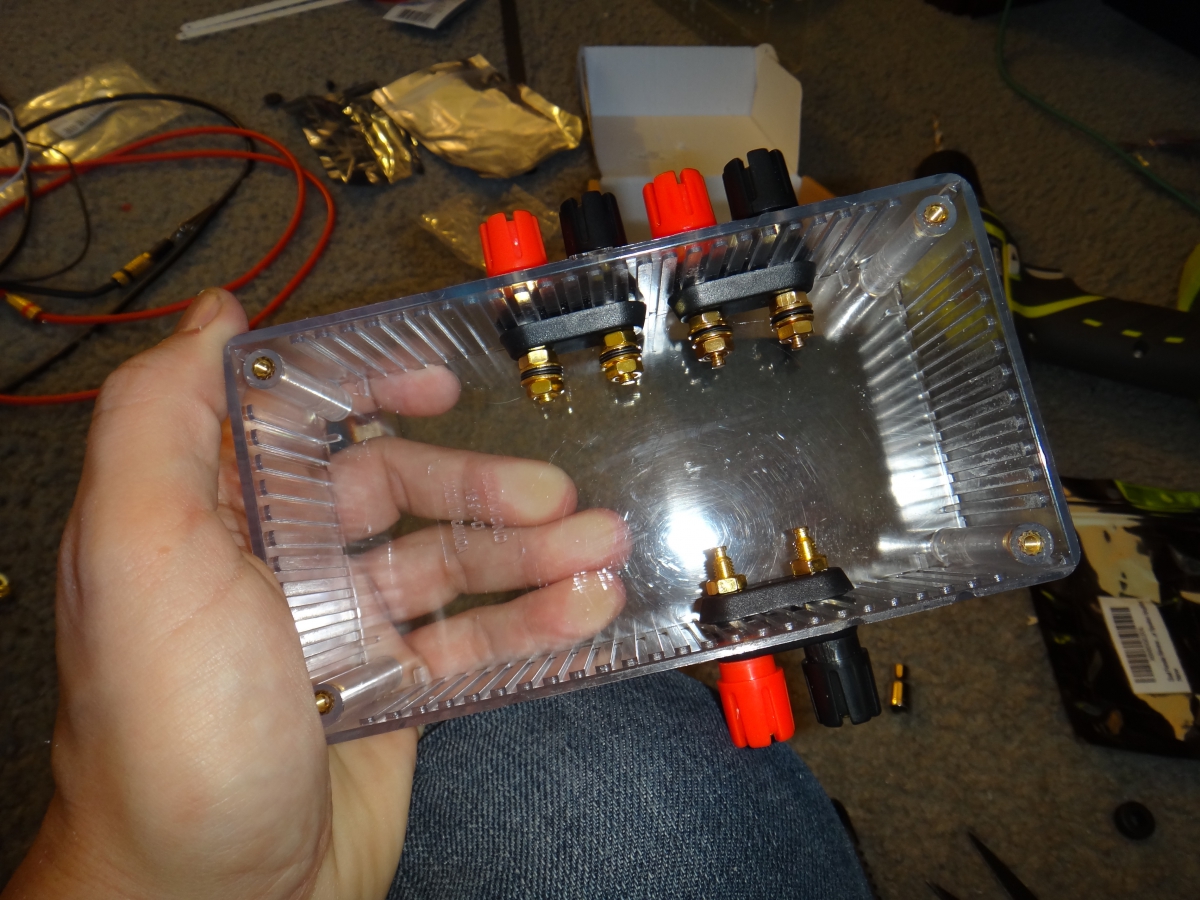
I knew I wanted to be able to quickly attach and detach the fans and power supply so I decided to go with banana terminals and plugs. I also went with heavy duty 12 gauge wire to make sure I had no problem carrying all of the current. With all of those components in mind, a 6” x 3” x 2” case ended up being the smallest I felt everything would fit in. And I was right; it just barely all fits in.

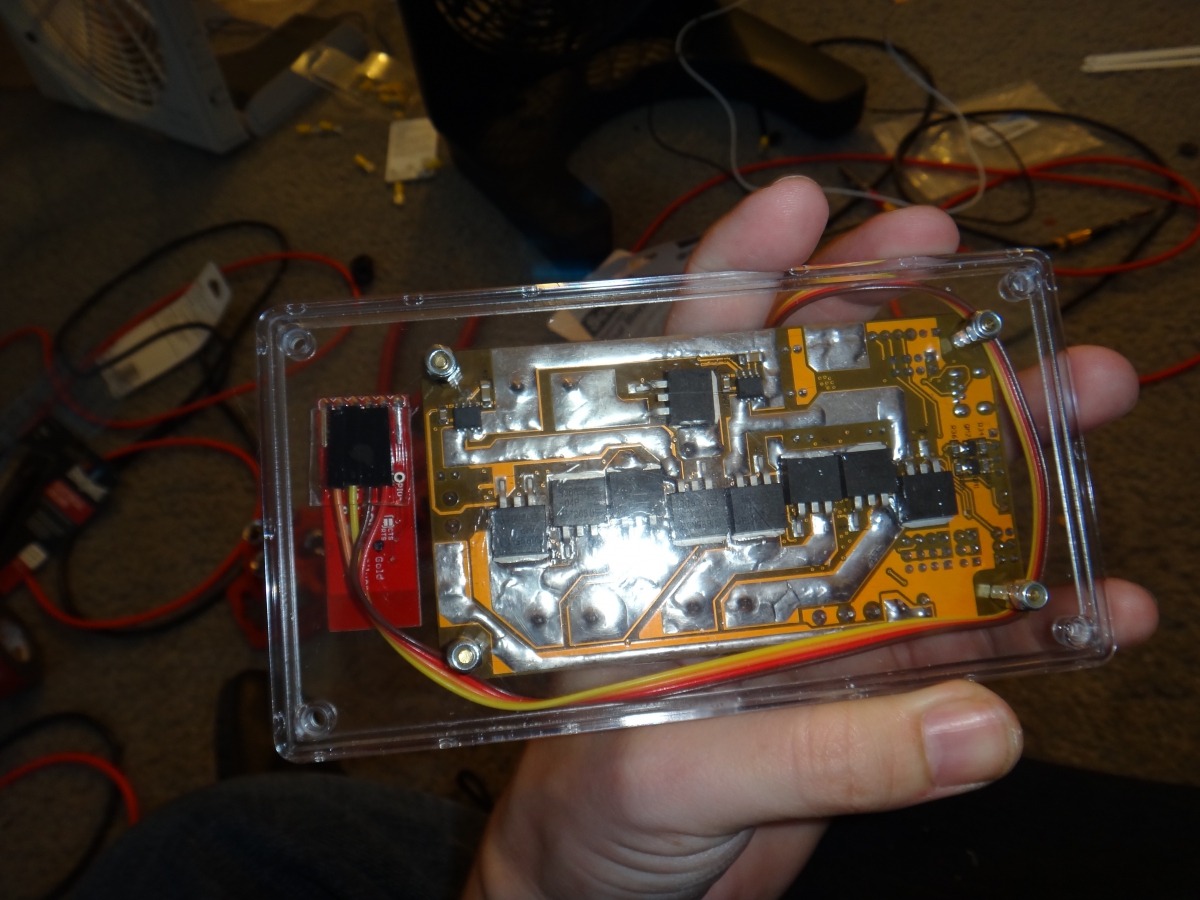
I started by mounting the T’Rex board to the lid of the case using the shorter of the supplied legs.

Then next to it I mounted the Bluetooth daughter board using some 2-sided tape. You can see the ribbon cable from the other side of the lid. I later added some more 2-sided tape between the daughter board and the ribbon because the daughter board ended up sliding out of the ribbon cable just enough that it stopped responding and I had to open the whole thing up again.

After the boards were attached to the lid I drilled holes for the banana terminals around the main body of the enclosure. This is a delicate procedure because the plastic is not a soft plastic and it can crack easily. I used several sized bits, starting from tiny and working my way up. I also ran the drill in reverse, which caused the drill bits to more melt their way through then cut their way through.

After all holes were drilled for the terminals I mounted them, then I drilled a few more holes for ventilation.

Finally I used the spade connectors, ring connectors and heat shrink tubing to connect the banana terminals to the corresponding ports on the T’Rex board. At this stage it’s very important to use just the right amount of wire. Too short and you won’t be able to connect all terminals to the controller. Too long and you won’t be able to fit everything into the enclosure. I estimate I used between 4” and 6” of wire for each terminal.
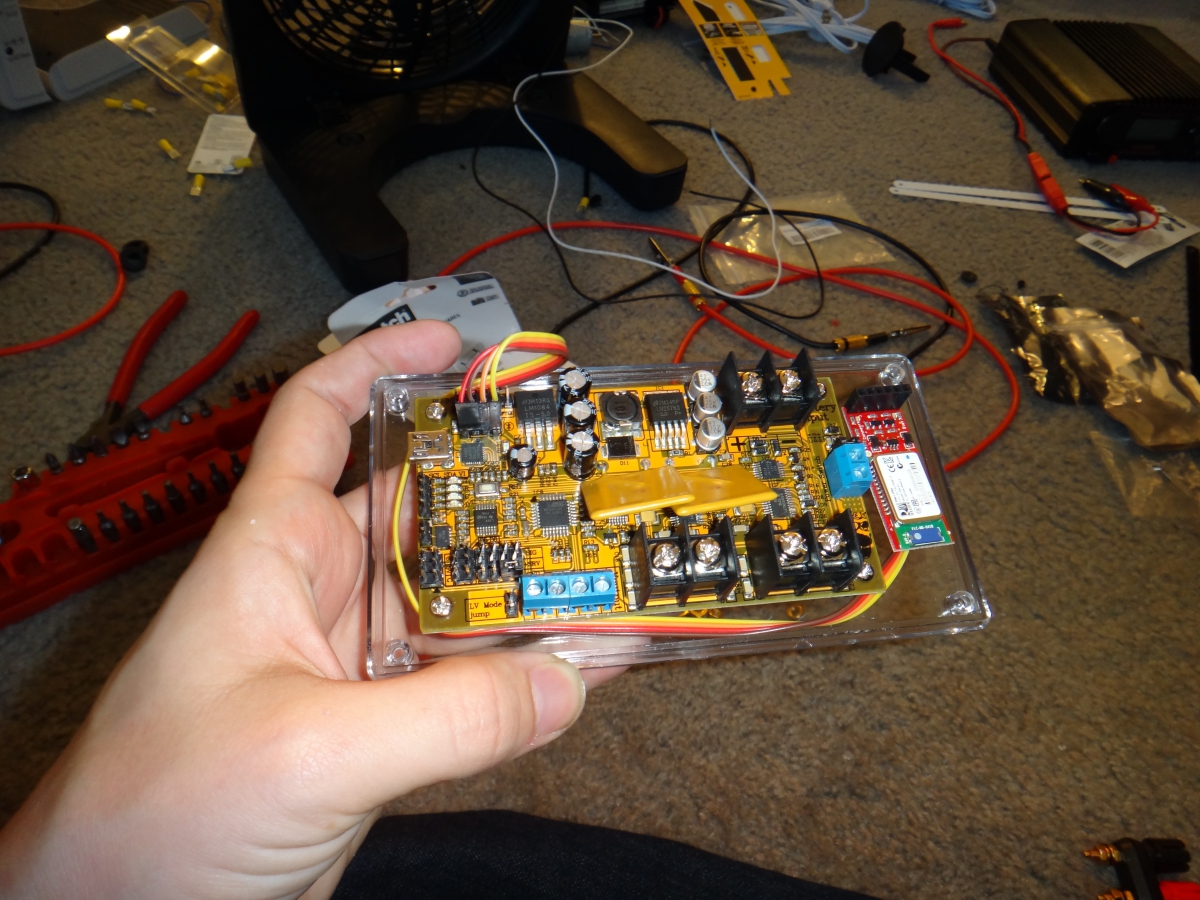
Power and Placement

The final step of the build is to connect the T’Rex to the power supply and the fan(s) to the T’Rex. Again I used banana plugs to make it easy to connect and disconnect everything, and since the T’Rex connects to the computer over Bluetooth there’s no need to worry about the USB cable or worry about keeping it close to the PC.
Software
SimTools
Now that we have the hardware built, the final piece of our project is getting the hardware to talk to software and games. When I first started the project I expected this step to be the most difficult. In fact I originally only planned to support NoLimits 2 and I was going to do that by tapping into the rumble motor support that NoLimits 2 has. If you haven’t heard about this before, connect an XBOX 360 controller to your computer and set it in your lap while riding a coaster. As the speed and turbulence increases, vibrations increase in the controller. It’s a cool effect and I was going to use a very interesting project called Durzno to inject software between the game and the controller and get access to the vibration data. The approach was working and I already had some code written when I stumbled onto SimTools (xsimulator.net).
SimTools is an amazing piece of software. The author (known in the forums as ‘yobuddy’) is a very bright guy. He wanted to make it easy build DIY motion simulators for the home and, more importantly, he wanted those simulators to work with existing popular games. SimTools accomplishes this with an impressive software package made up of five components:
- Game Plugins – The magic that make SimTools work. Every game that is supported by SimTools has a plugin that’s been written for it. The job of the plugin is to read values out of the game in real-time while the user is playing and provide those values into the simulation environment. The values that a plugin can provide include but are not limited to: Yaw, Pitch, Roll, Heave, Sway, Surge and Speed. Speed is less commonly provided by plugins because it’s not needed for motion simulation, but more and more plugin authors are adding Speed for Game Dash support (below) and so that the game can work with projects like SuperFan.
- Game Plugin Updater – A nice little utility that allows you to drag and drop a plugin zip file from the forum and have the files all installed to the right places.
- Game Manager – Effectively is the simulation environment. It provides a UI that allows the user to select from the list of supported games and when the game is launched, Game Manger loads the plugin and begins reading simulation values into memory. It then makes those values available to Game Engine and Game Dash (below).
- Game Engine – Establishes a connection to one ore more controller boards via the network or serial port. It receives data from the simulated environment and translates that data into commands that the controller understands. The controller in turn moves motors, pistons, etc. to give the user a sense of motion. SuperFan does not use Game Engine because Game Dash (below) gives us better access to the Speed value and more control over formatting the data for the fan controller.
- Game Dash – Similar to Game Engine it receives data from the simulation environment and translates that data for a connected controller. But where Game Engine is typically used for moving mechanical things, Game Dash is typically used to animate dashboards and heads-up displays. As mentioned above, Speed isn’t needed for physical simulation so Speed isn’t always sent to Game Engine. However when Speed is available, it’s almost always sent to Game Dash. Game Dash also supports a small scripting language that makes it easy to translate simulation values (like 0 to 30 meters per second) into controller values (like a byte range 0 to 255).
SimTools is amazing, and out of the entire system the only thing I’m not a fan of is their monetization strategy. All of the SimTools components and even the plugins are free, but in order to download them you need “coins” for their forum. Technically you can easily earn coins for free by being an active member of the community. For example, creating a new thread earns you 16 coins and responding to an existing thread earns you 6 – 8 coins. Even simply reading a thread gives you a coin. Unfortunately every download costs 10 coins, so in order to download SimTools (which includes everything but Game Dash), Game Dash and at least one game plugin you’ll need 30 coins. That means that if you’re a brand new SimTools user you’ll need to join the forum and create 2 new threads or participate in 6 existing threads before you can download the software. That’s for just a single game and that’s assuming you never download any updates.If you don’t want to participate in the forums in order to download tools and plugins you can buy an “upgrade package”. For about $30 USD you can have unlimited downloads for a month. You can buy a one year membership for about $50 USD and you can buy a lifetime membership for about $115 USD. The one month membership is the route I went and I’ve also been participating in the forums. So now I’m up to about 162 coins, but when my month ends and 162 coins runs out I’ll be back to trying to save up coins. As I’ve said before, I think SimTools is amazing package and I think the developer should absolutely be compensated for his hard work. I’m just not a fan of needing to make ongoing payments in order to continue downloading plugins over time. I’d much rather pay $30 for SimTools and maybe small modest fees for significant upgrades over time, but be able to download plugins for free. The good news is that anything you’ve already downloaded continues to work even after your membership and coins have expired.
Future Proofing
One of the amazing things about the SimTools plugin system is that it effectively helps you “future proof” your system. As games are updated over time, plugin authors update their plugins to match. And as new games come out, plugin authors can create new plugins for those games as well. This means your shiny new SuperFan already supports several games and more games will be supported over time with very little effort on your part. In fact, if a game you want to play isn’t supported you can write your own plugin and share it with the community! A little bit of programming experience is recommended, but it’s actually surprisingly simple.
The SimTools forum has a step-by-step tutorial on how to write a plugin. The only piece that tutorial doesn’t explain is how to find the memory locations you need in the plugin. That information can be found in this post. Essentially you use a tool like CheatEngine to scan for known values until you find the location the plugin needs to monitor. This approach is notably fragile because it can break if the game is updated, but it’s extremely flexible and can be used with virtually any game or simulation.
Setup and Configuration
Here are the steps to install SimTools and get it working with NoLimits 2:
-
- Turn on your SuperFan and pair it with your PC under Bluetooth settings. Note which COM port number it is assigned.
- Make sure NoLimits 2 is installed and updated to the latest version
- Install SimTools
- Install Game Dash
- Rename your existing GameDash.exe to GameDash.bak, then extract this modified GameDash.exe into the same folder. This modified exe does not allow negative percentages and will no longer be necessary with an update coming soon. GameDash.exe can be found in C:Program Files (x86)GameDash.
- Download the NoLimits 2 plugin and keep track of where you save it
- Run SimTools Plugin Updater and drag-and-drop the zip file from the previous step onto the updater window to install the plugin

- Close the plugin updater then start Game Dash
- Right-click on the Game Dash icon in the system tray and choose ‘Settings’
- Set the following Output Settings for Game Dash (these are assuming you’re using the recommended SuperFan protocol documented above):Output Type – SER
ComPort – (the port you noted in step 1)
BitsPerSec – 115200
DataBits – 8
Parity – None
StopBits – 1 - Click the ‘Save’ button and close the window
- Double-click on the Game Dash icon in the system tray to bring up the Game Dash window
- In the Game Dash window, select No Limits Simulator from the Game Name dropdown
- Click the button shaped like a pencil next to the field named Dash1

- Paste the following into the Command Editor window:PERCENT 2.5 30
SCALE 0 255
ROUND 0
TOCHR - Click the Save button to save and close the Command Editor window.
- Configure the Output Settings at the bottom of the window to work with your controller. If your controller is programmed with the recommended SuperFan protocol documented above, these are the settings you should use:Startup – <15><49><0><0><0><0> @ 50 ms
Interface – <15><83><Dash1><Dash1><Dash1><Dash1> @ 50 ms
Shutdown – <15><48><0><0><0><0> @ 50 ms - Click the Save button to save these settings into the No Limits Simulator profile
- Start Game Engine – Technically we don’t need it for SuperFan but we can right-click on the system tray icon to launch Tuning Center, which is handy for testing and for figuring out top speeds.
- Start Game Manager (it will display a message and then minimize to the tray)
- Double-click on the Game Manager icon in the system tray to bring up the Game Manager window
- In the ‘Game Selection’ dropdown select No Limits Simulator
- Click the ‘Patching’ button and follow the steps to patch NoLimits 2
- Back in the Game Manager window click on the ‘Dash’ button
- Make sure the ‘Enable Dash Output’ box is checked and set the ‘Packet Rate’ dropdown to 50 ms
- Start NoLimits 2 and ride!


Troubleshooting
Here are some things to try if your SuperFan doesn’t move with the coaster:
- The script starts with PERCENT 2.5 30. That means the fans will not turn if the coaster is moving less than 2.5 meters per second (also, if the coaster is going more than 30 meters per second the fans will not turn any faster). This keeps the fans from running when entering and departing the station or when going up the incline.
- The NoLimits 2 plugin does not initialize immediately when NoLimits 2 starts. Instead, it initializes when you load a coaster or if you wait long enough on the opening screen for the coaster animation to start playing.
- When the plugin initializes you should see the green light on the BlueSMiRF turn on. This indicates that a connection has been established from the PC. If this doesn’t happen try exiting the game, exiting all SimTools icons from the tray, powering off the controller and starting again.
- If a connection is still not established, verify that you are using the proper COM port in Game Dash settings.
- Finally, verify that you’ve programmed the proper sketch from the GitHub site onto your controller.
If all else fails, try connecting directly to the COM port of your SuperFan with the free serial program RealTerm. Once connected try sending the following commands through the ‘Send Numbers’ feature on ‘Send’ tab:

0x0F 0x4C 0x04 0x00 0x00 0x00
This should should enable logging. If successful the controller should respond with “Logging enabled level 4”.
0x0F 0x53 0x15 0x15 0x15 0x15
This should should cause the motors to turn at a slow speed.
0x0F 0x30 0x00 0x00 0x00 0x00This should should cause all motors to stop. If successful the controller should respond with “Shut down.”
Contact
Well, that’s it! If you’re having fun with your SuperFan please leave me a comment below – I’d love to hear from you! Oh, and if you implement the SuperFan protocol on a controller other than the T’REX please consider contributing the sketch to the GitHub site. Thanks

One thought on “Create your own SuperFan”