
I wanted to finally take some time to review the multi-color laser trim kit sold by user Djgabriel2004 [here and here]. Though I completed my install back in January, I’ve been waiting to see how a few important kinks might get worked out before sharing my experience online.
My laser kit was bought for me as a Christmas gift. I knew going into it this that it was a prototype, and at $512.00 I knew I was taking a risk. Luckily most things worked out quite well, though some did not. I’ve spent a lot of time writing and editing this post, because I really do want it to be a fair representation of both.
This is my personal experience. It includes photos and details, but if you’re not interested in the details feel free to skip to the TL;DR section at the bottom.
What Went Well
First I want to talk about the positives – because there are many. At the top of the positives list absolutely has to be the appearance. Side-emitting laserwire is beautiful. It looks like nothing you’ve ever seen, and EL wire just isn’t the same. Have you ever played with a laser pointer? If you have, did you notice that special “shimmering” pattern that’s unique to lasers? Well that shimmering effect can be seen down the entire length of the fiber.
The laser engine emits quite a wide and bright beam at the base:
Then that wide beam bounces and distributes down the entire length of the fiber:
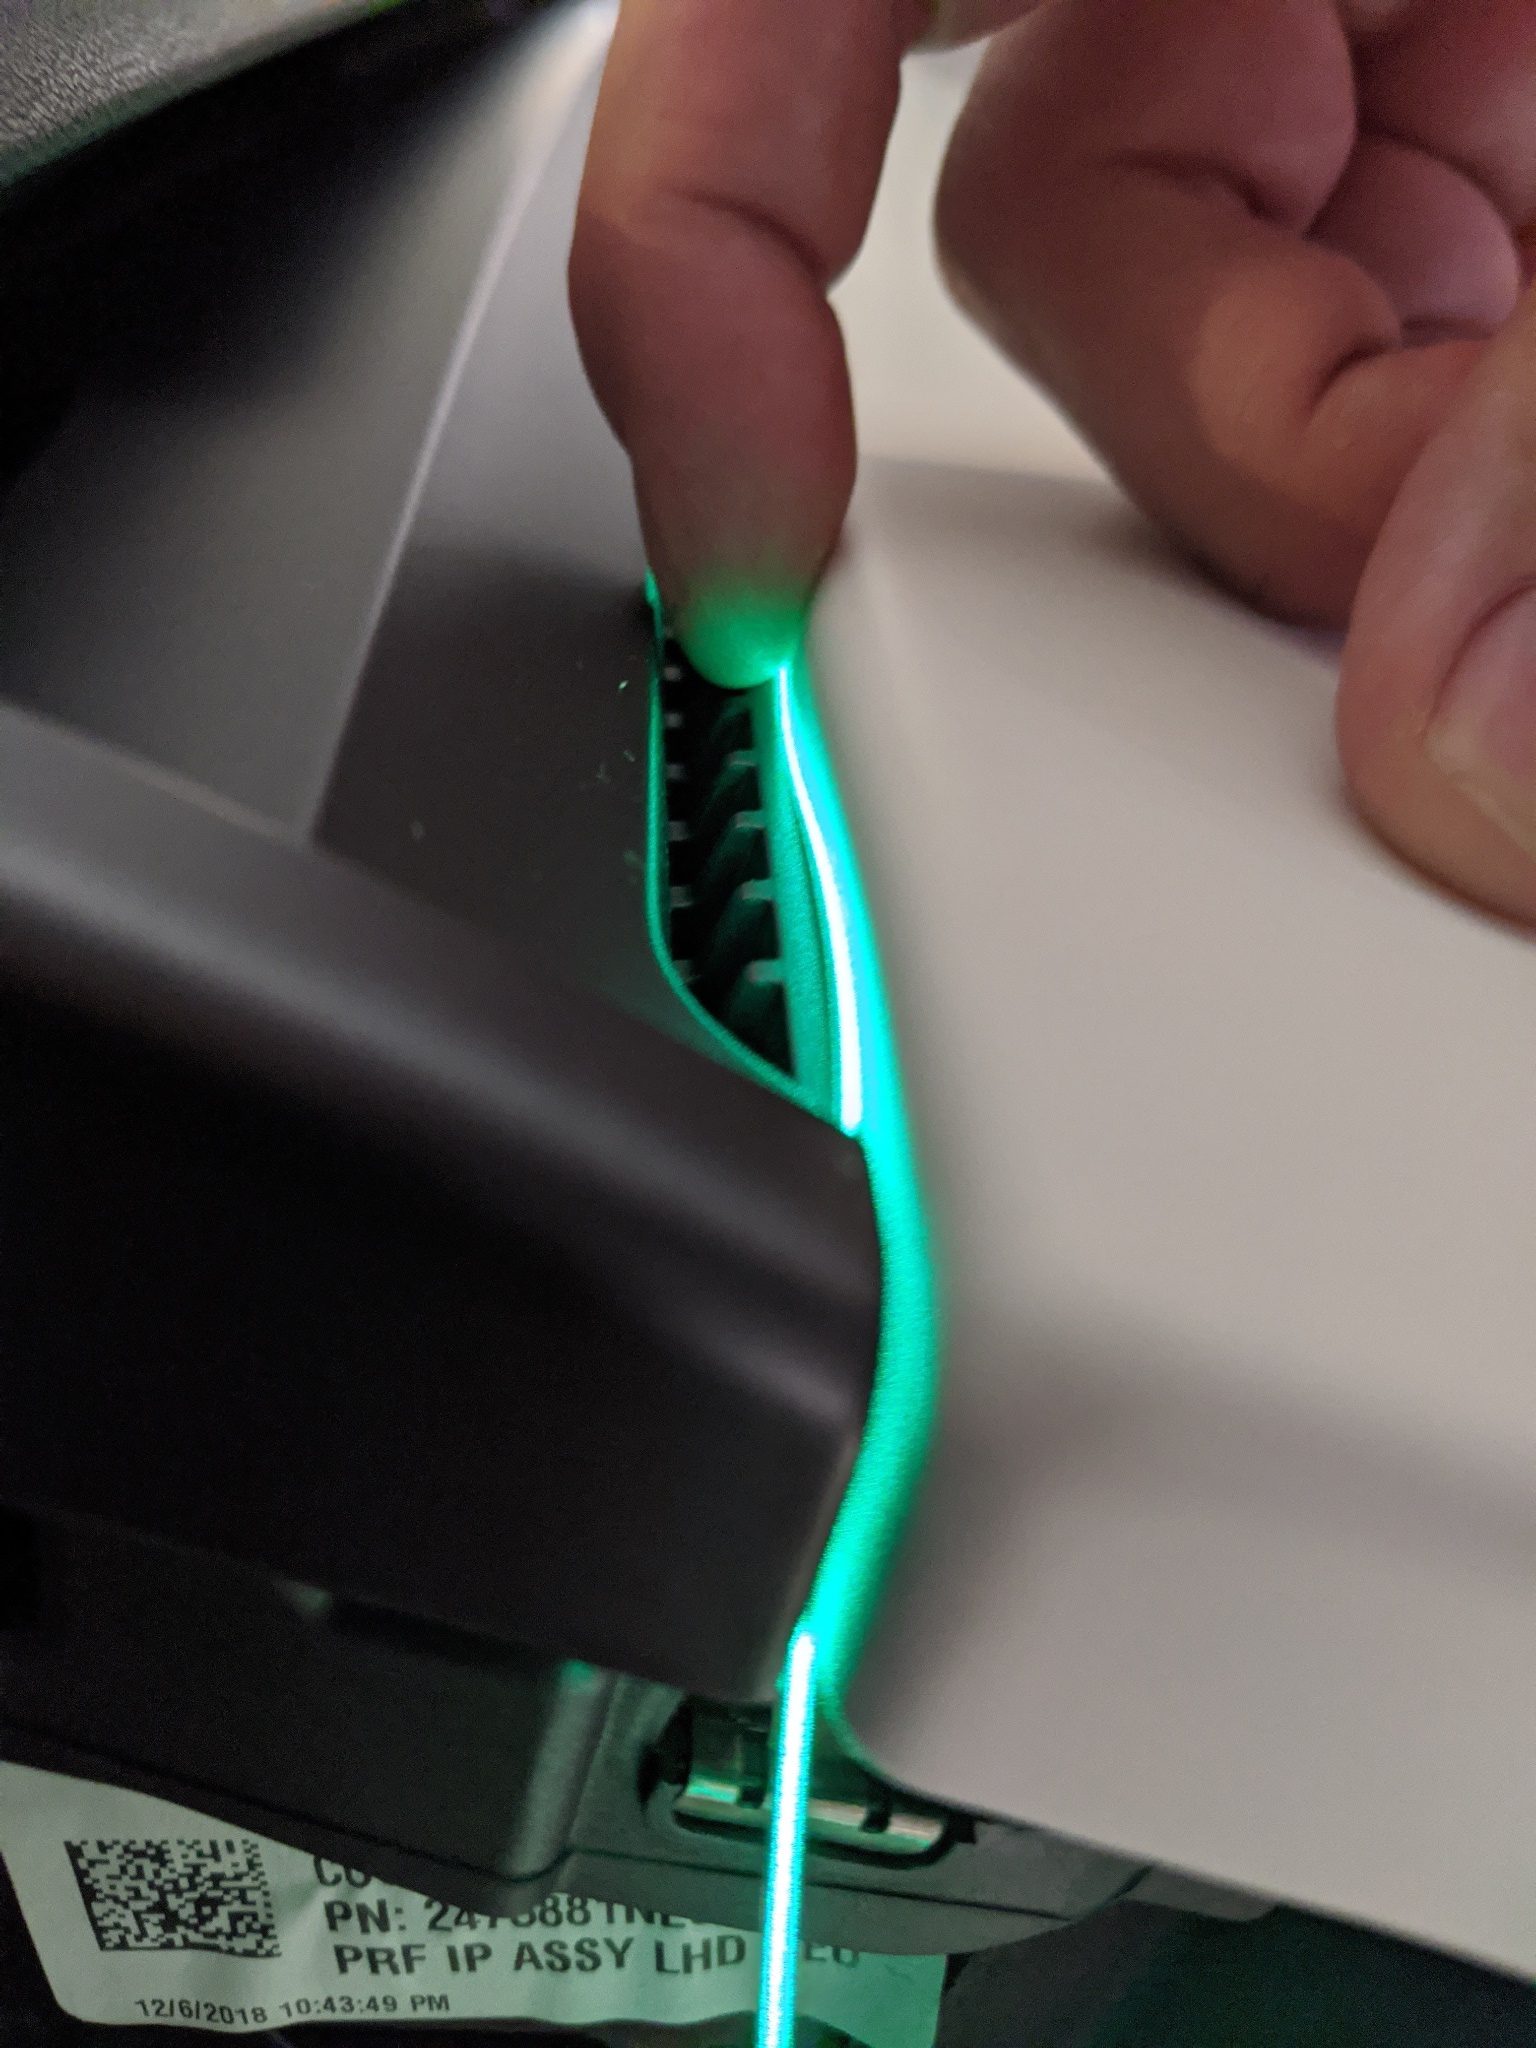
Anywhere you look it shimmers. The effect is hard to explain, but part of what makes it special is that “specs” of light enter your left and right eyes differently from different parts of the fiber. When you move your head the pattern moves too. It’s mesmerizing. And since there are basically 3 internal lasers (Red Green and Blue), you can make the light virtually any color you want. It looks amazing. It looks beautiful. It’s unique!
Another great positive is that the laser can be controlled over Bluetooth. This kit actually comes in two parts: The Laser module and a Bluetooth controller. The controller even speaks a well-known protocol (the MagicBulb protocol documented here). This means that the laser can be controlled by Android and iOS apps that speak the same protocol. One of the best I’ve found is Magic Light – BLE.
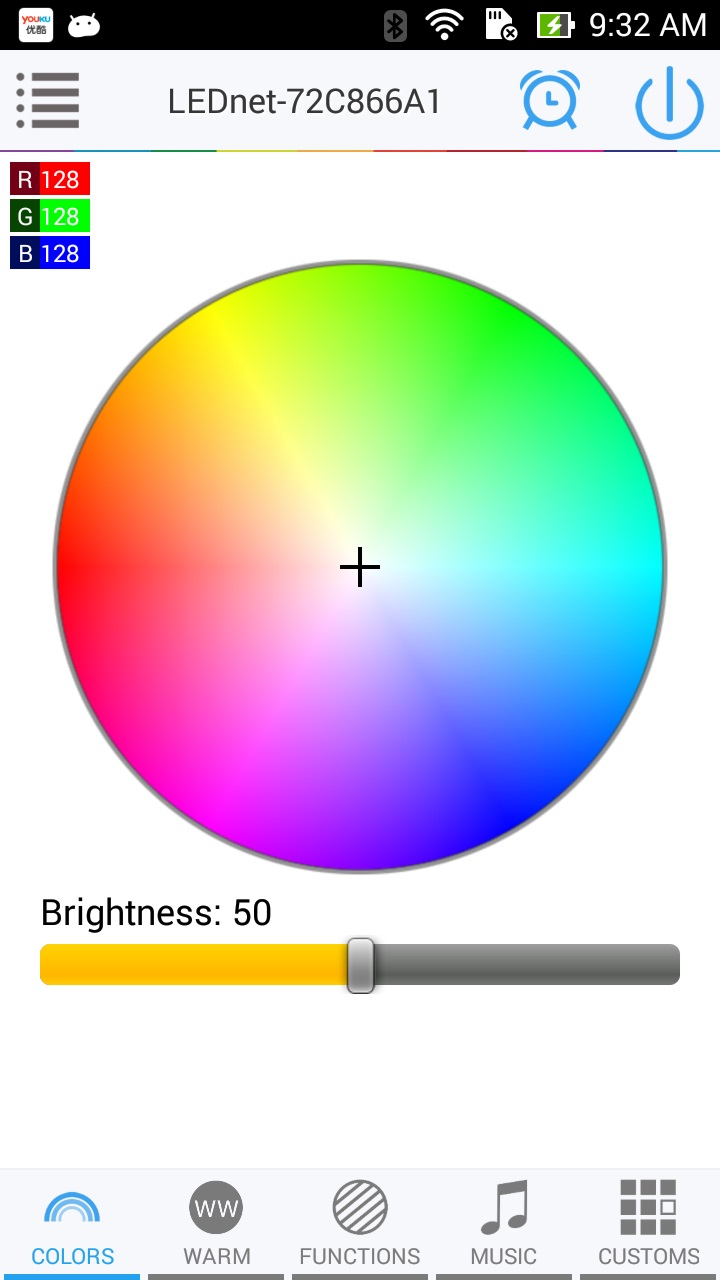
This app can do neat things like pulse the laser to the beat of music or change the laser to match a color sampled by the camera. Very cool indeed!
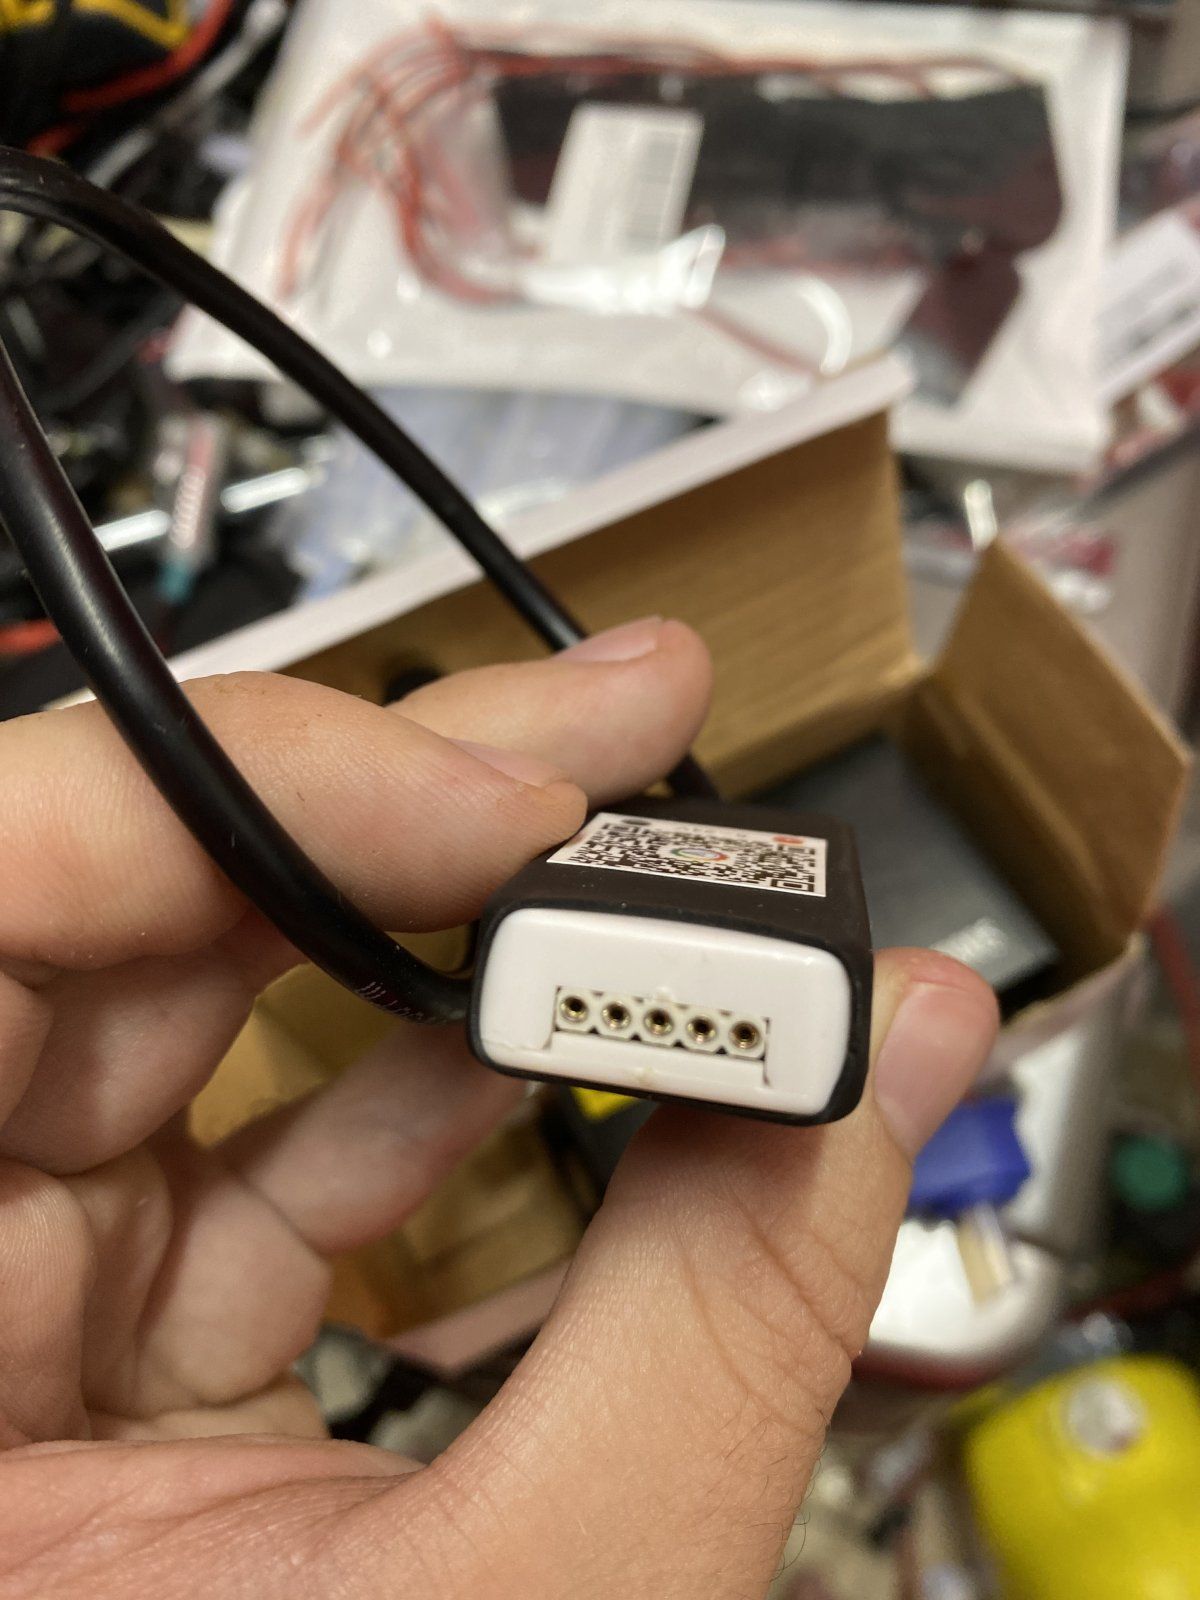
The Bluetooth controller comes with a standard 5-pin LED lighting connector on it. This connector could theoretically allow you to connect any standard LED lighting you might want. In fact the seller offers his own multi-color footwell lights that connect to this port. This makes the front footwells match the color of the laser too!
Here are the first pictures I received of the Bluetooth controller and the footwell lights from the seller:
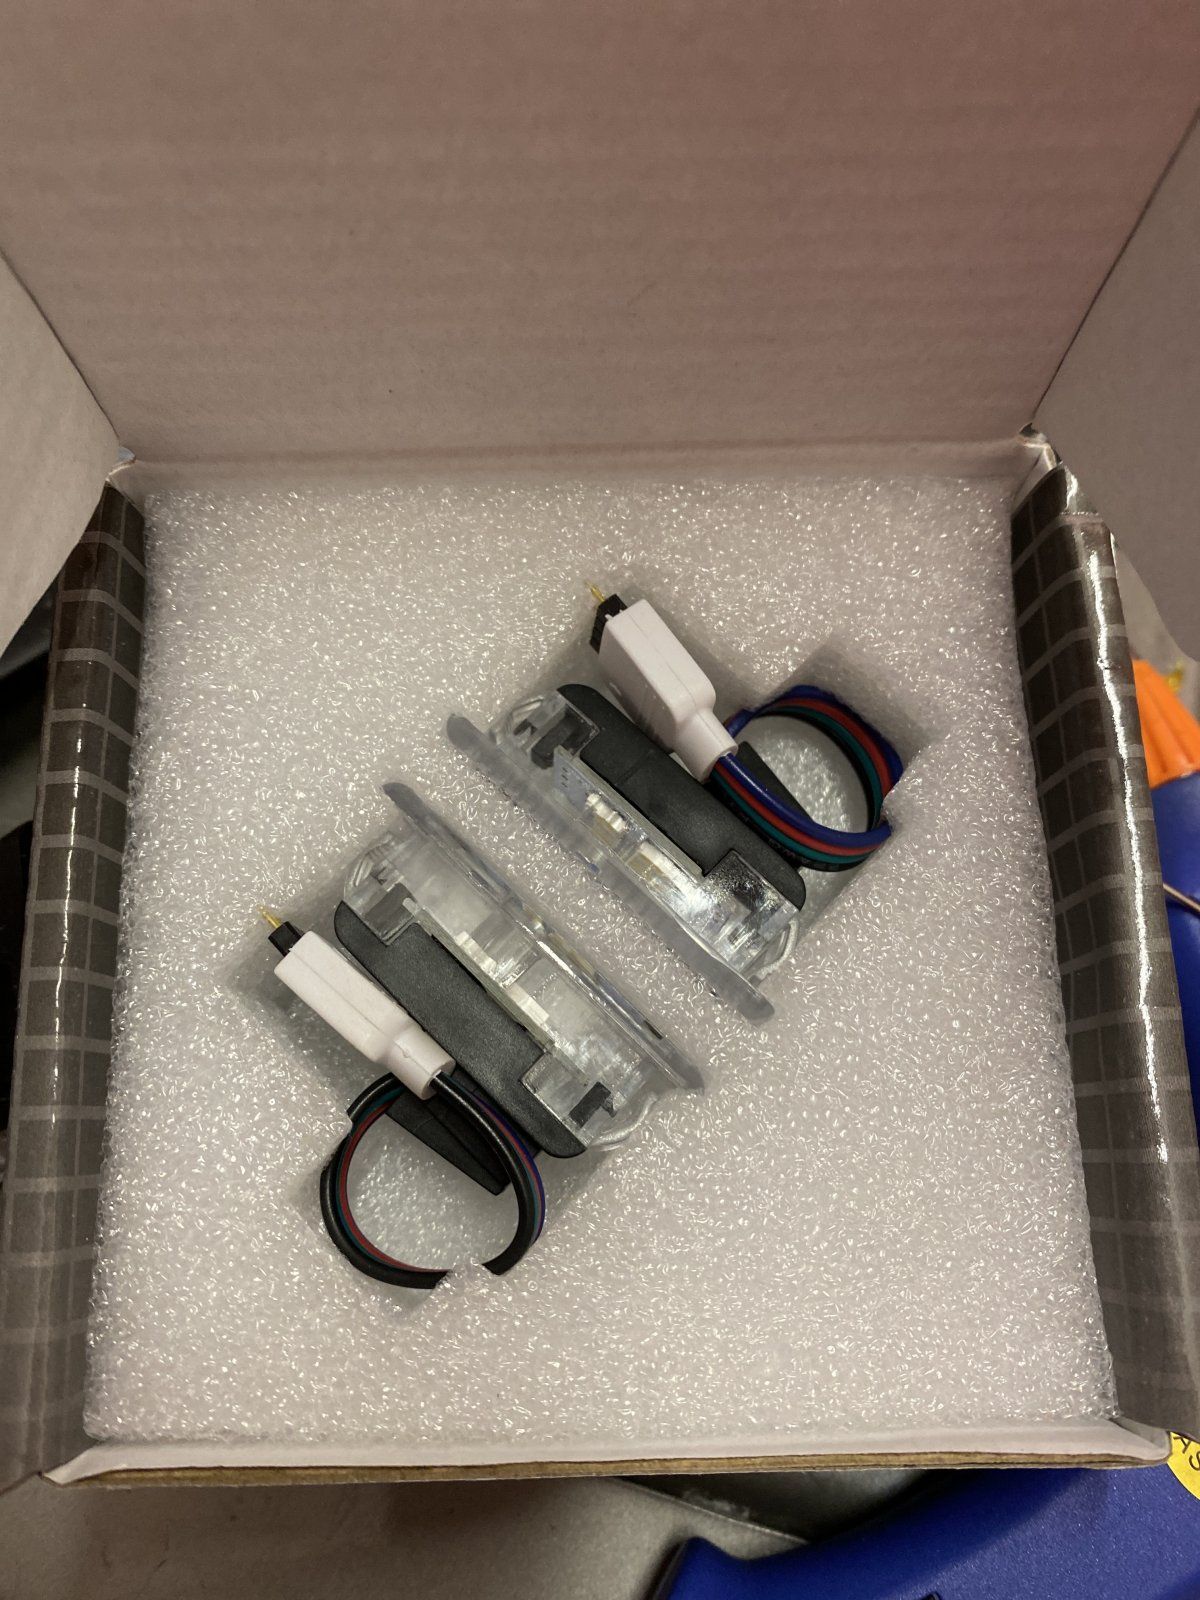
The moment I saw the footwell lights I decided I wanted them too. In fact I ordered them before I even had the Laser module and Bluetooth controller installed! The footwell lights were an additional $113, bringing the grand total up to $625.00.
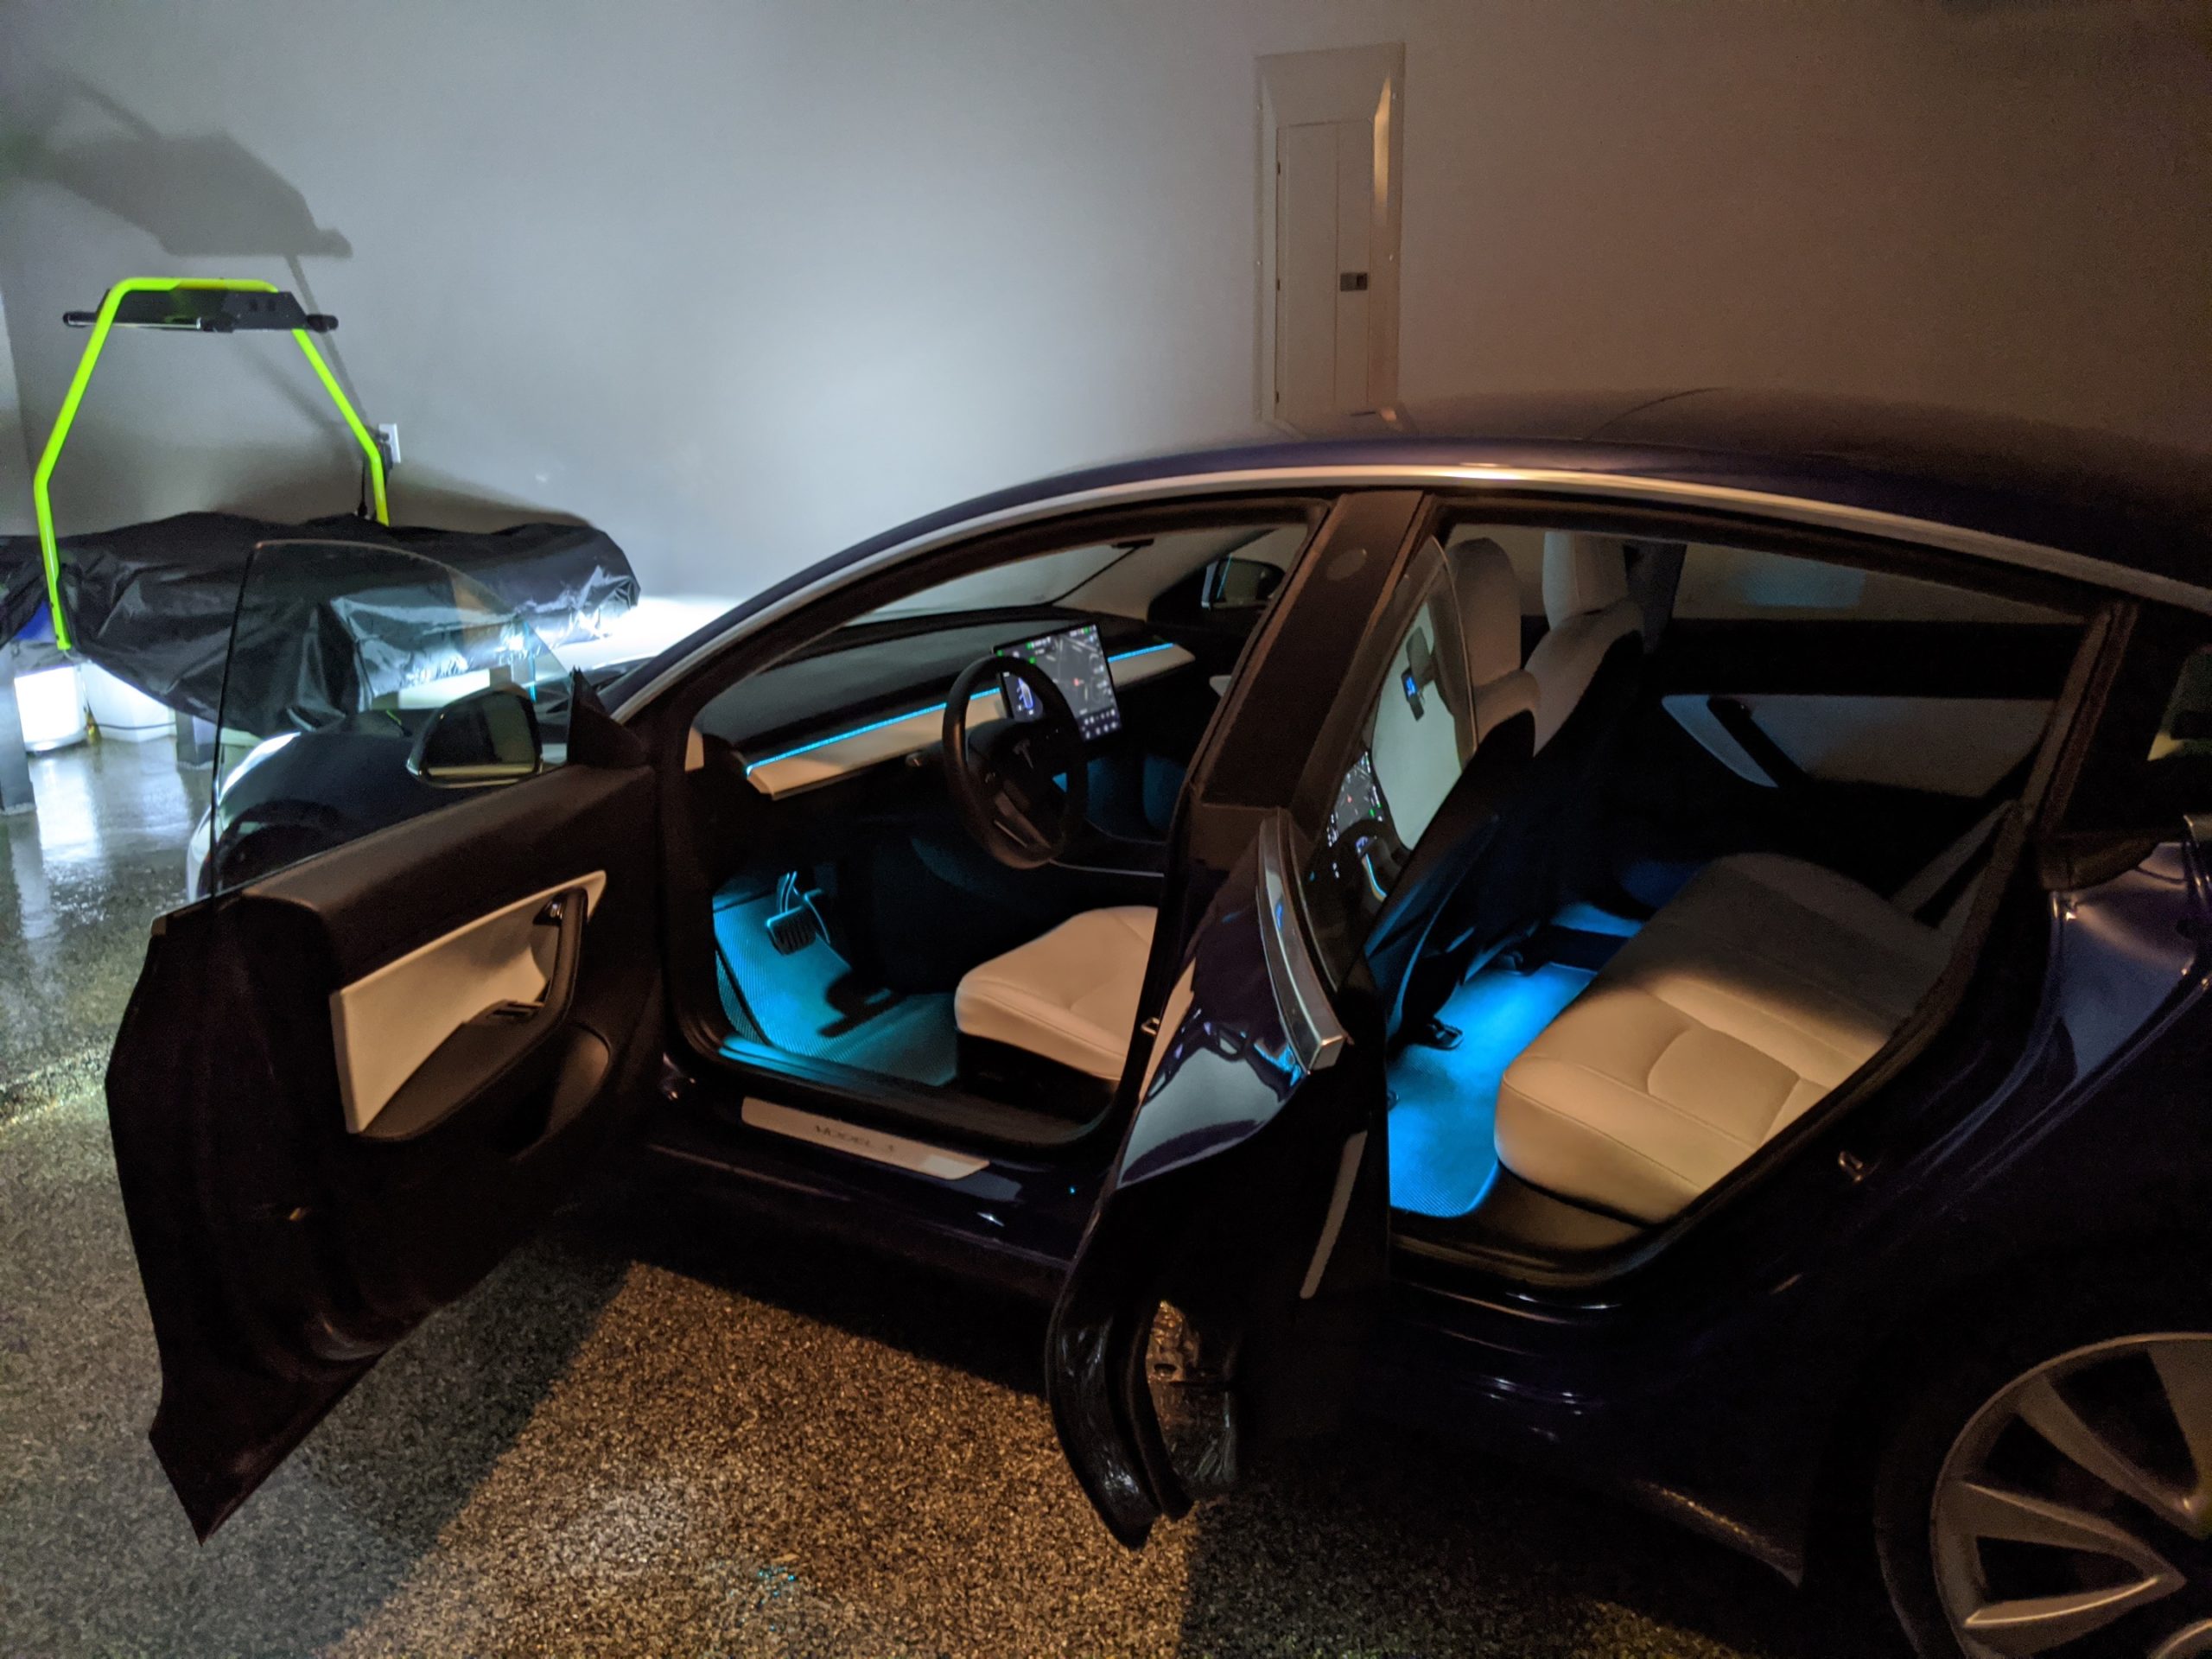
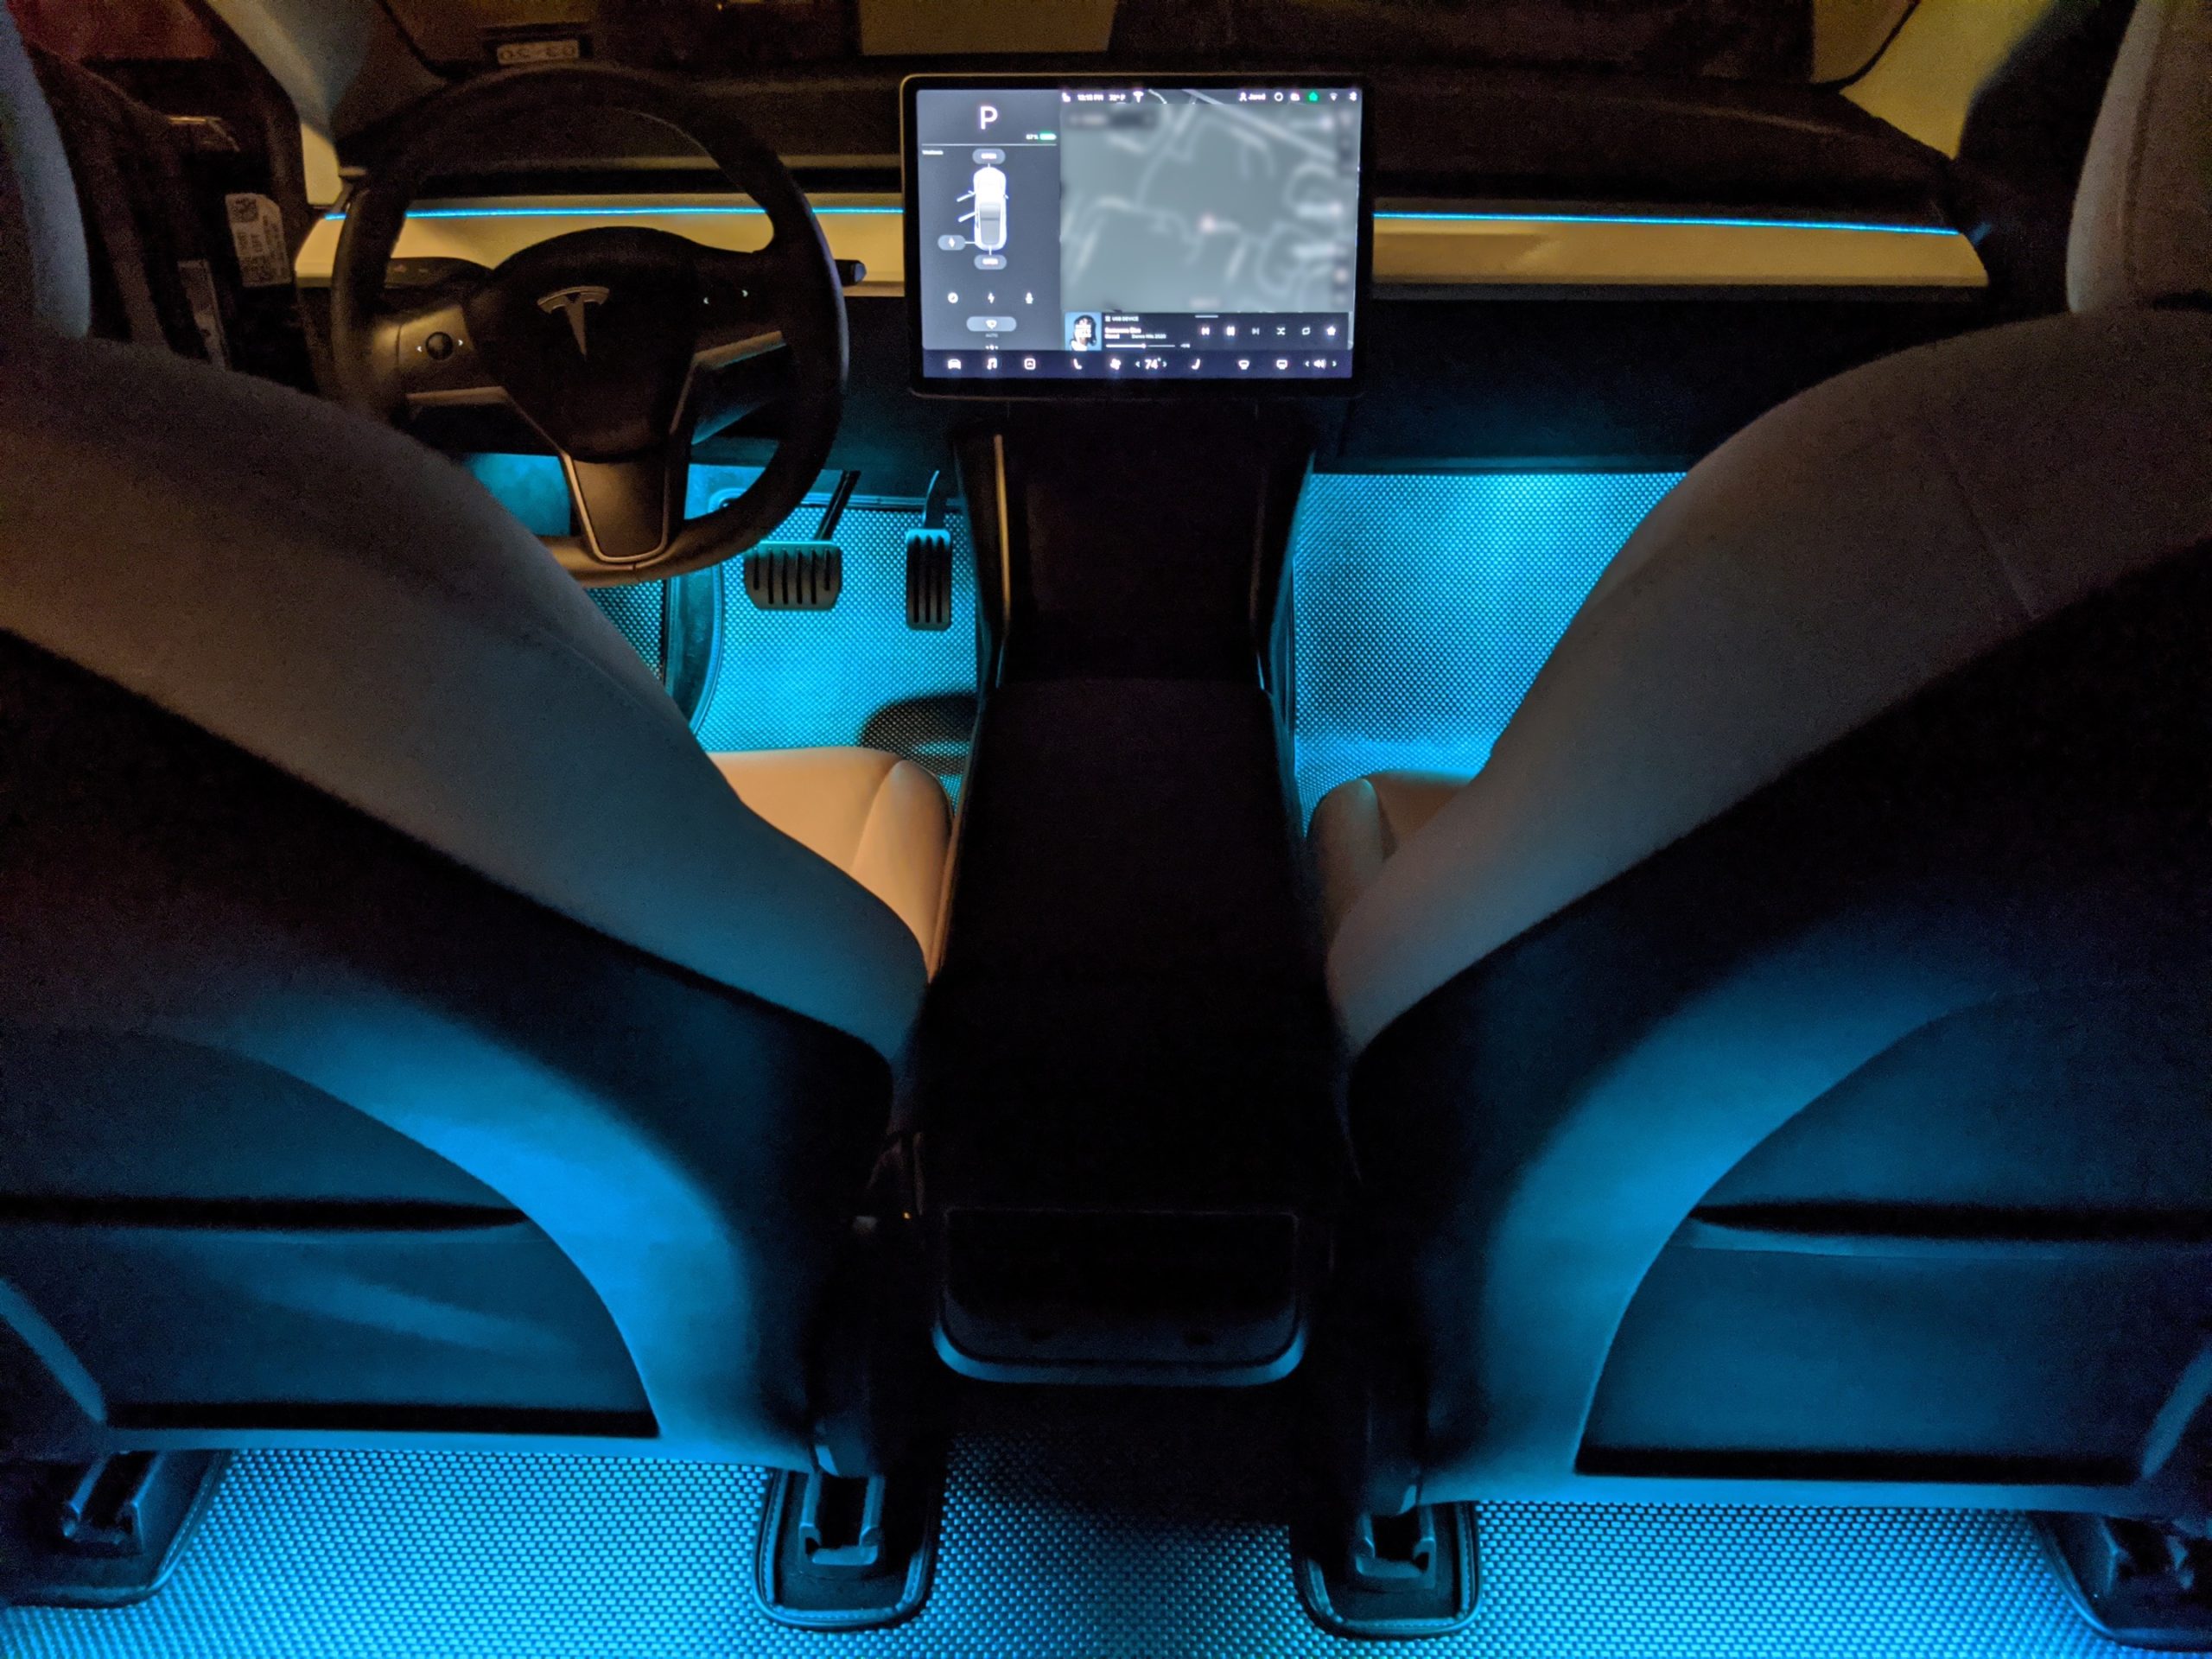
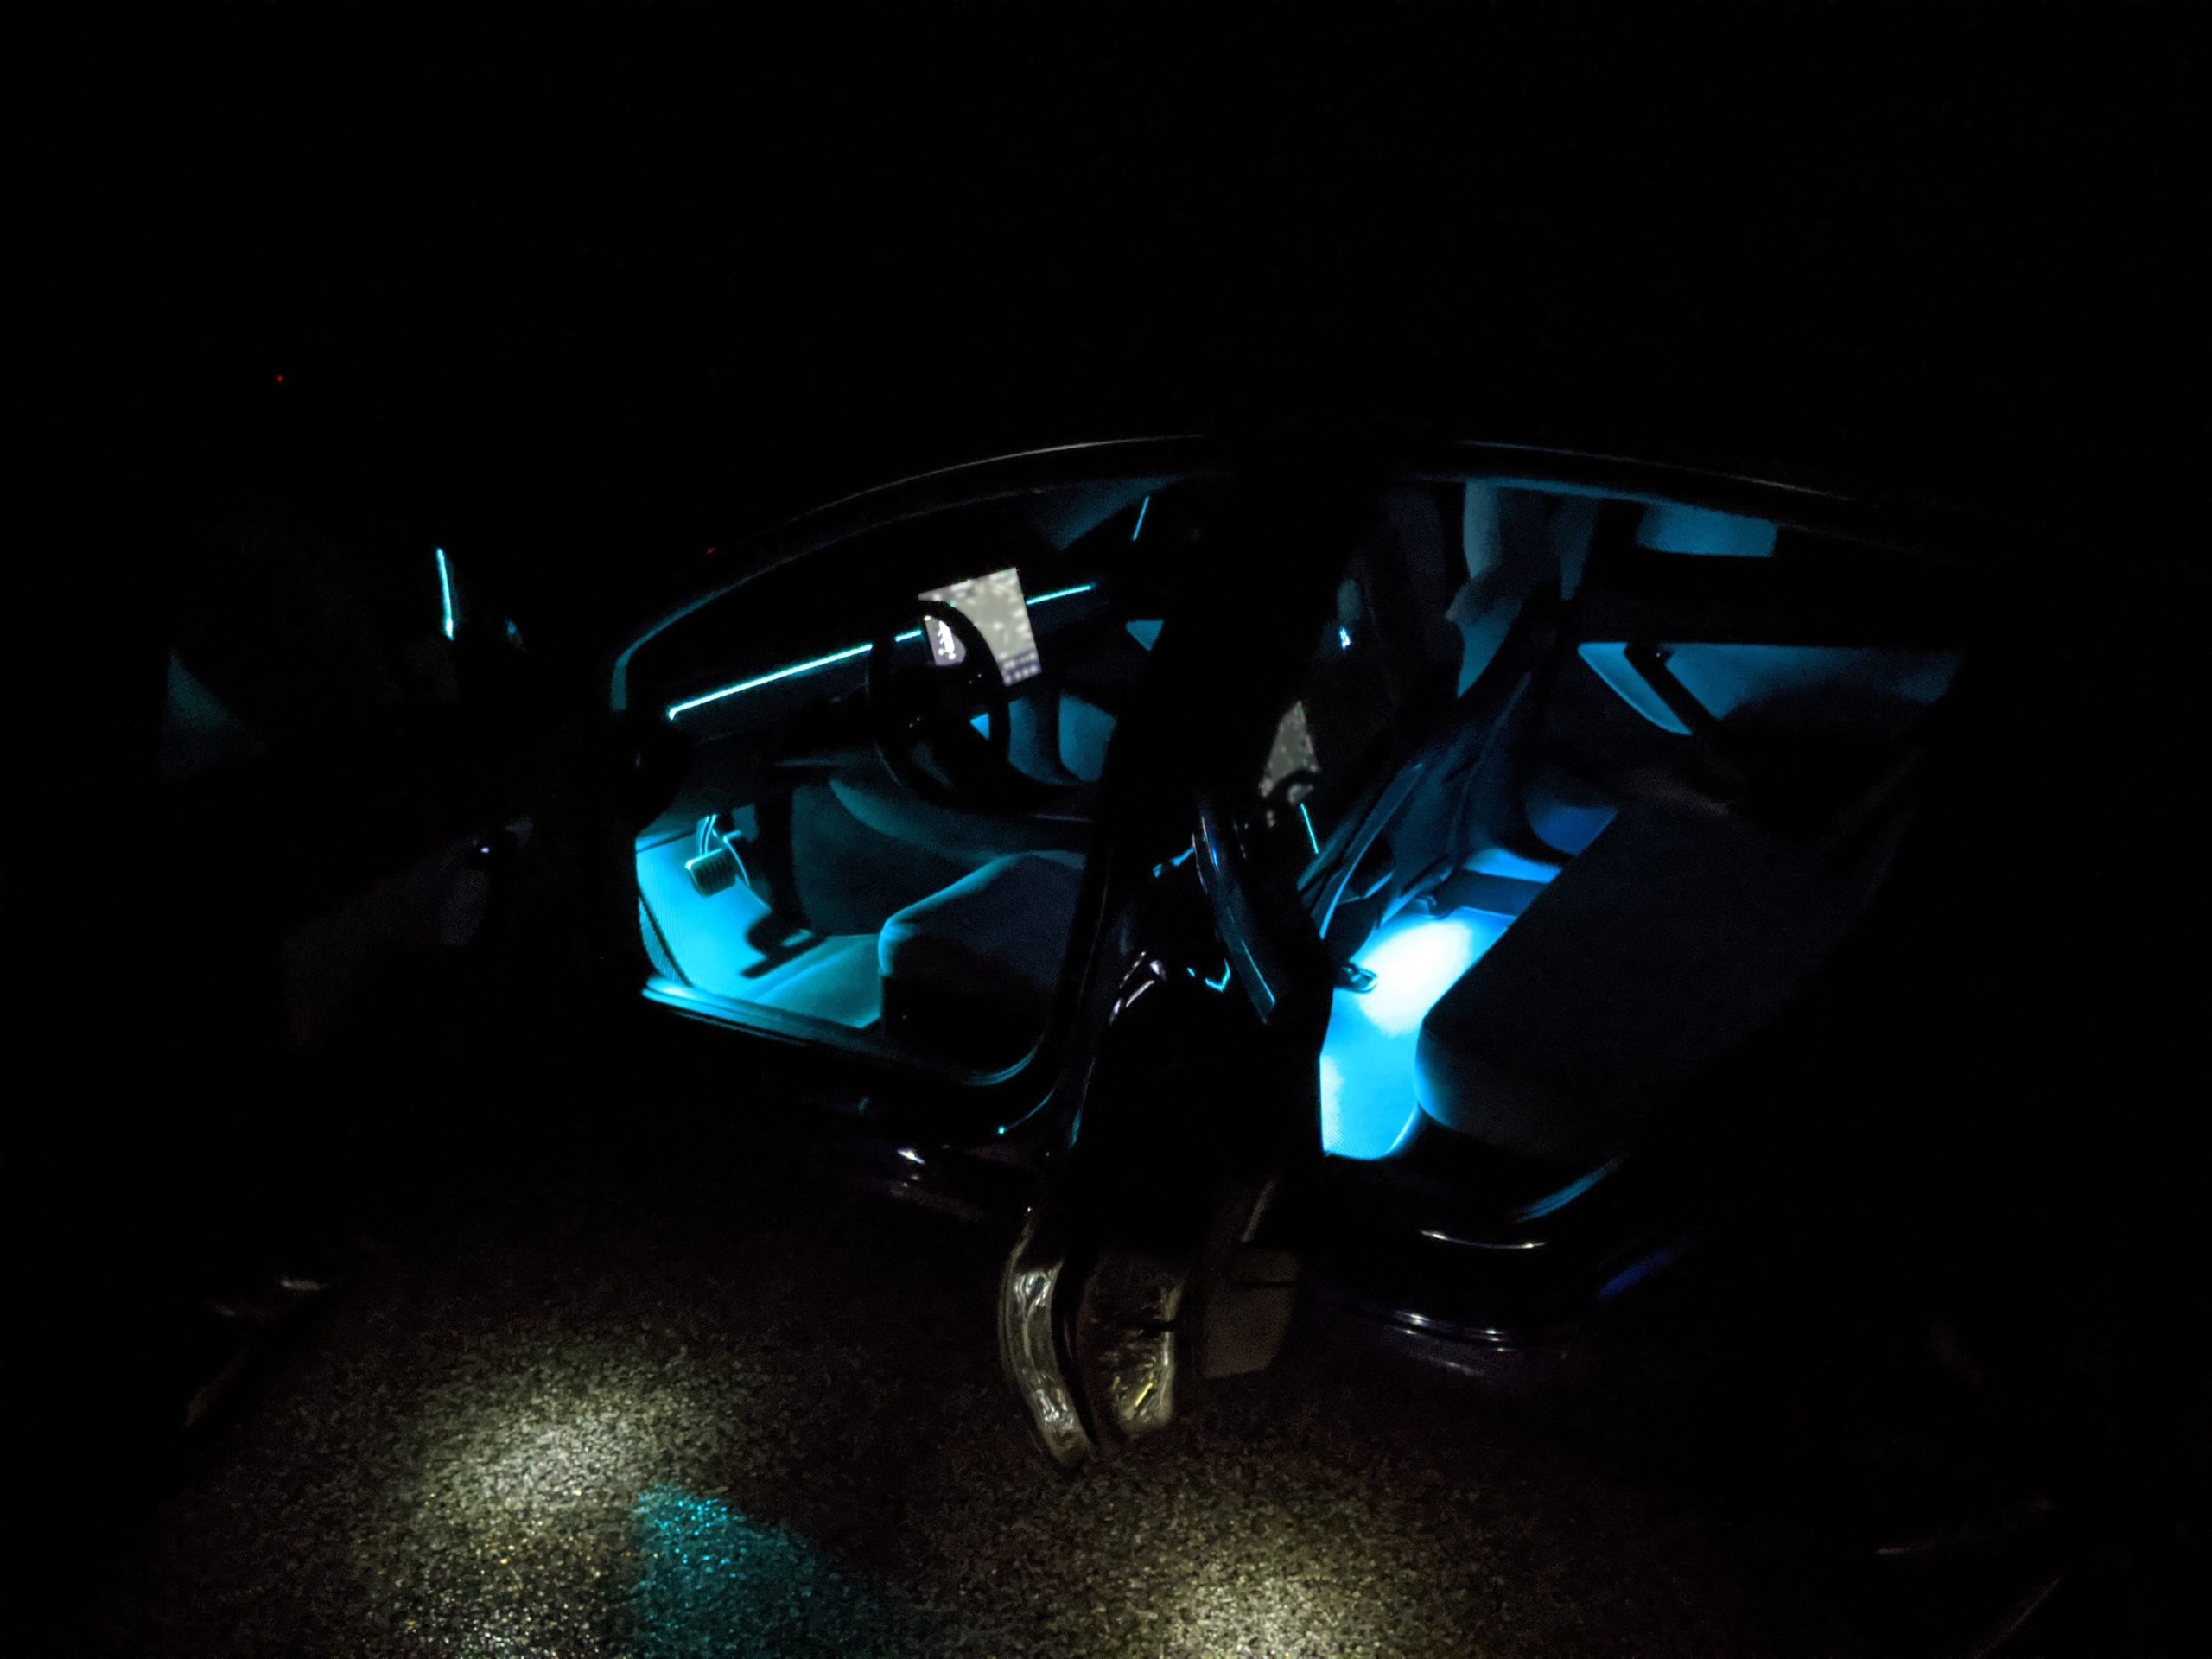
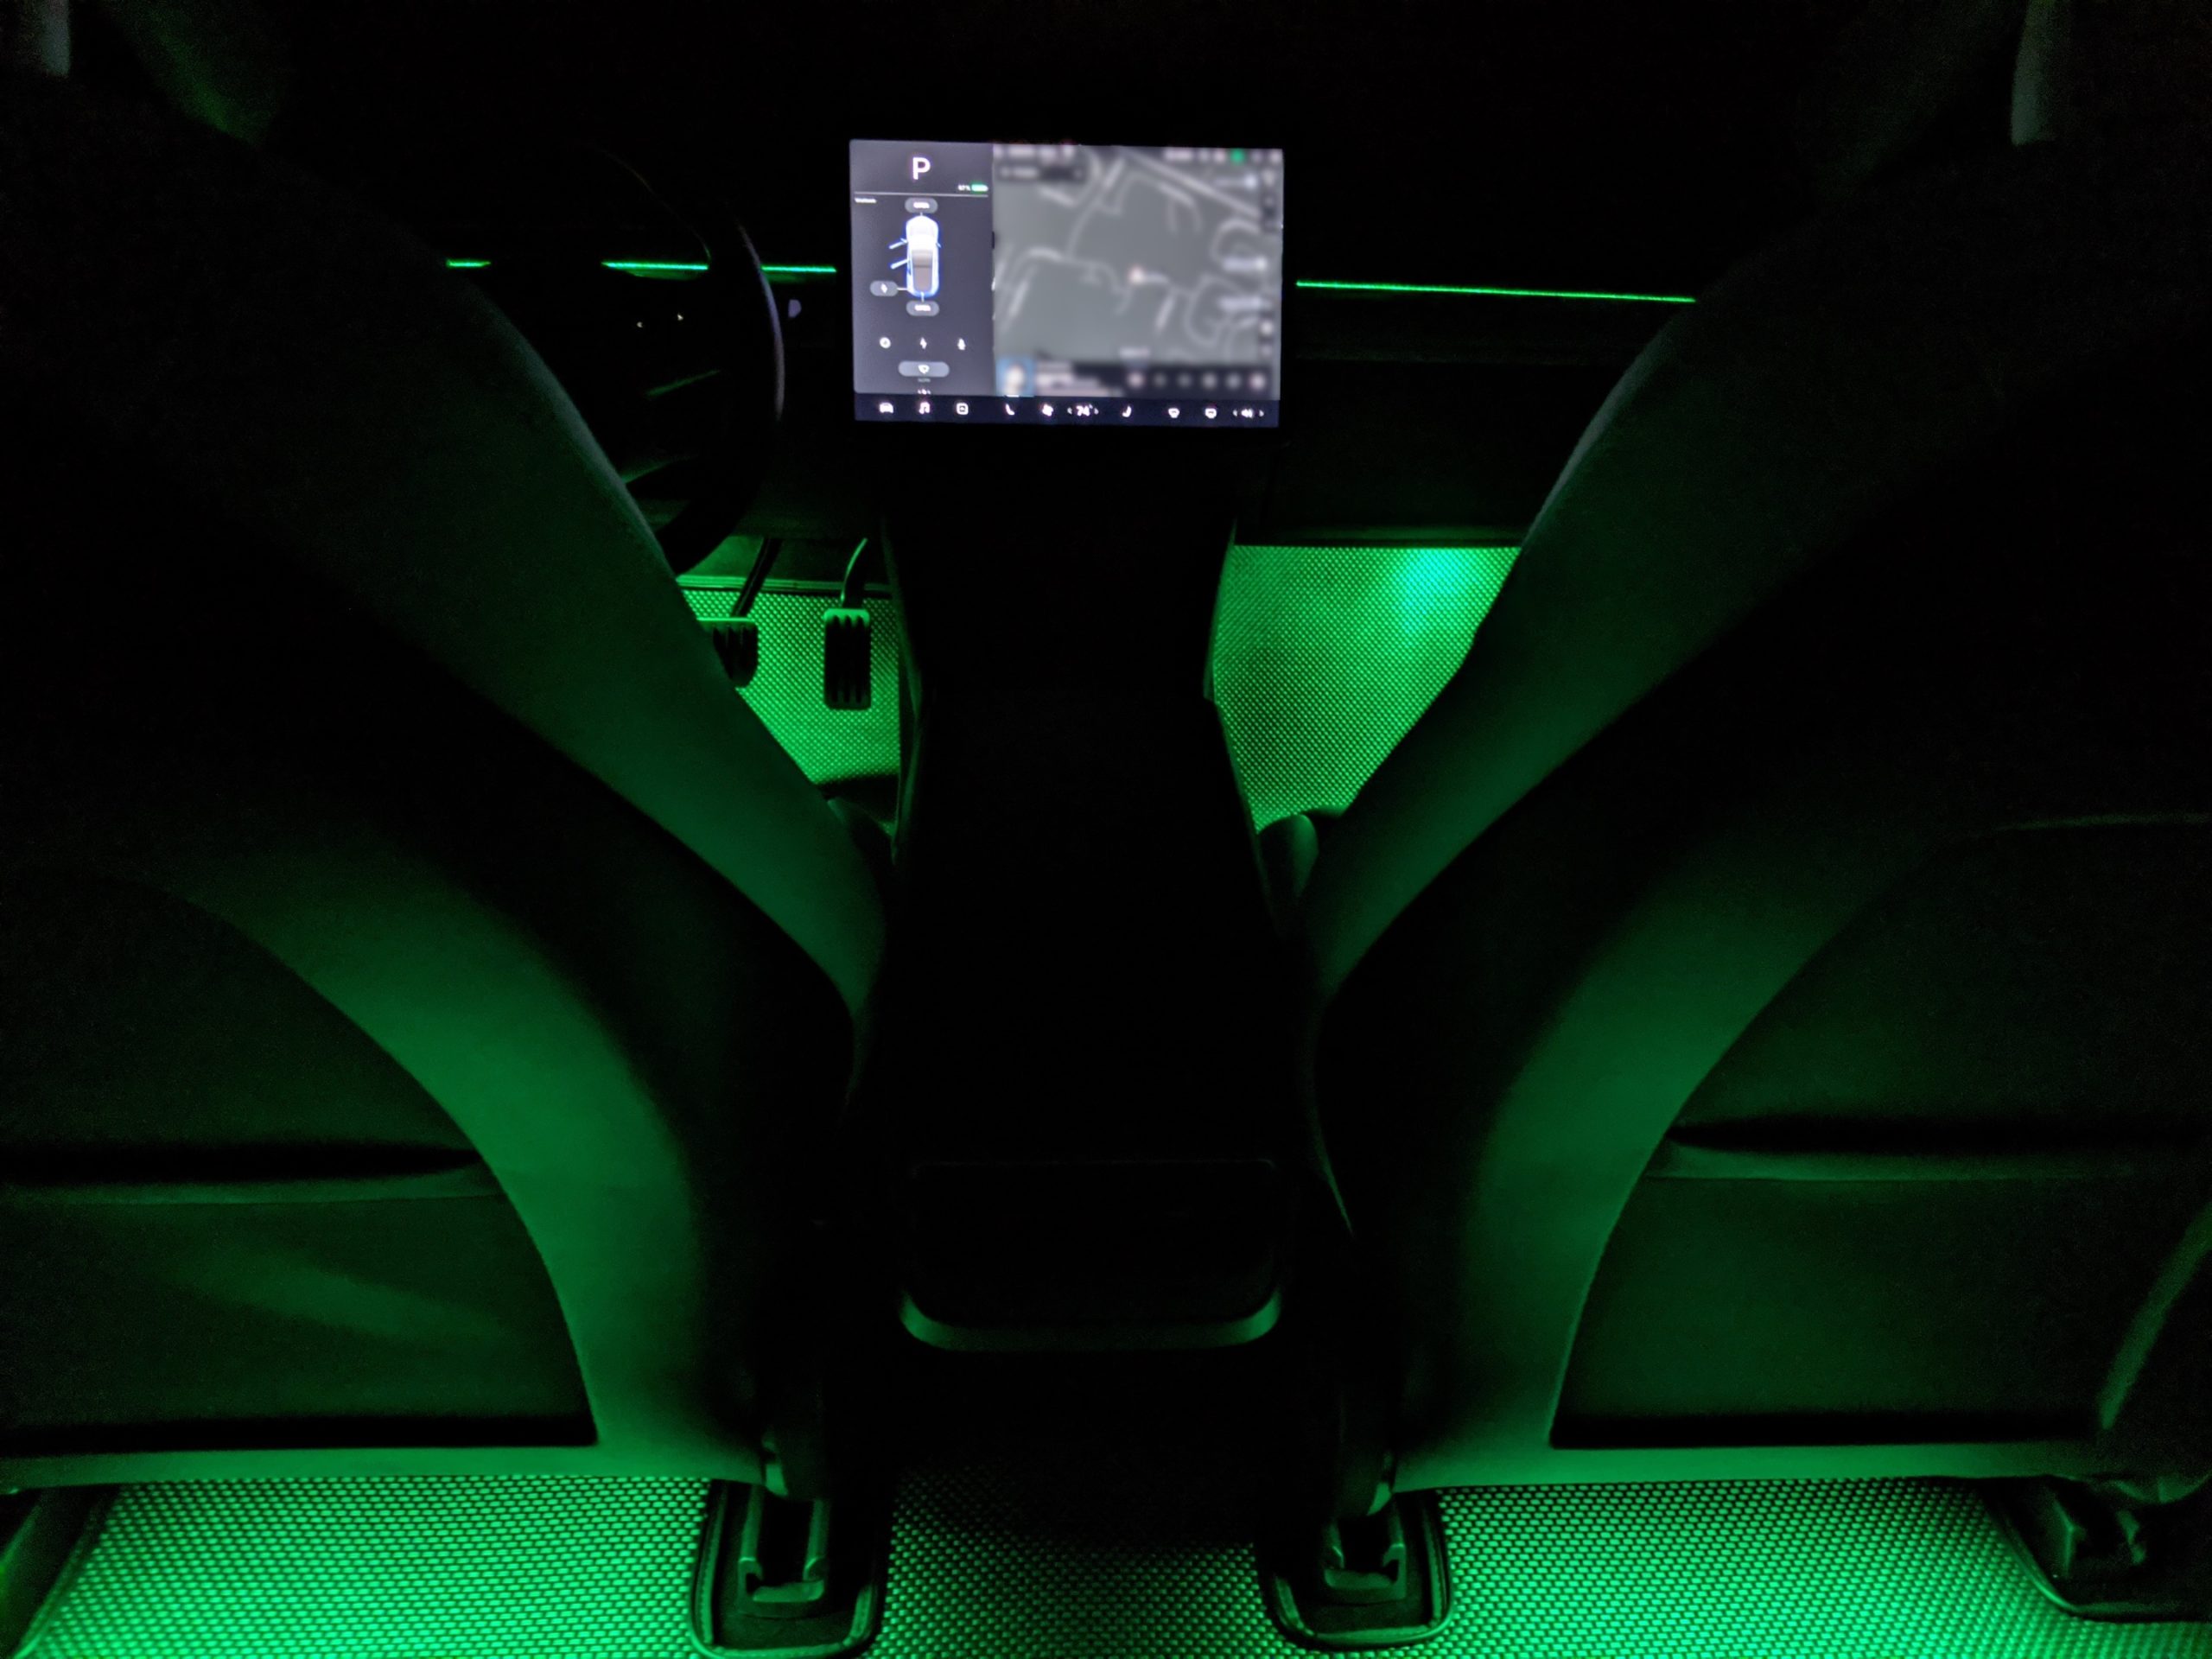
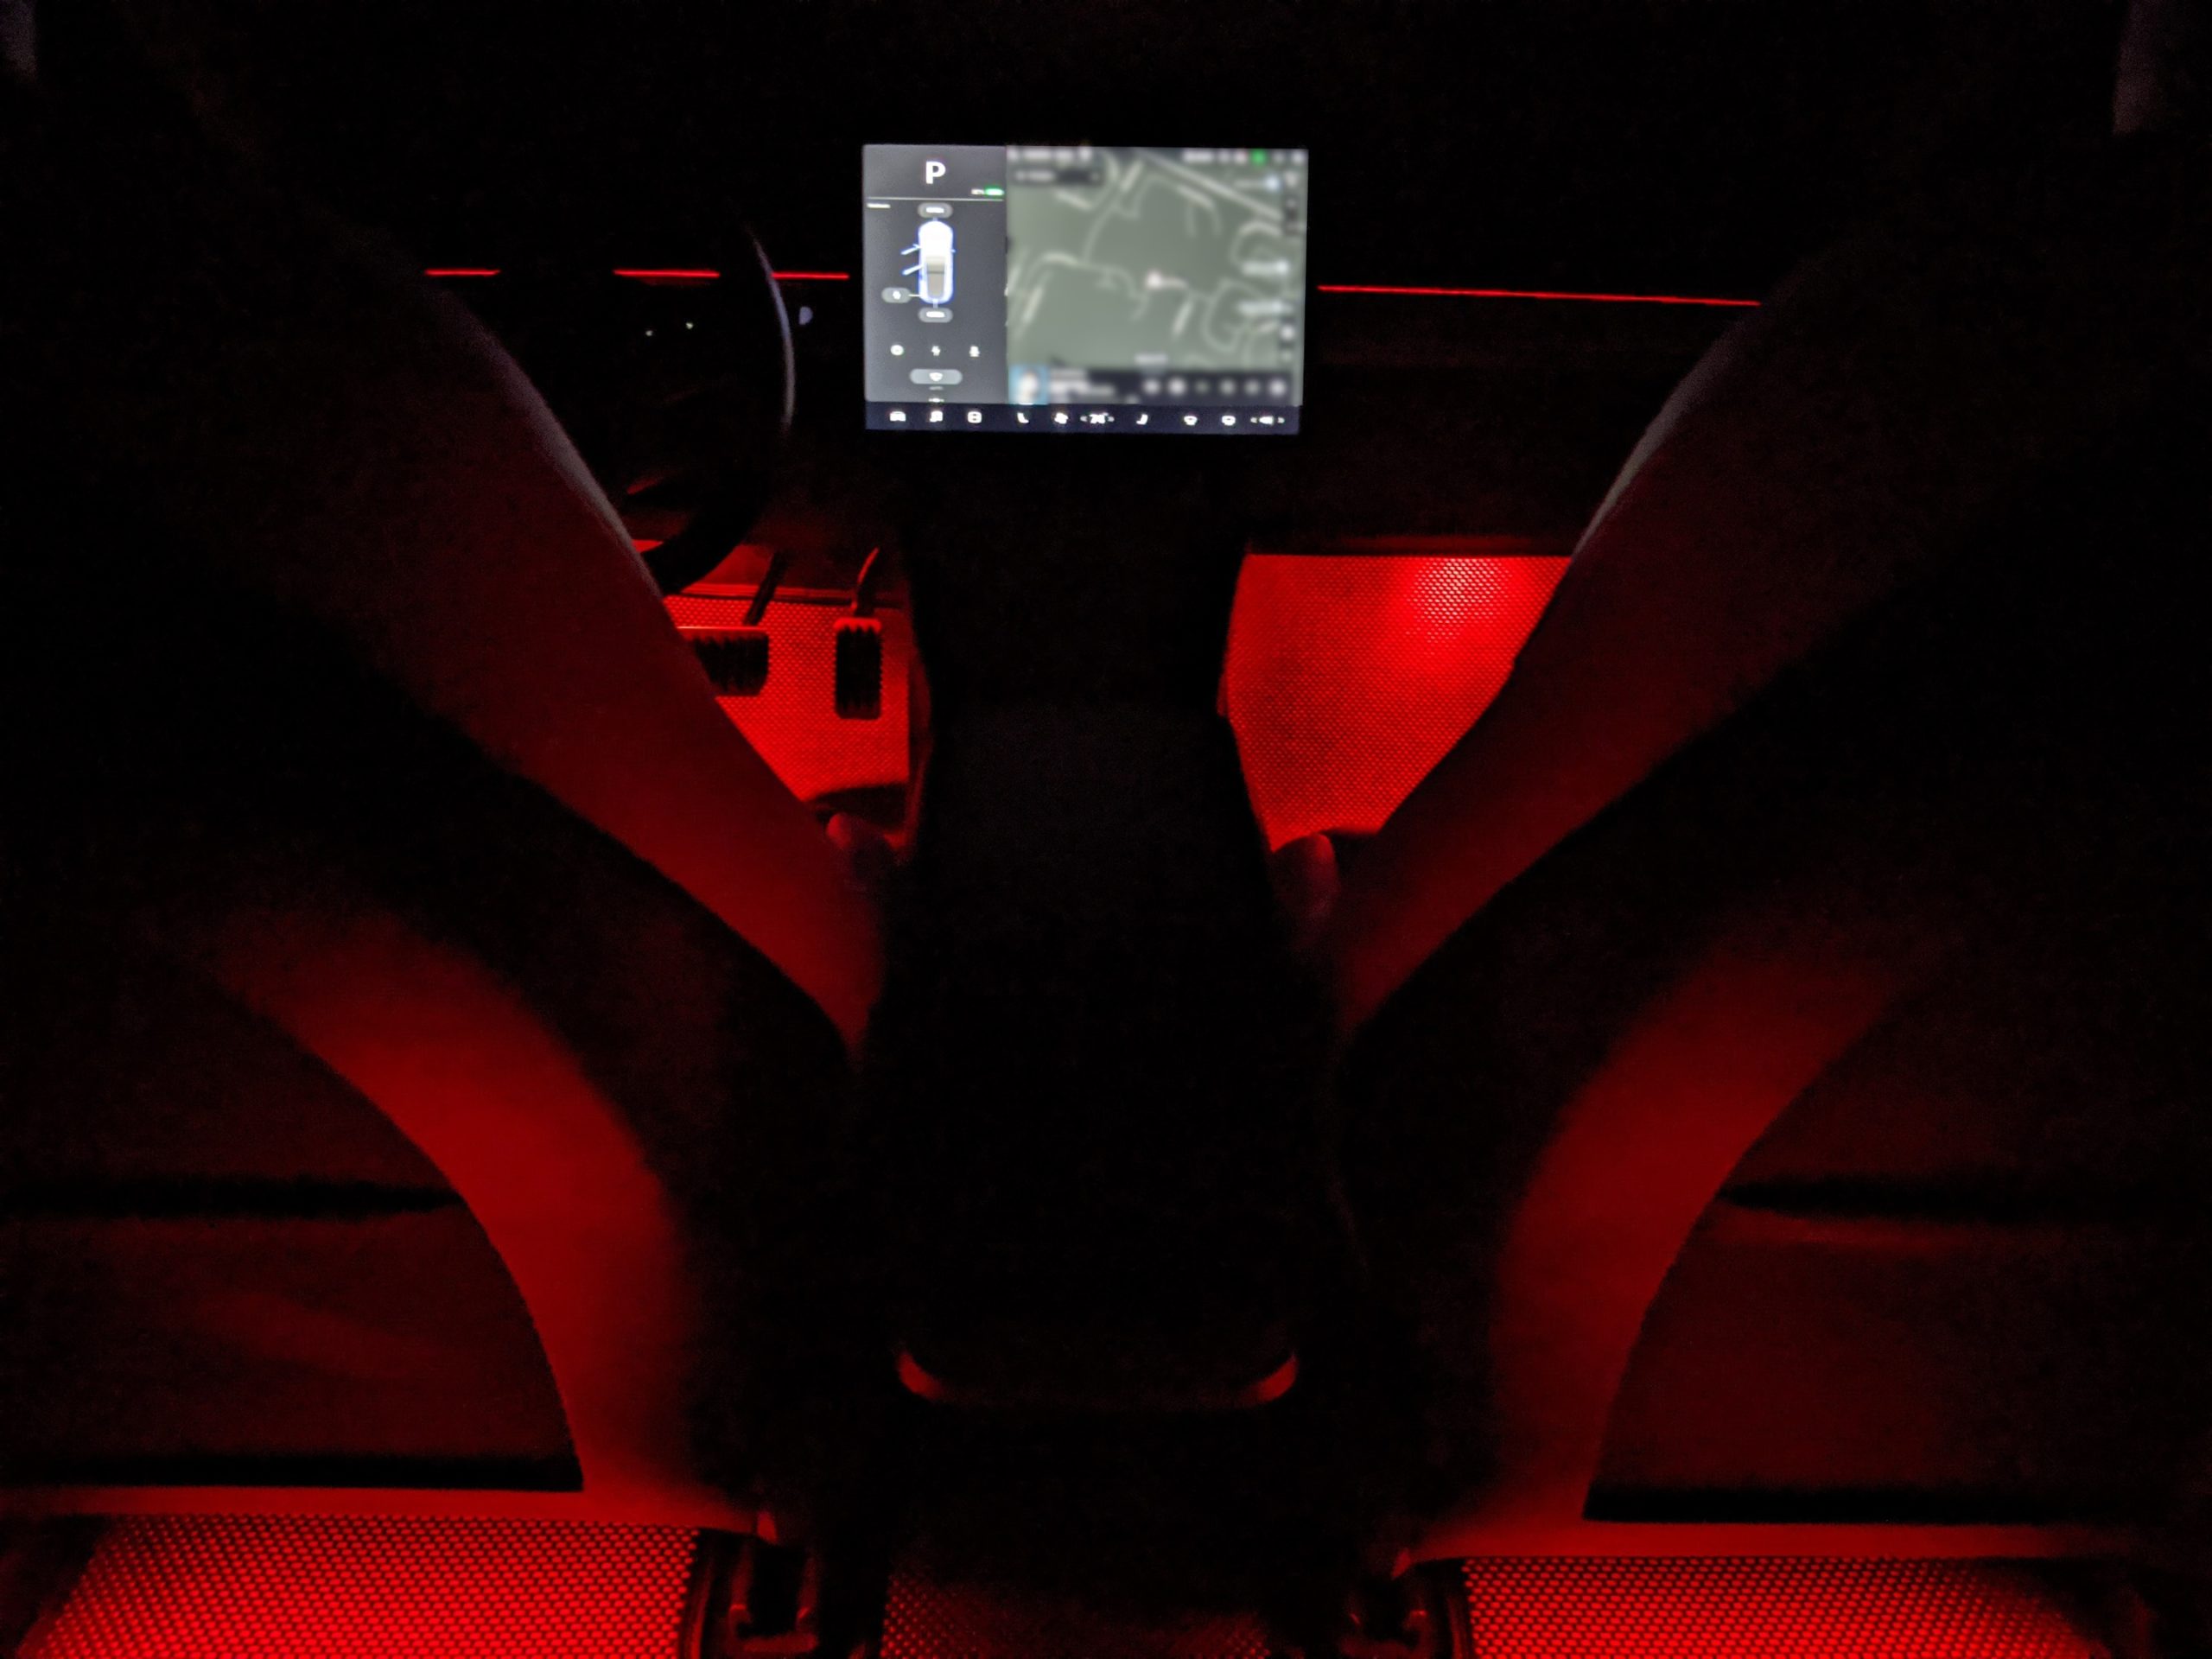
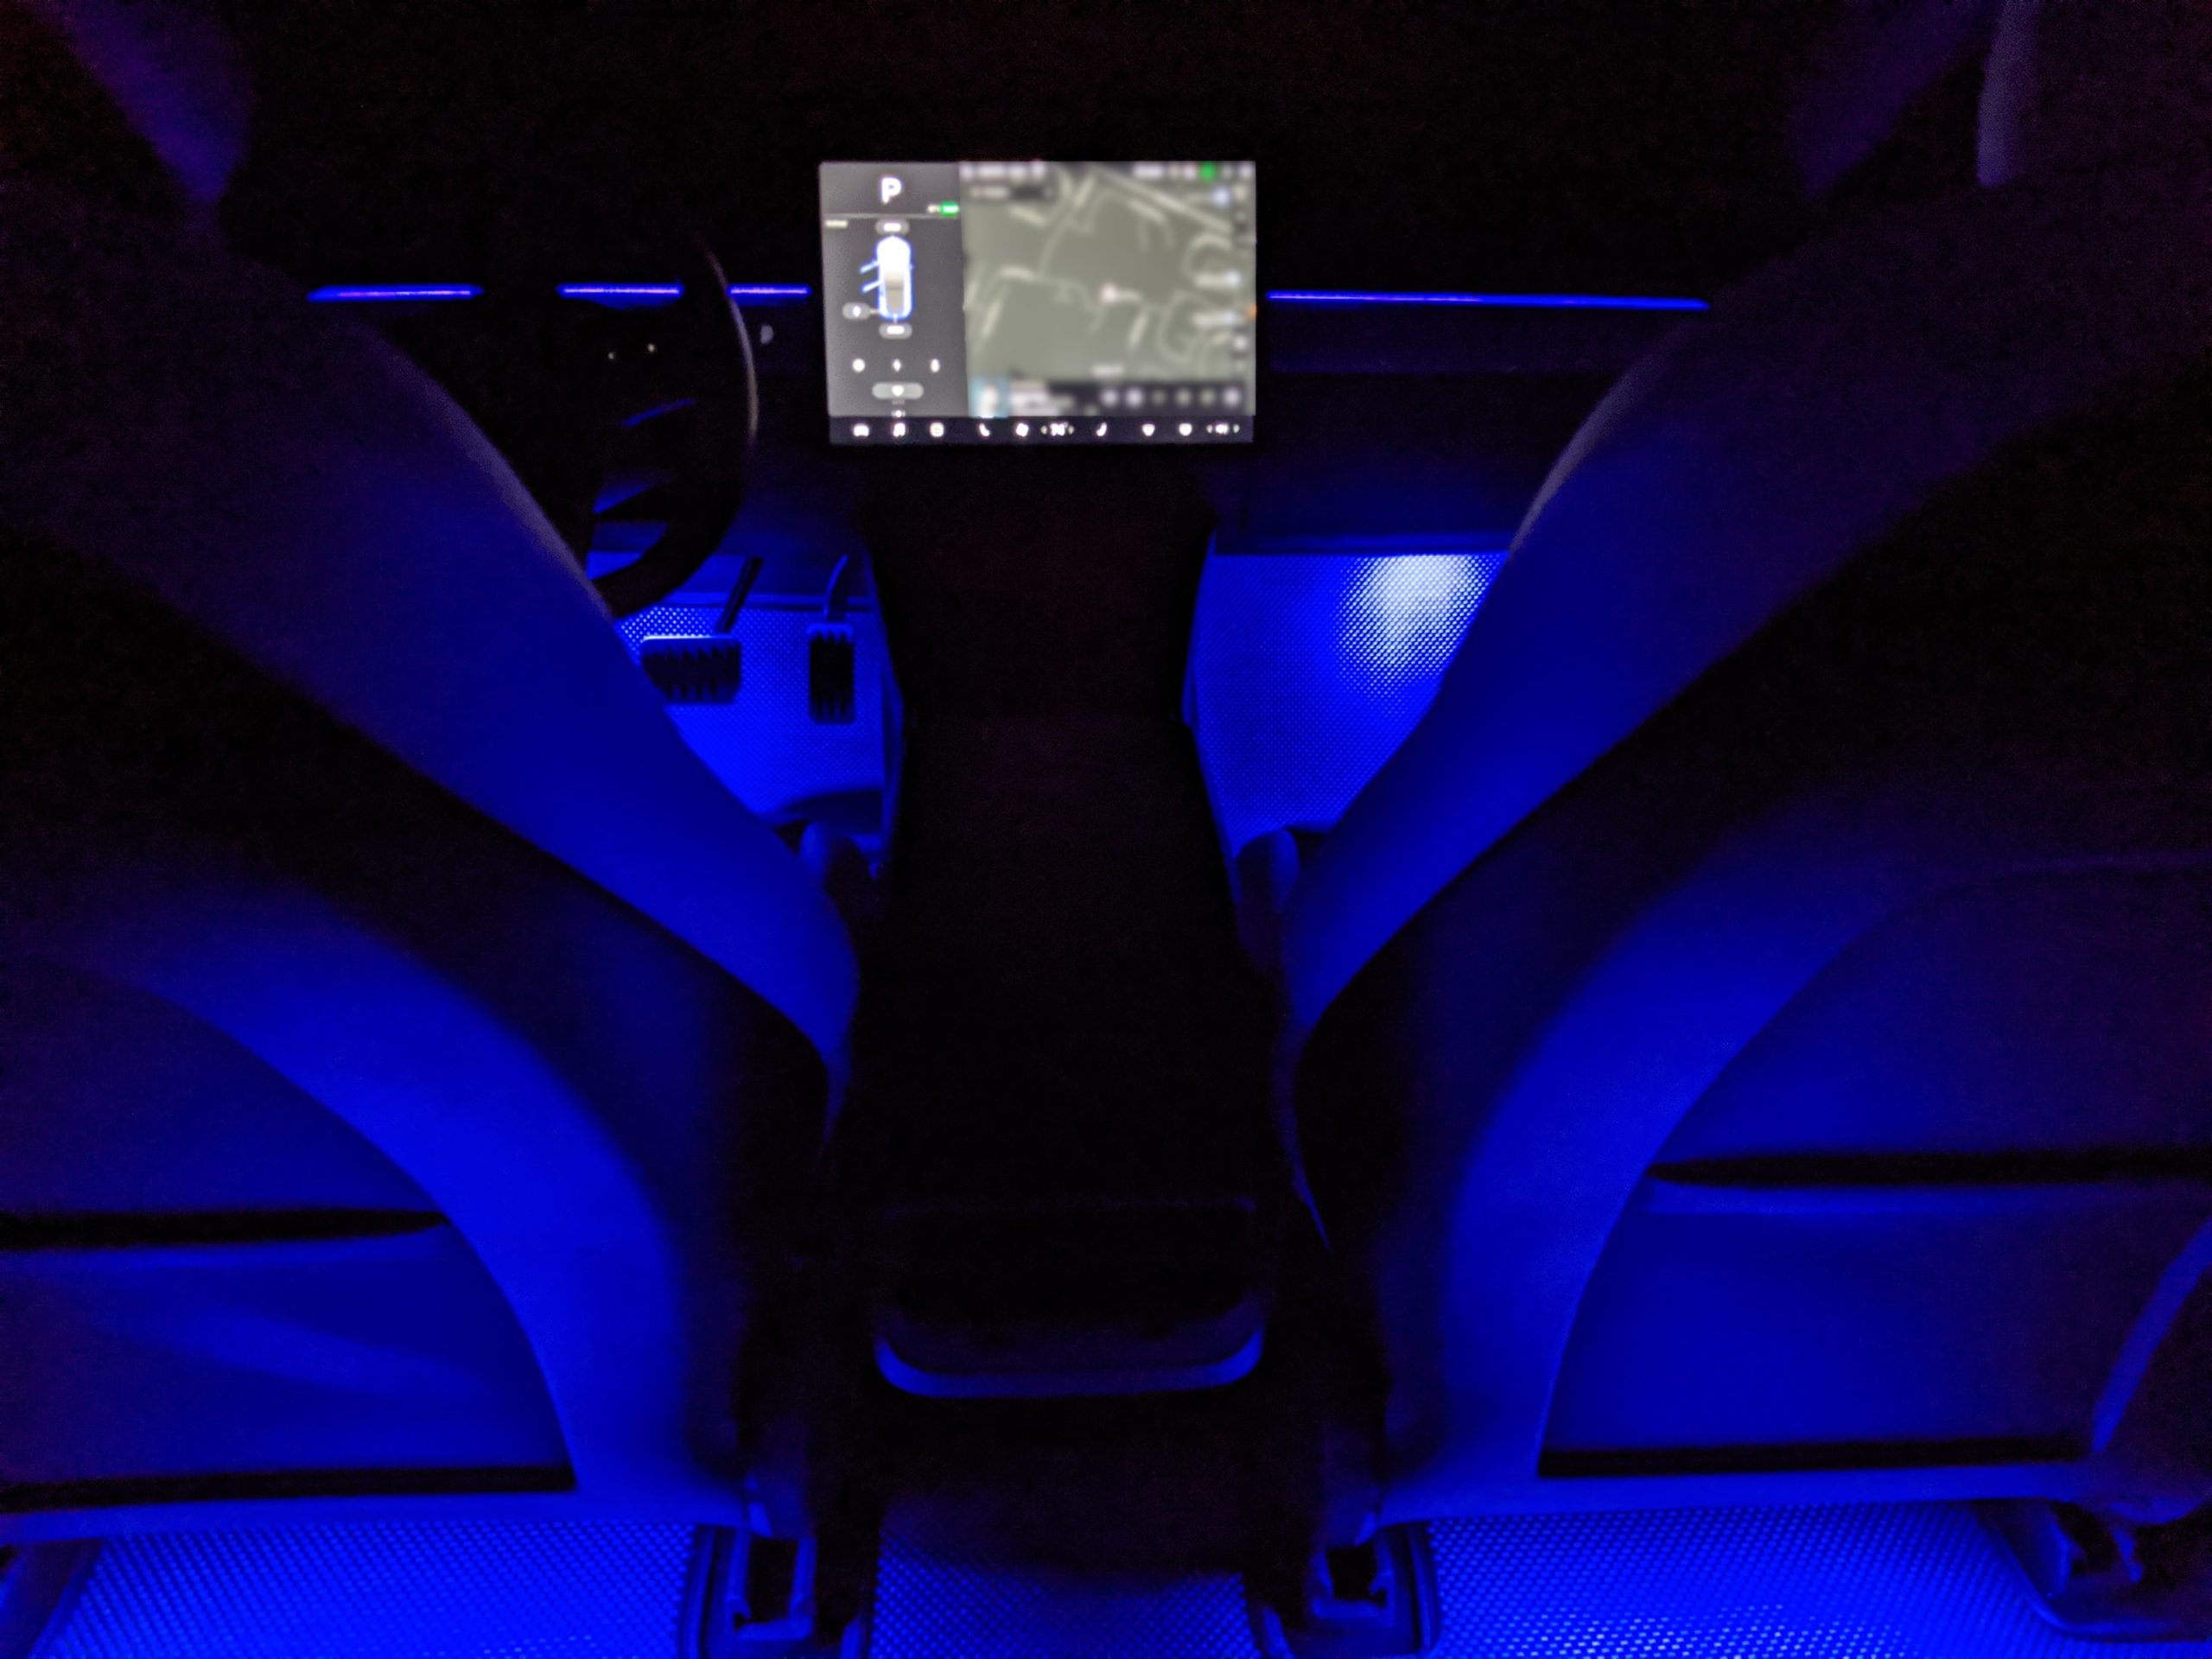
At this point, since I already owned a number of RGB lighting systems in my house, I decided to go all out in the car too. I bought LED strips and splitters and waited for the footwell lights to arrive. I’ll talk about the install process below, but while we’re up here in the “positives” section I really want to share pictures of my final install. Because I’m quite proud of how it looks.
What didn’t go so well
That all sounds amazing! So what didn’t go quite so well?
The first issue I ran into during install was the Laser module getting HOT. Just sitting out in the open air at night the module was reaching 113F / 45C. I live in Houston where summer days can easily top 105F / 40C. I was deeply concerned about putting a 113F module behind a kick panel on a 105F day.
The seller asked me to check my voltage at VC_LEFT. I tested and confirmed it to be 14.5v. The seller thought his own vehicle was closer to 13v and suggested I buy a Buck Converter to reduce the voltage down to 12V.
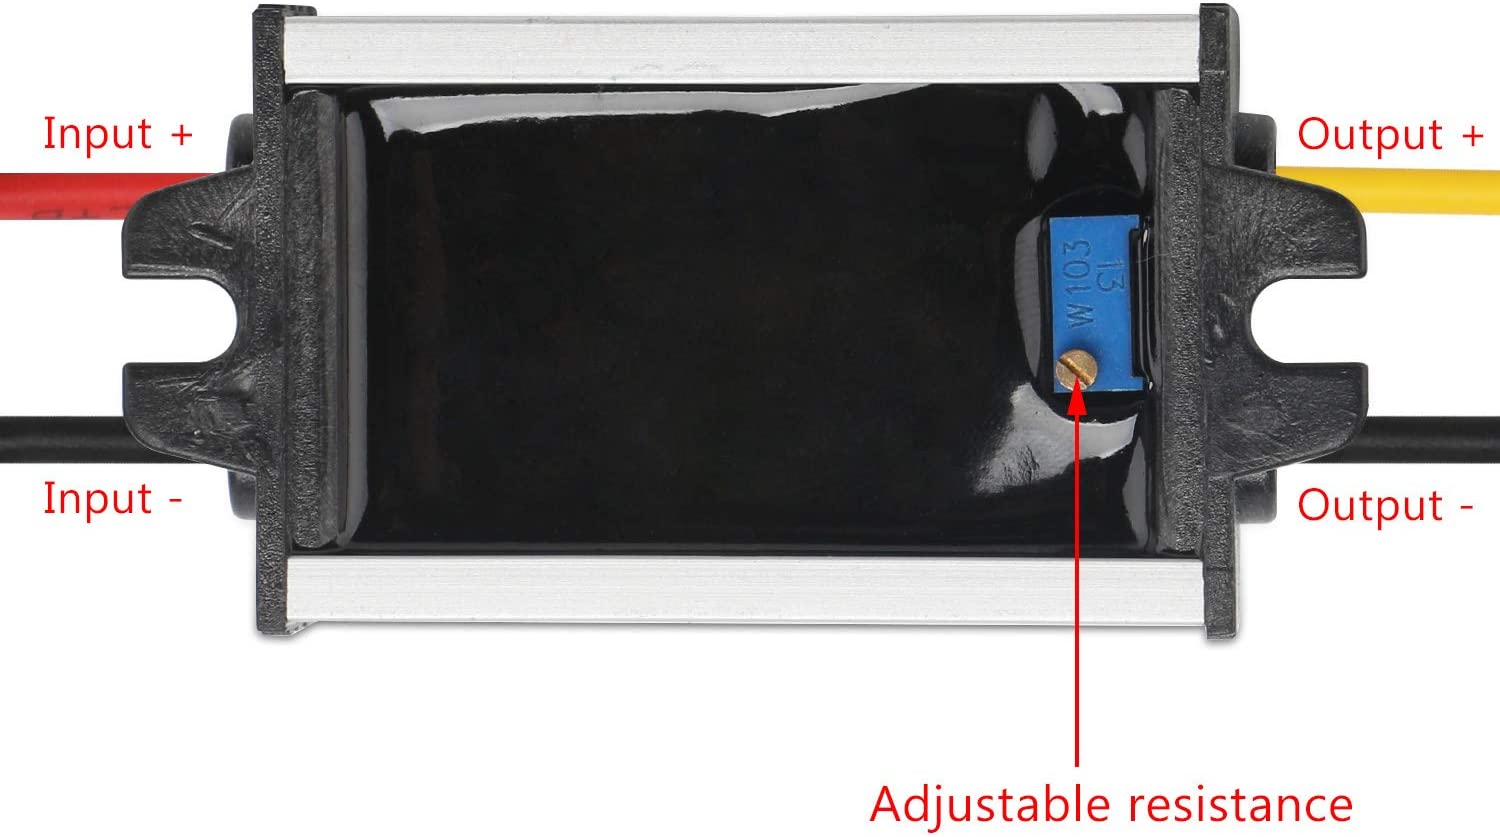
The Buck Converter did make a huge difference. It brought the temps down to several degrees above ambient. This issue was mostly just an annoyance of needing to wait days for the Buck Converter to arrive when I already had the kick panel open. At $15 it also brought the total cost up to $640, but overall that was of course negligible.
The remaining issues centered around that 5-Pin connector on the Bluetooth controller.
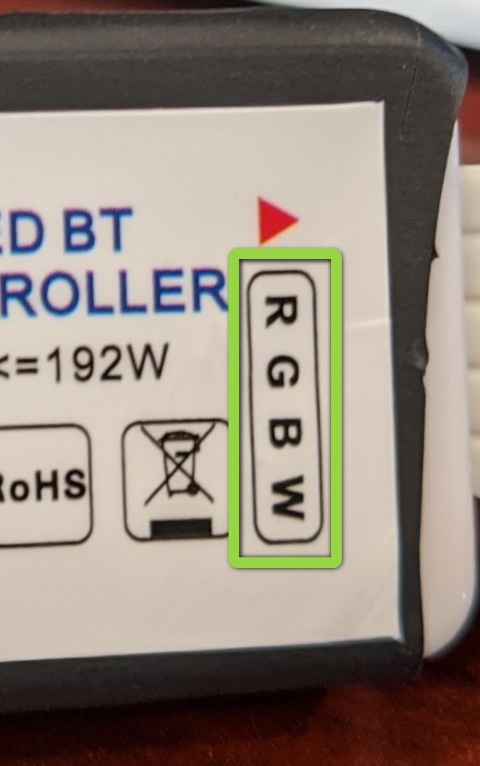
In all of my initial communications with the seller we both used the words “RGB”. The Bluetooth controller itself is also labeled “RGBW”
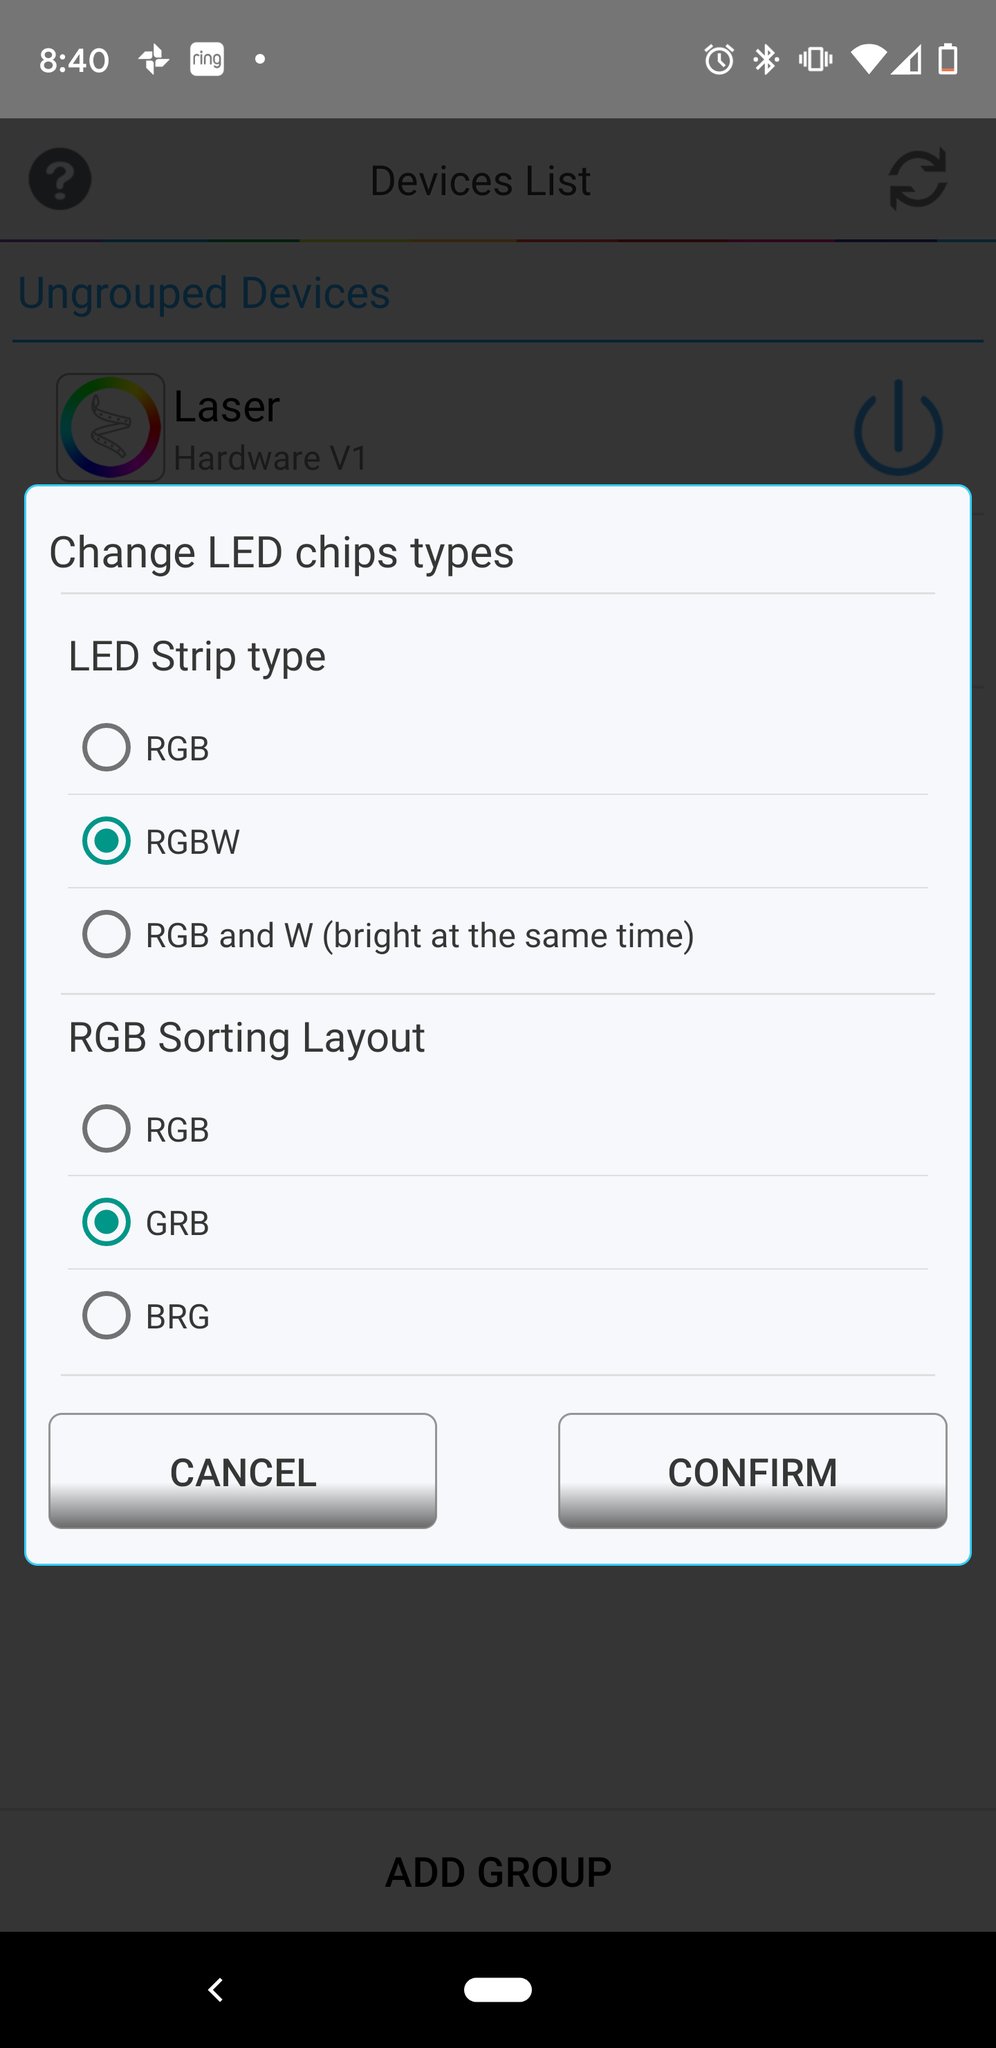
But when I went to install everything it turned out that the Laser module and the footwell lights were both wired “GRB” instead of “RGB”. This means that inside the Laser module, Red and Green have been swapped.
I contacted the seller and he confirmed both Laser and footwells were wired for GRB. Luckily the software I was using allows for this:
But based on previous conversations with the seller, and based on the label affixed to the controller itself, I had already purchased RGB equipment. RGB wire, RGB LEDs, RGB splitters, etc. I asked the seller if I could exchange the equipment I had bought from him for ones that were wired RGB instead of GRB. I offered to pay for shipping both ways. The seller informed me he didn’t have any modules actually wired for RGB and suggested I resolder my equipment to make it compatible. Since I hadn’t installed anything yet, I instead returned my RGB equipment and purchased all GRB equipment. Though I really would have preferred the wiring to match the label on the controller, this was again more about lost time. I just wished this had been communicated to me from the beginning, before I had purchased additional equipment.
The final issue was the biggest one for me and it’s again related to the LED connector of the Bluetooth controller. The question was whether this kit supports the 5th pin on that connector. For those of you who aren’t familiar with LED lighting, the 5th pin is a dedicated “white channel”. Whether the 5th pin worked or not would determine whether I should buy 4-pin (GRB) or 5-pin (GRBW) equipment.
So I asked the seller:
“I’m assuming the BLE controller supports white (and therefore the 5th pin)?”
The seller replied:
“Yes the laser supports RGBW however the app needs to be setup as a RGB so the controller turns 100% the 3 colors when you put white.”
The seller explained to me that while the Bluetooth controller has a white channel, the Laser module only supports RGB and therefore wouldn’t respond to the white channel. That was OK with me because I wanted to use the white channel to get back ambient lighting. Meaning I wanted to be able to light the footwells and seats with white, even when the laser wasn’t showing any colors.
The seller also mentioned
“Actually the footwells are RGBW”
and
“I think adding the W to the footwells is easy Just solder a new wire going to the W”
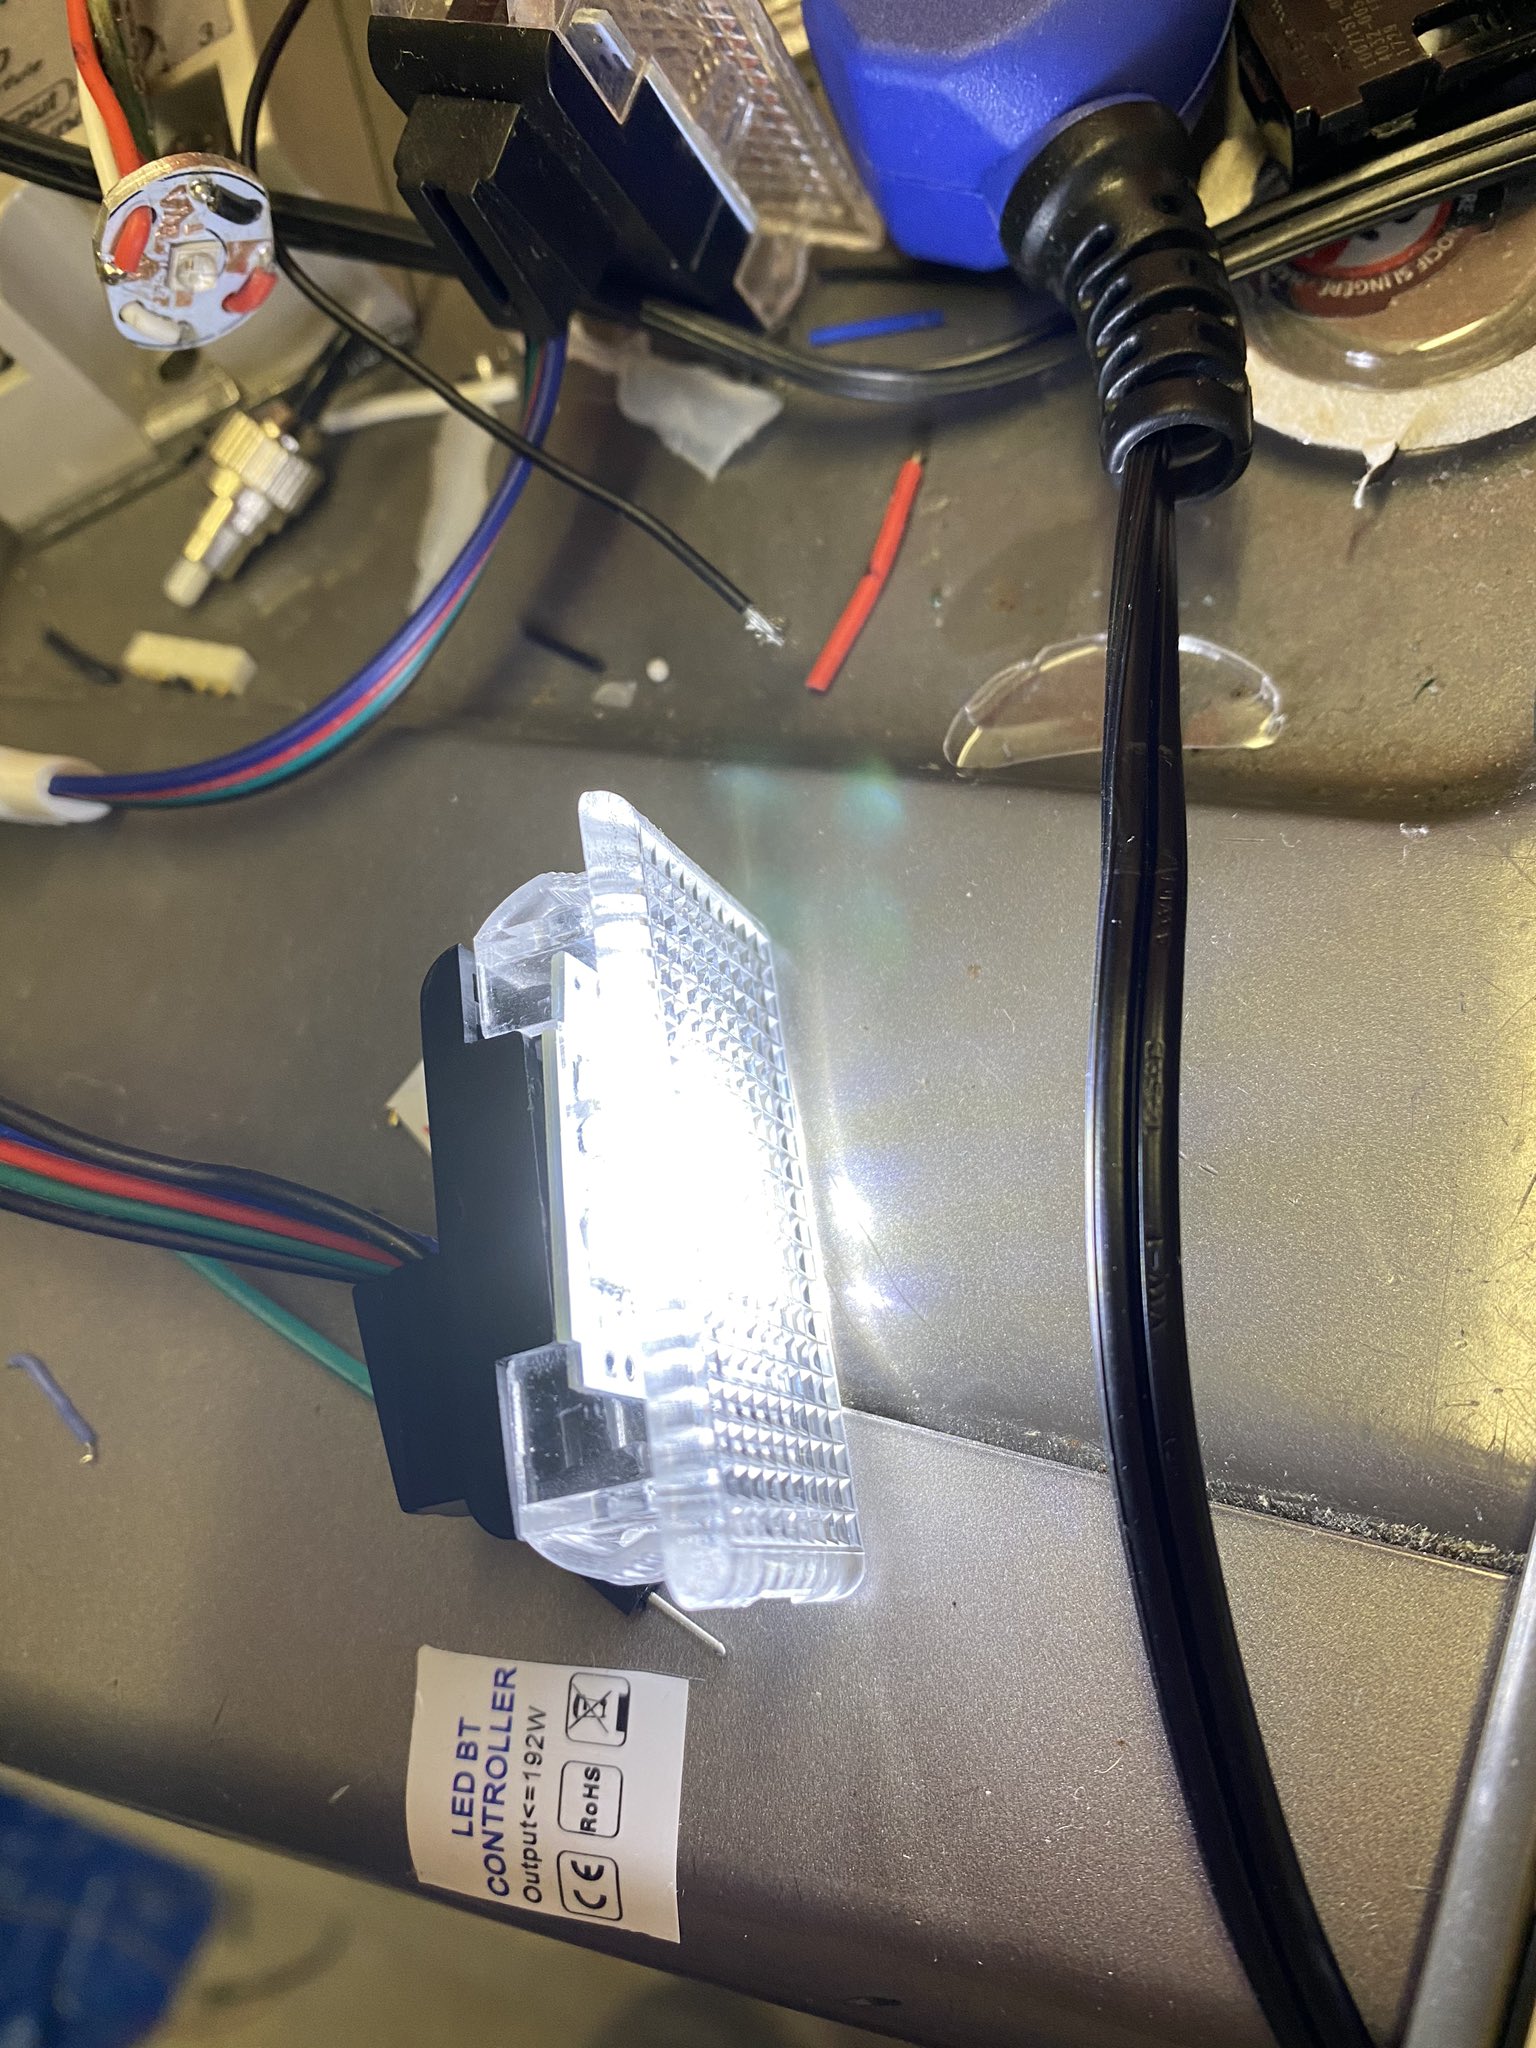
In fact he was kind enough to send pictures of his footwell lights doing “RGB white”:

As well as them doing dedicated white with a newly soldered wire:
The seller even kindly helped me figure out where to solder the new wire to get dedicated white support with his footwells.

I thanked him, then proceeded to purchase GRBW wires, GRBW connectors and GRBW lights.
When the equipment arrived I was excited once again. But when I went to plug everything into the controller I ran into the next problem. It turned out that the controller I received with my laser had a wire broken off inside the 5th hole!
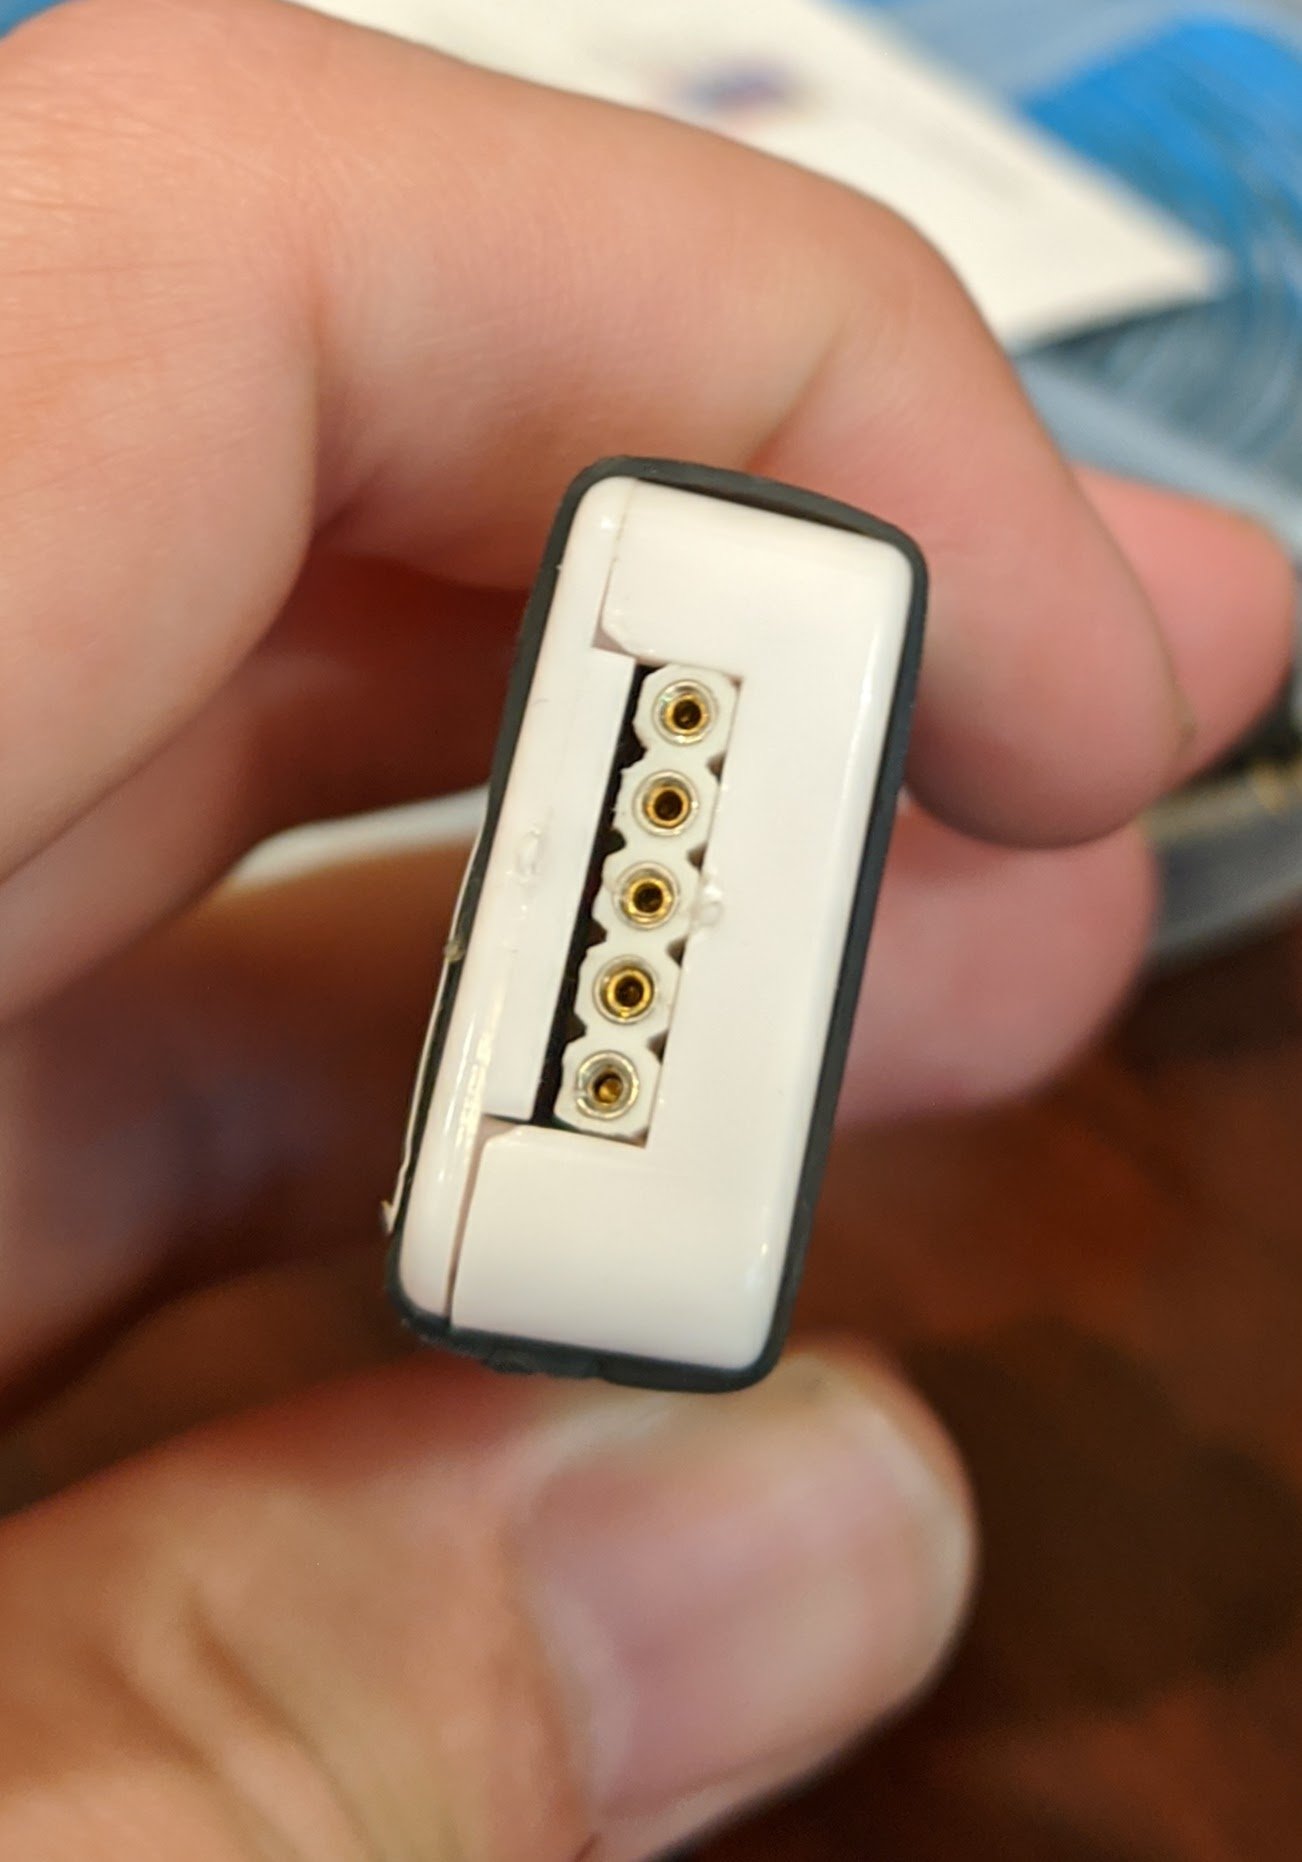
To complicate matters, when I tried testing the GRBW light strip (by holding the pins to the connector), white wasn’t working.
I contacted the seller and he informed me that he had intentionally broken a wire off in the 5th pin to make sure someone didn’t accidentally use it. This was confusing for me. I didn’t understand why this wasn’t mentioned in our previous conversations about pin 5 and white. Since I couldn’t get the broken wire out, I asked about getting a replacement controller. The seller did approve a replacement, but only if I paid for shipping both ways. He said he would waive his restocking fee, but he also warned me that my new controller might not work any better. This confused me again. I mentioned that if the 5th pin didn’t work then there was no need for us to exchange the controller. He told me that he checked his own controller and confirmed that he saw voltage on pin 5 when using RGBW. So I decided to order a replacement controller and keep the one I had as a backup.
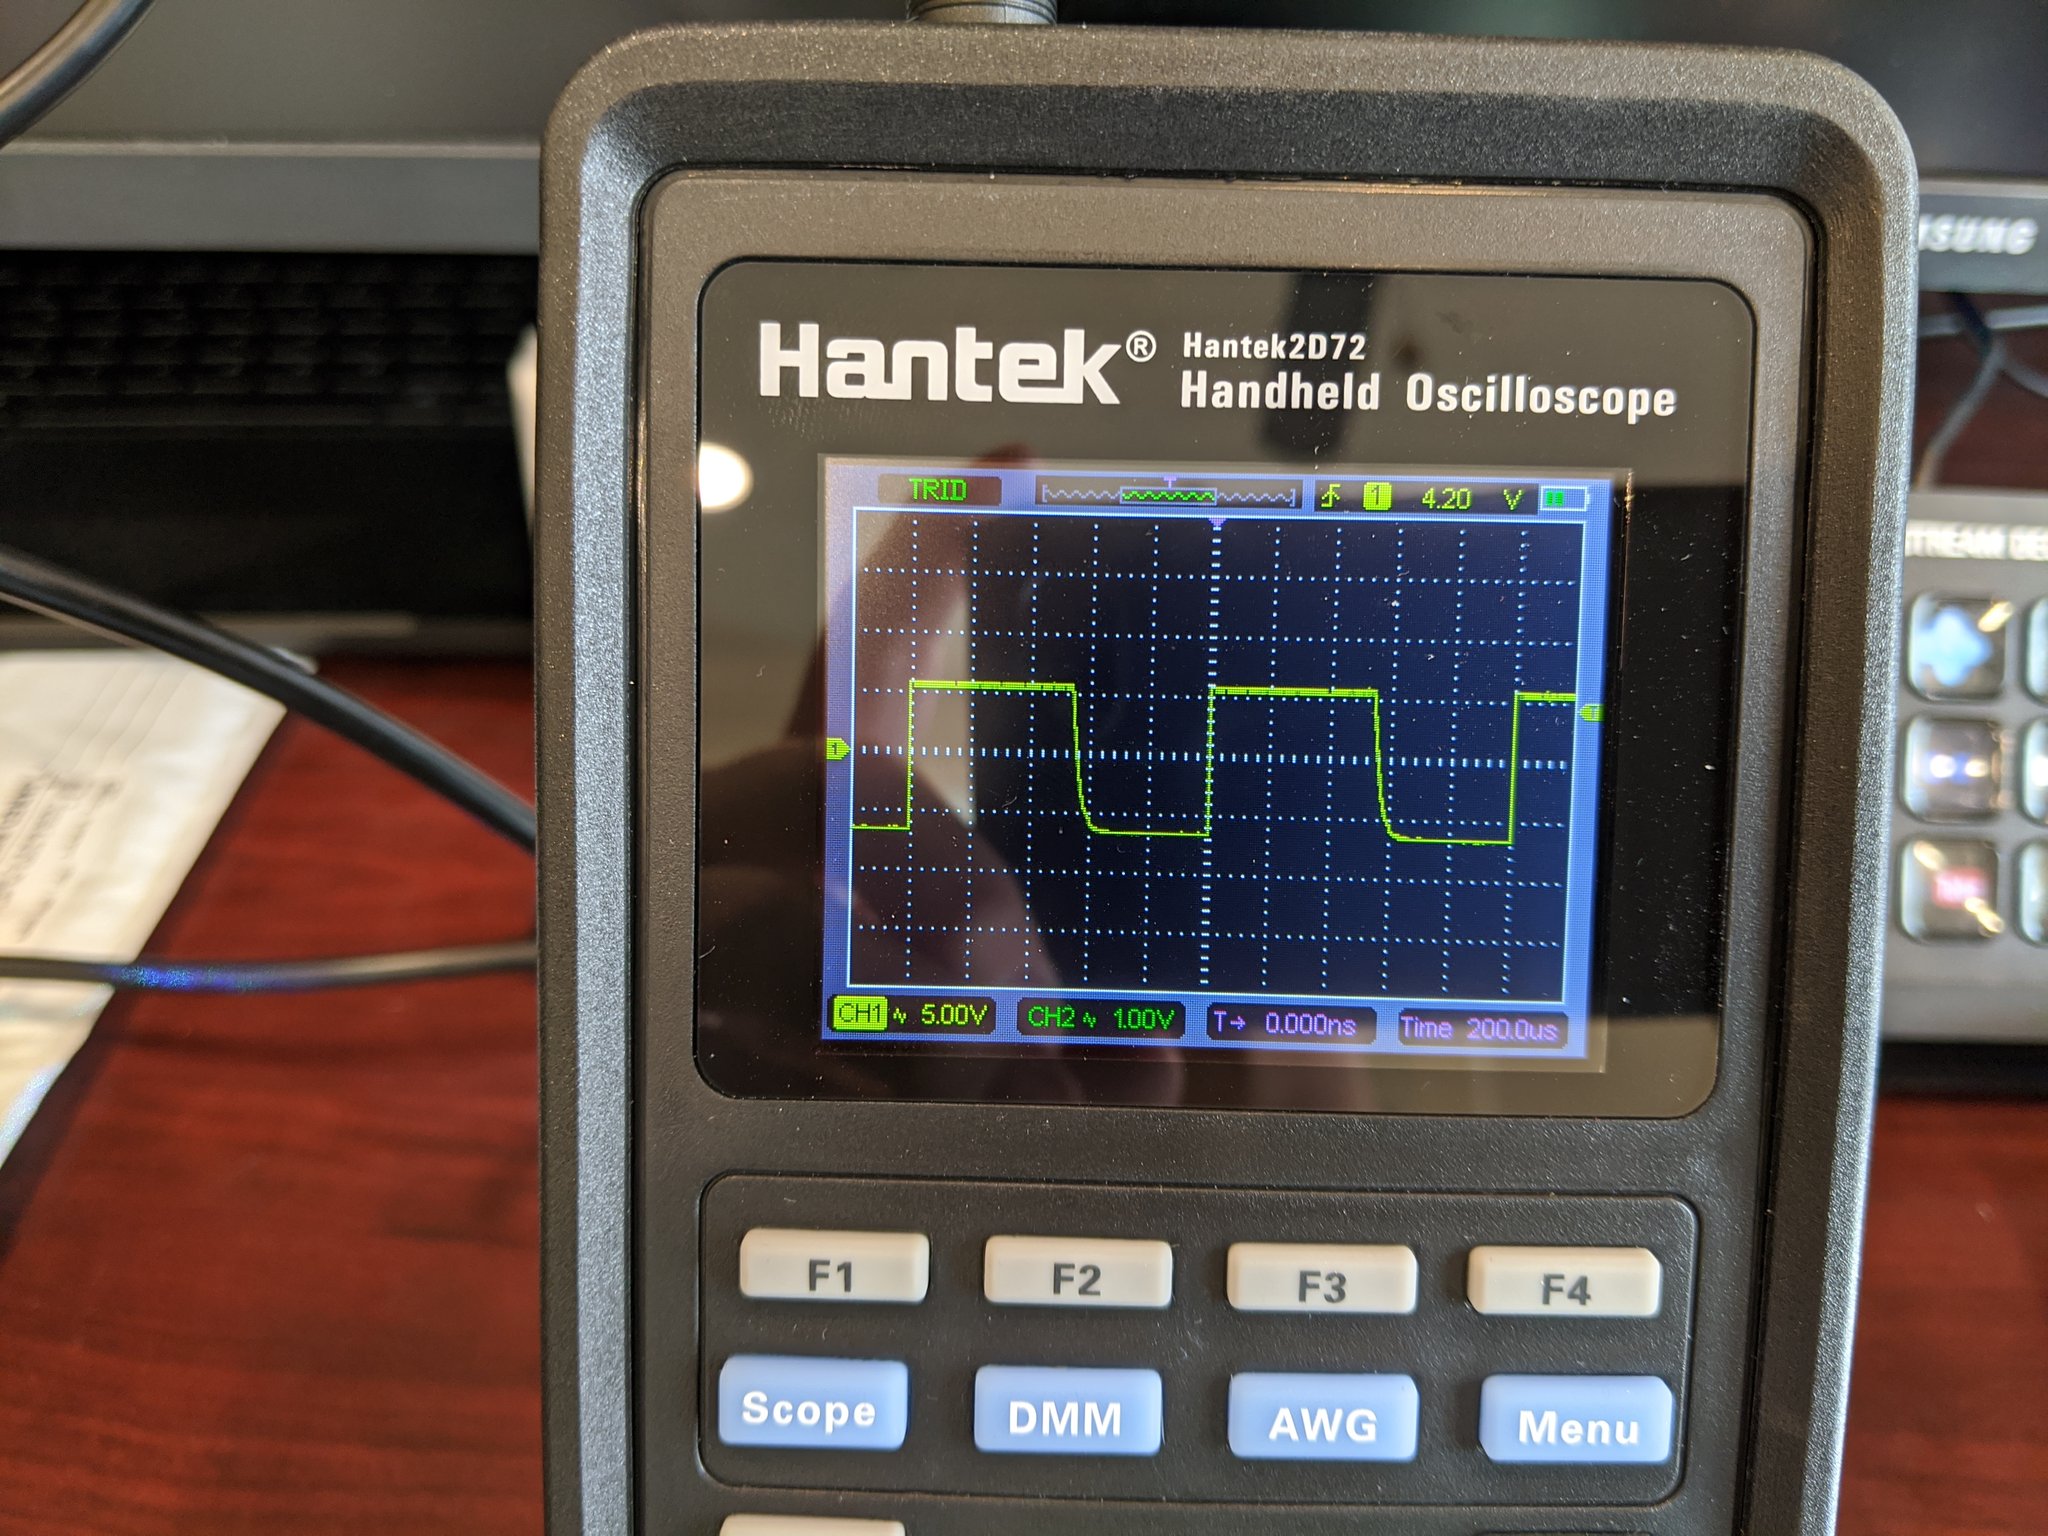
Several days later I got the new controller and was able to connect it all up. Everything plugged in fine and Red, Green and Blue worked perfectly but White still wouldn’t work. I even broke out the oscilloscope to verify. Testing any of the color channels showed a clear PWM signal which adjusted with brightness.
But testing the White channel showed only noise:
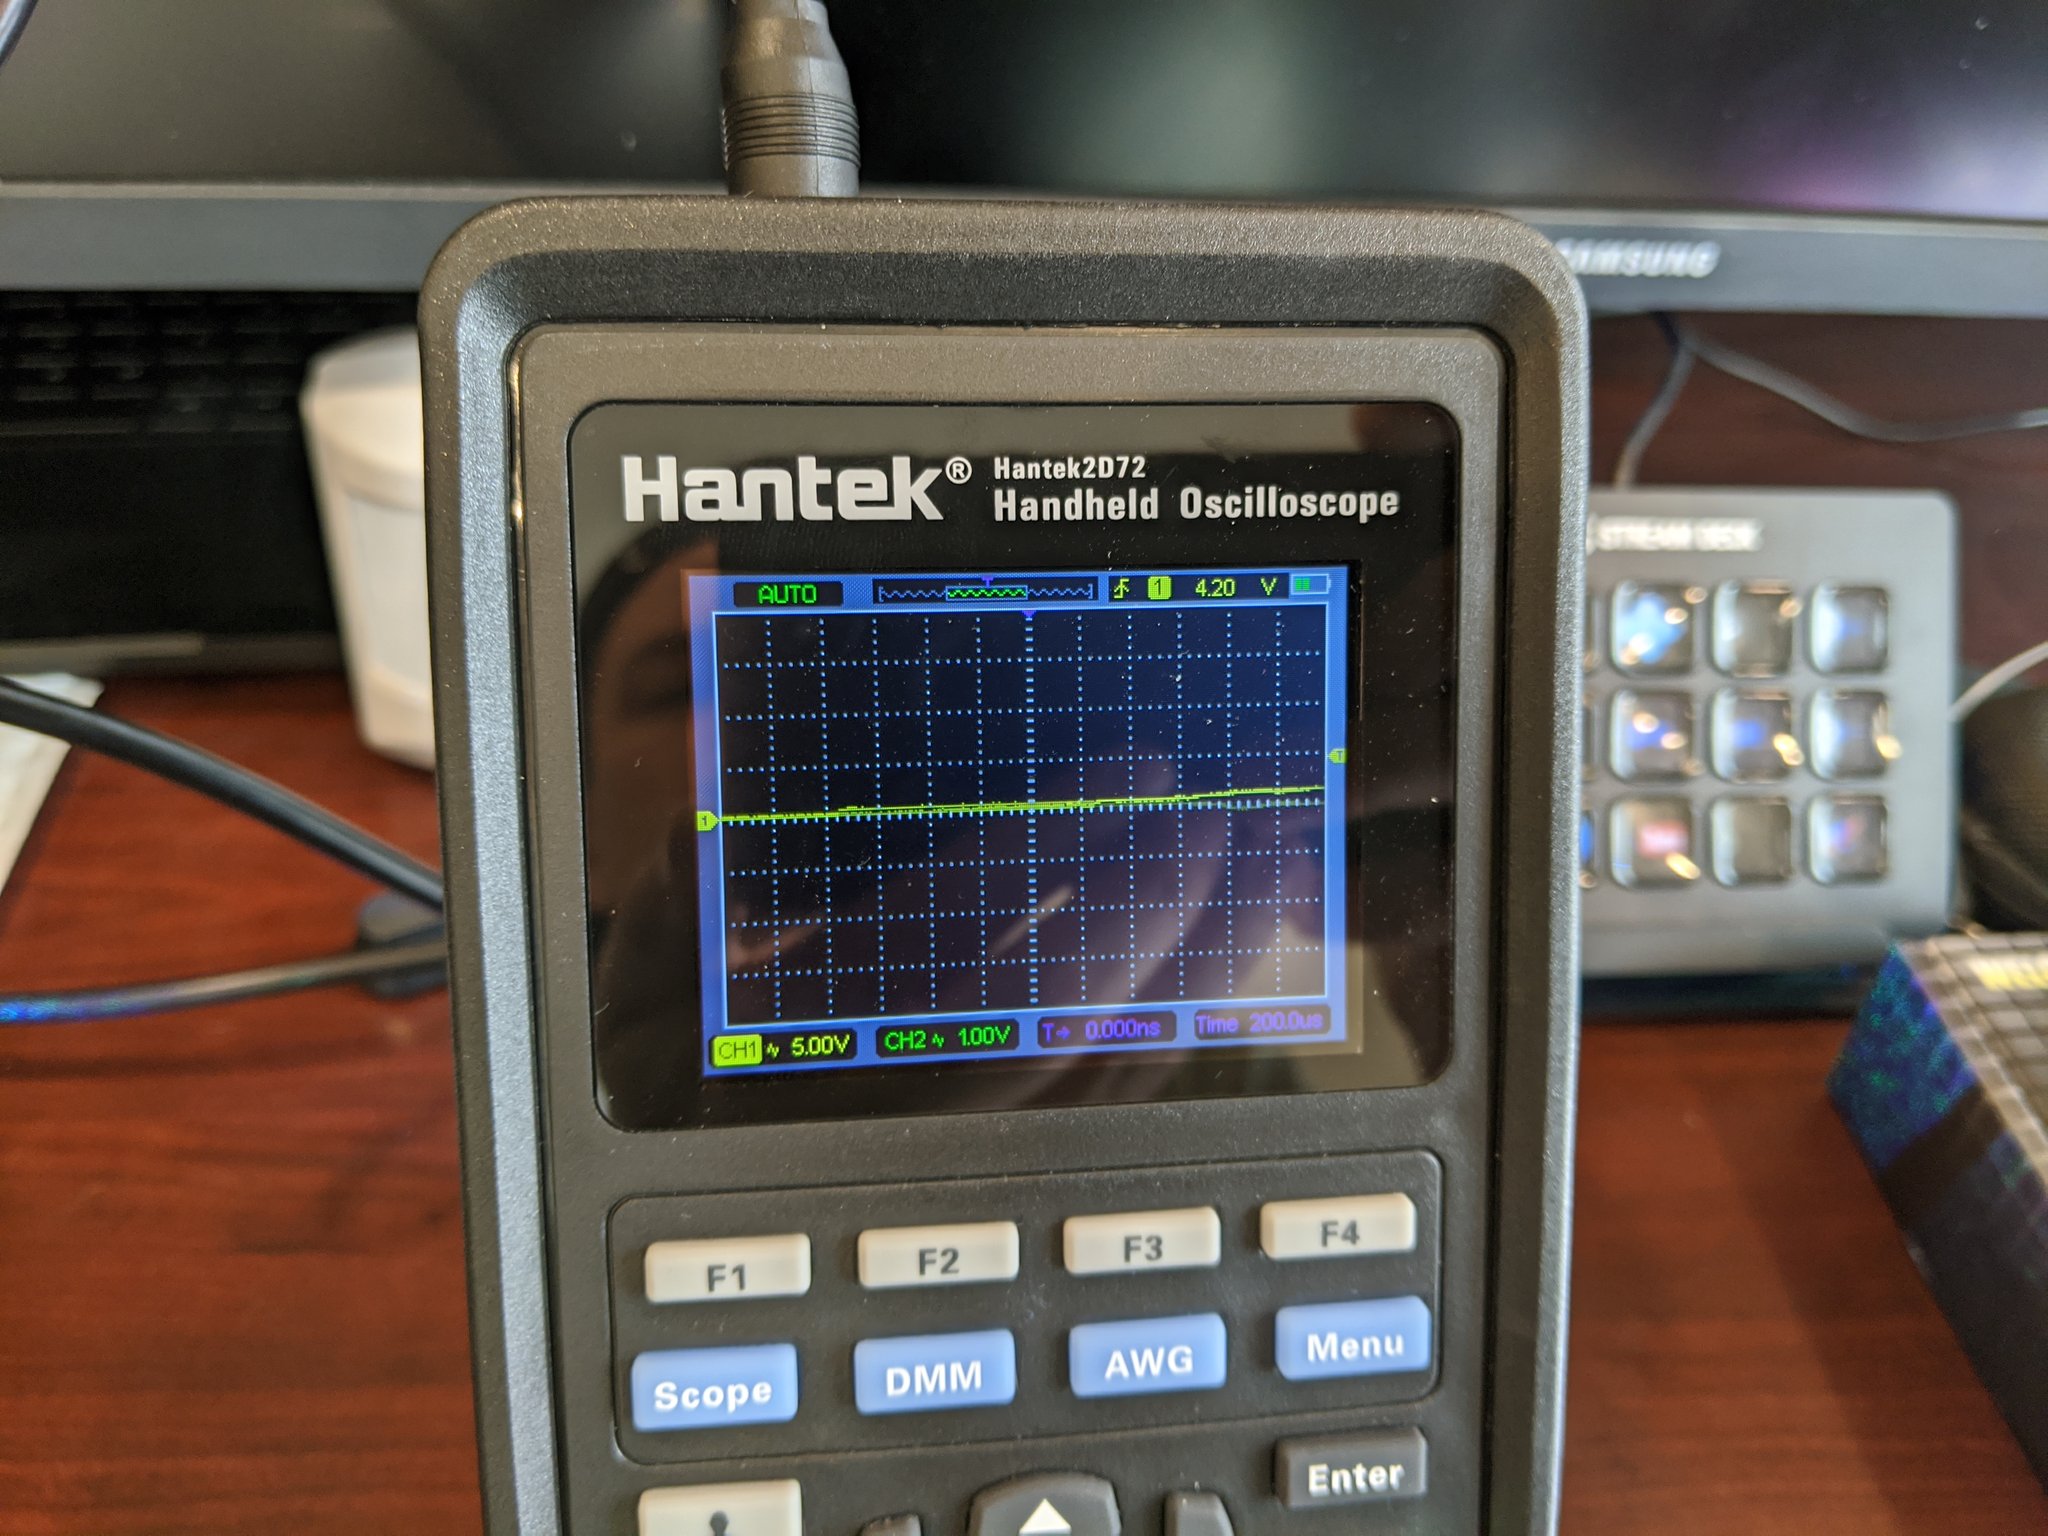
It was the same thing with both the old and new controller.
I contacted the seller and we spent a LOT of time troubleshooting. I mean we spent hours. The seller sent me video of Pin 5 working in his shop with his modified footwells. But I changed power supplies. I isolated components. I even got out my old iPad so I could use the exact same app the seller was using. No matter what, White just would not work for me.
Finally the seller said
“Send me the old one, I’ll test it here. If it works here… it might be the module. Which I don’t think so. I meant the laser module not the controller. It’s a weird behavior.”
So, I shipped the first Bluetooth controller back and waited to hear from the seller. A few weeks passed and I didn’t hear anything so I reached out. The seller confirmed he received the controller but hadn’t tested it yet. After a few weeks more I reached out again but it still hadn’t been tested.
I asked if it could be tested because if we confirmed there may be an issue with the Laser module, I wanted to exchange it. I even offered again to pay for shipping both ways. This time the seller said
“I can’t be responsible for something that I didn’t advertise”
and
“The laser works as advertised, So unfortunately I won’t be able to exchange it”
TL;DR
In summary, this kit is beautiful and incredibly unique. It really is something special to behold. This kit is also a prototype; produced and supported by an individual. Most of my interactions with the seller were impeccable. He spent many hours on Twitter with me troubleshooting issues and discussing white support. The seller even sent me a generous section of tubing for free so I could elevate the fiber above my dash. I deeply valued and appreciated each and every one of those interactions with him. Unfortunately, after multiple conversations about white support (and after buying and installing white equipment), the seller decided I was using his product in an unsupported way. And, sadly, when something like this happens there’s just no way to appeal to a customer service team of one.
I feel it’s worth noting here that there are several highly regarded accessory manufacturers offering aftermarket lighting kits for the Model 3. Companies with impeccable customer service records like Abstract Ocean, RPMTesla and EVANNEX. (These companies also financially support Tesla forums through their advertisements and sponsored posts.)
The laser kit is much more unique than anything you’ll find from those sellers. The laser kit is also 10 times more expensive. Of course you’ll need to decide what’s right for your own ride, but when I spend 10 X on something unique, having compassionate customer service is really important to me.
On one hand I’m quite proud of what I have installed now. It’s very special. On the other hand, it wasn’t easy and it still isn’t everything I hoped it would be. I’ll be keeping what I have for as long as it functions. Someday, if it stops working, I’ll either buy something from one of the sellers above or build my own addressable LED kit like what user R1Fast did here. I really like the looks of his mod too.
I want to close by reiterating that this is my own personal experience. Your mileage and experience may vary. I’d still really like to work with the seller to finish my project, should he ever decide that white is officially supported.
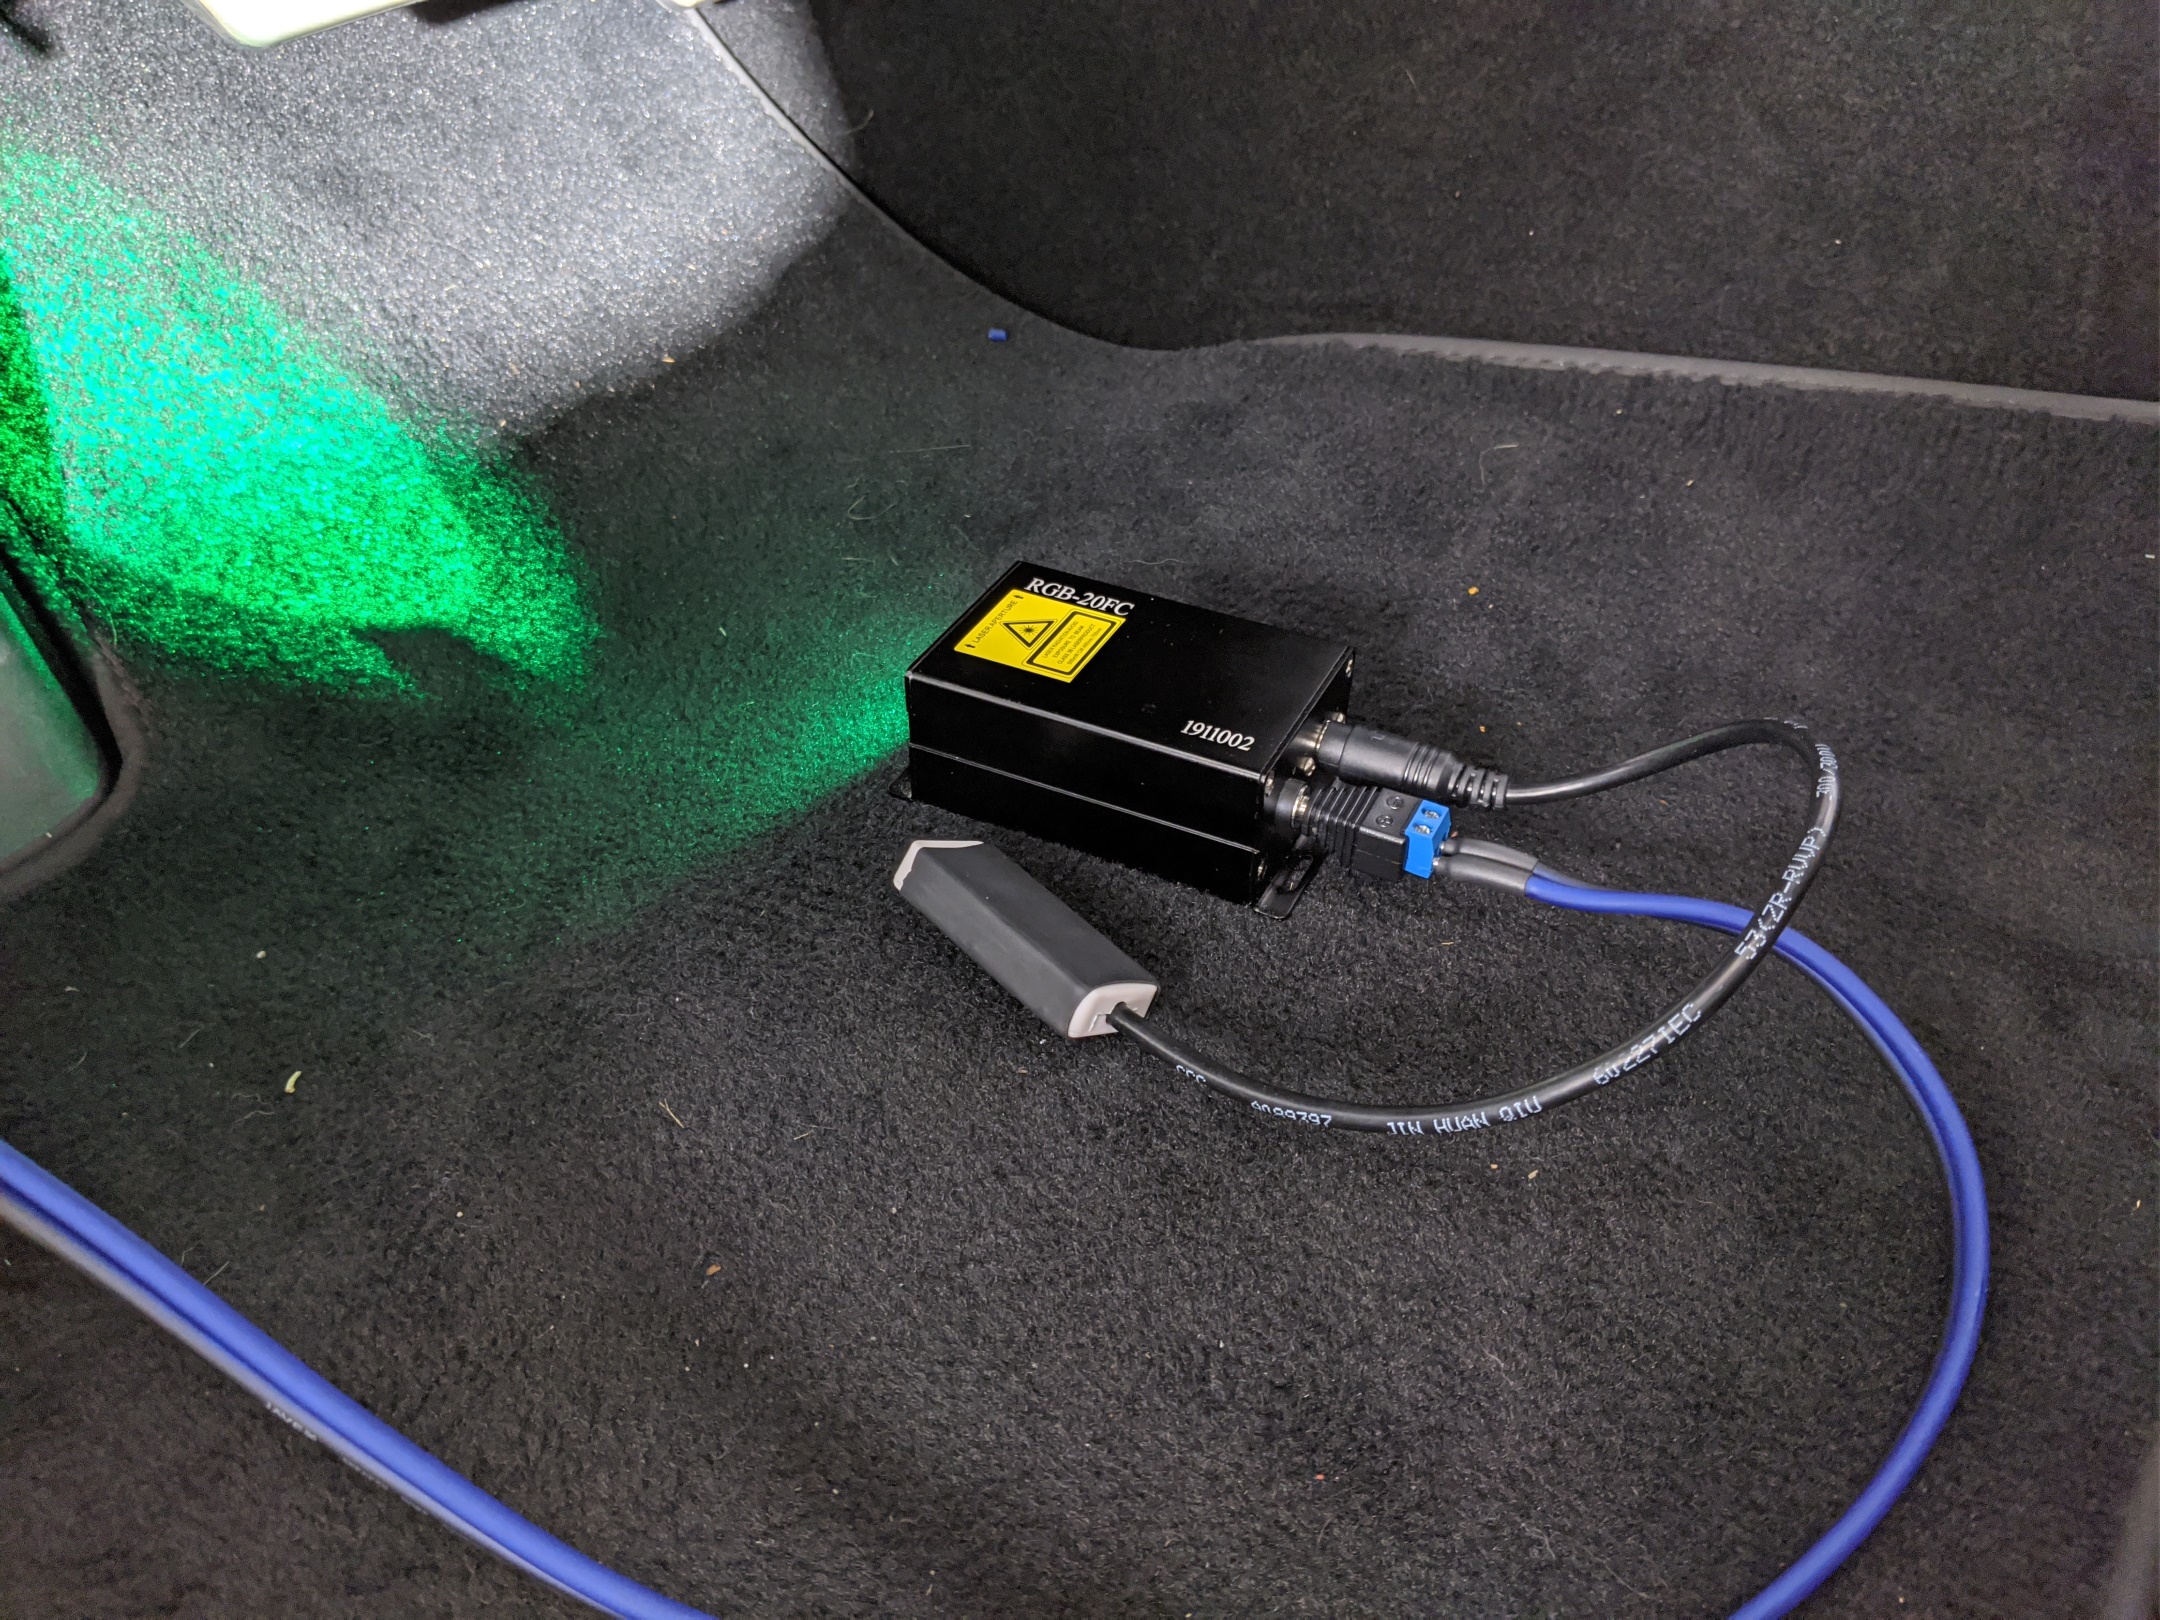
Recently a community member reached out and let me know that he was able to source the same hardware in this post for significantly cheaper than what I paid. For those interested in doing something similar, I wanted to follow up here and share those resources too.
The RGB Laser can be purchased here or here from a company named Elite OptoElectronics. Elite is an electronics parts supplier in Xi’an China. It’s important to note that similar to other part suppliers, Elite may only want to sell in significant quantities. You may be able to request a “sample order” of one, but if a few people want to get one of these I recommend organizing a group buy rather than a bunch of people asking to buy samples at the same time. The community member who reached out to me said that they were able to purchase one of these Laser modules for $370 (USD) plus $30 UPS shipping. This includes an IR RGB controller and is obviously significantly cheaper than the $510.00 I paid.
It’s also super important to note that the Laser module is designed for an input voltage of 5V. However, even though it’s not mentioned on the website the community member I spoke with said that input voltage can be customized by speaking with an Elite sales rep. If this is possible I recommend requesting an input voltage of 14V. This should remove the need for the Buck Converter in the Model 3.
The part number for the Laser module is RGB-20FC and I have a copy of the data sheet if you need it. The most important information in the data sheet is the pinouts of the DIN connector:
RGB Control Connector KPJX-PM-4S
PIN1– Red TTL (red wire), Active low in the PWM TTL controls
PIN2– Green TTL (green wire), Active low in the PWM TTL controls
PIN3– Blue TTL (blue wire), Active low in the PWM TTL controls
PIN4– GND (black wire)
The Bluetooth LED controller I wrote about can be purchased from Ali Express here for only $4.00 USD. $4.00 is obviously much cheaper than the $75 I was charged for a replacement. Though to be completely fair, it appears that modifications were made to both the Laser module and the Bluetooth module to make them work together more easily. The Laser module from Elite uses a KPJX-PM-4S connector which has only 4 pins, but the Laser module I bought has 5 pins. It appears the 5th pin carries power from the Laser module back to the Bluetooth module so you don’t need a separate power source for the Bluetooth module. Also, in my install it appears the pigtail was soldered directly into the Bluetooth module so that the 5-Pin RGBW connector remains available for other equipment. This is a nice touch, but I believe as long as you’re OK with two power wires you could get by with a simple 5-pin “Y adapter” for this (easily purchasable on Amazon).
If all you care about is the RGB Laser, the one from Elite comes with its own RGB controller. But be aware that the RGB controller they provide is an IR controller and not a Bluetooth one. If all you care about is controlling LED lighting via Bluetooth, then the only thing you need is the Bluetooth module above. If you want both, you’ll need to do a little bit of wiring to get them talking to each other, but hopefully the pinouts I listed above will help you make those connections.
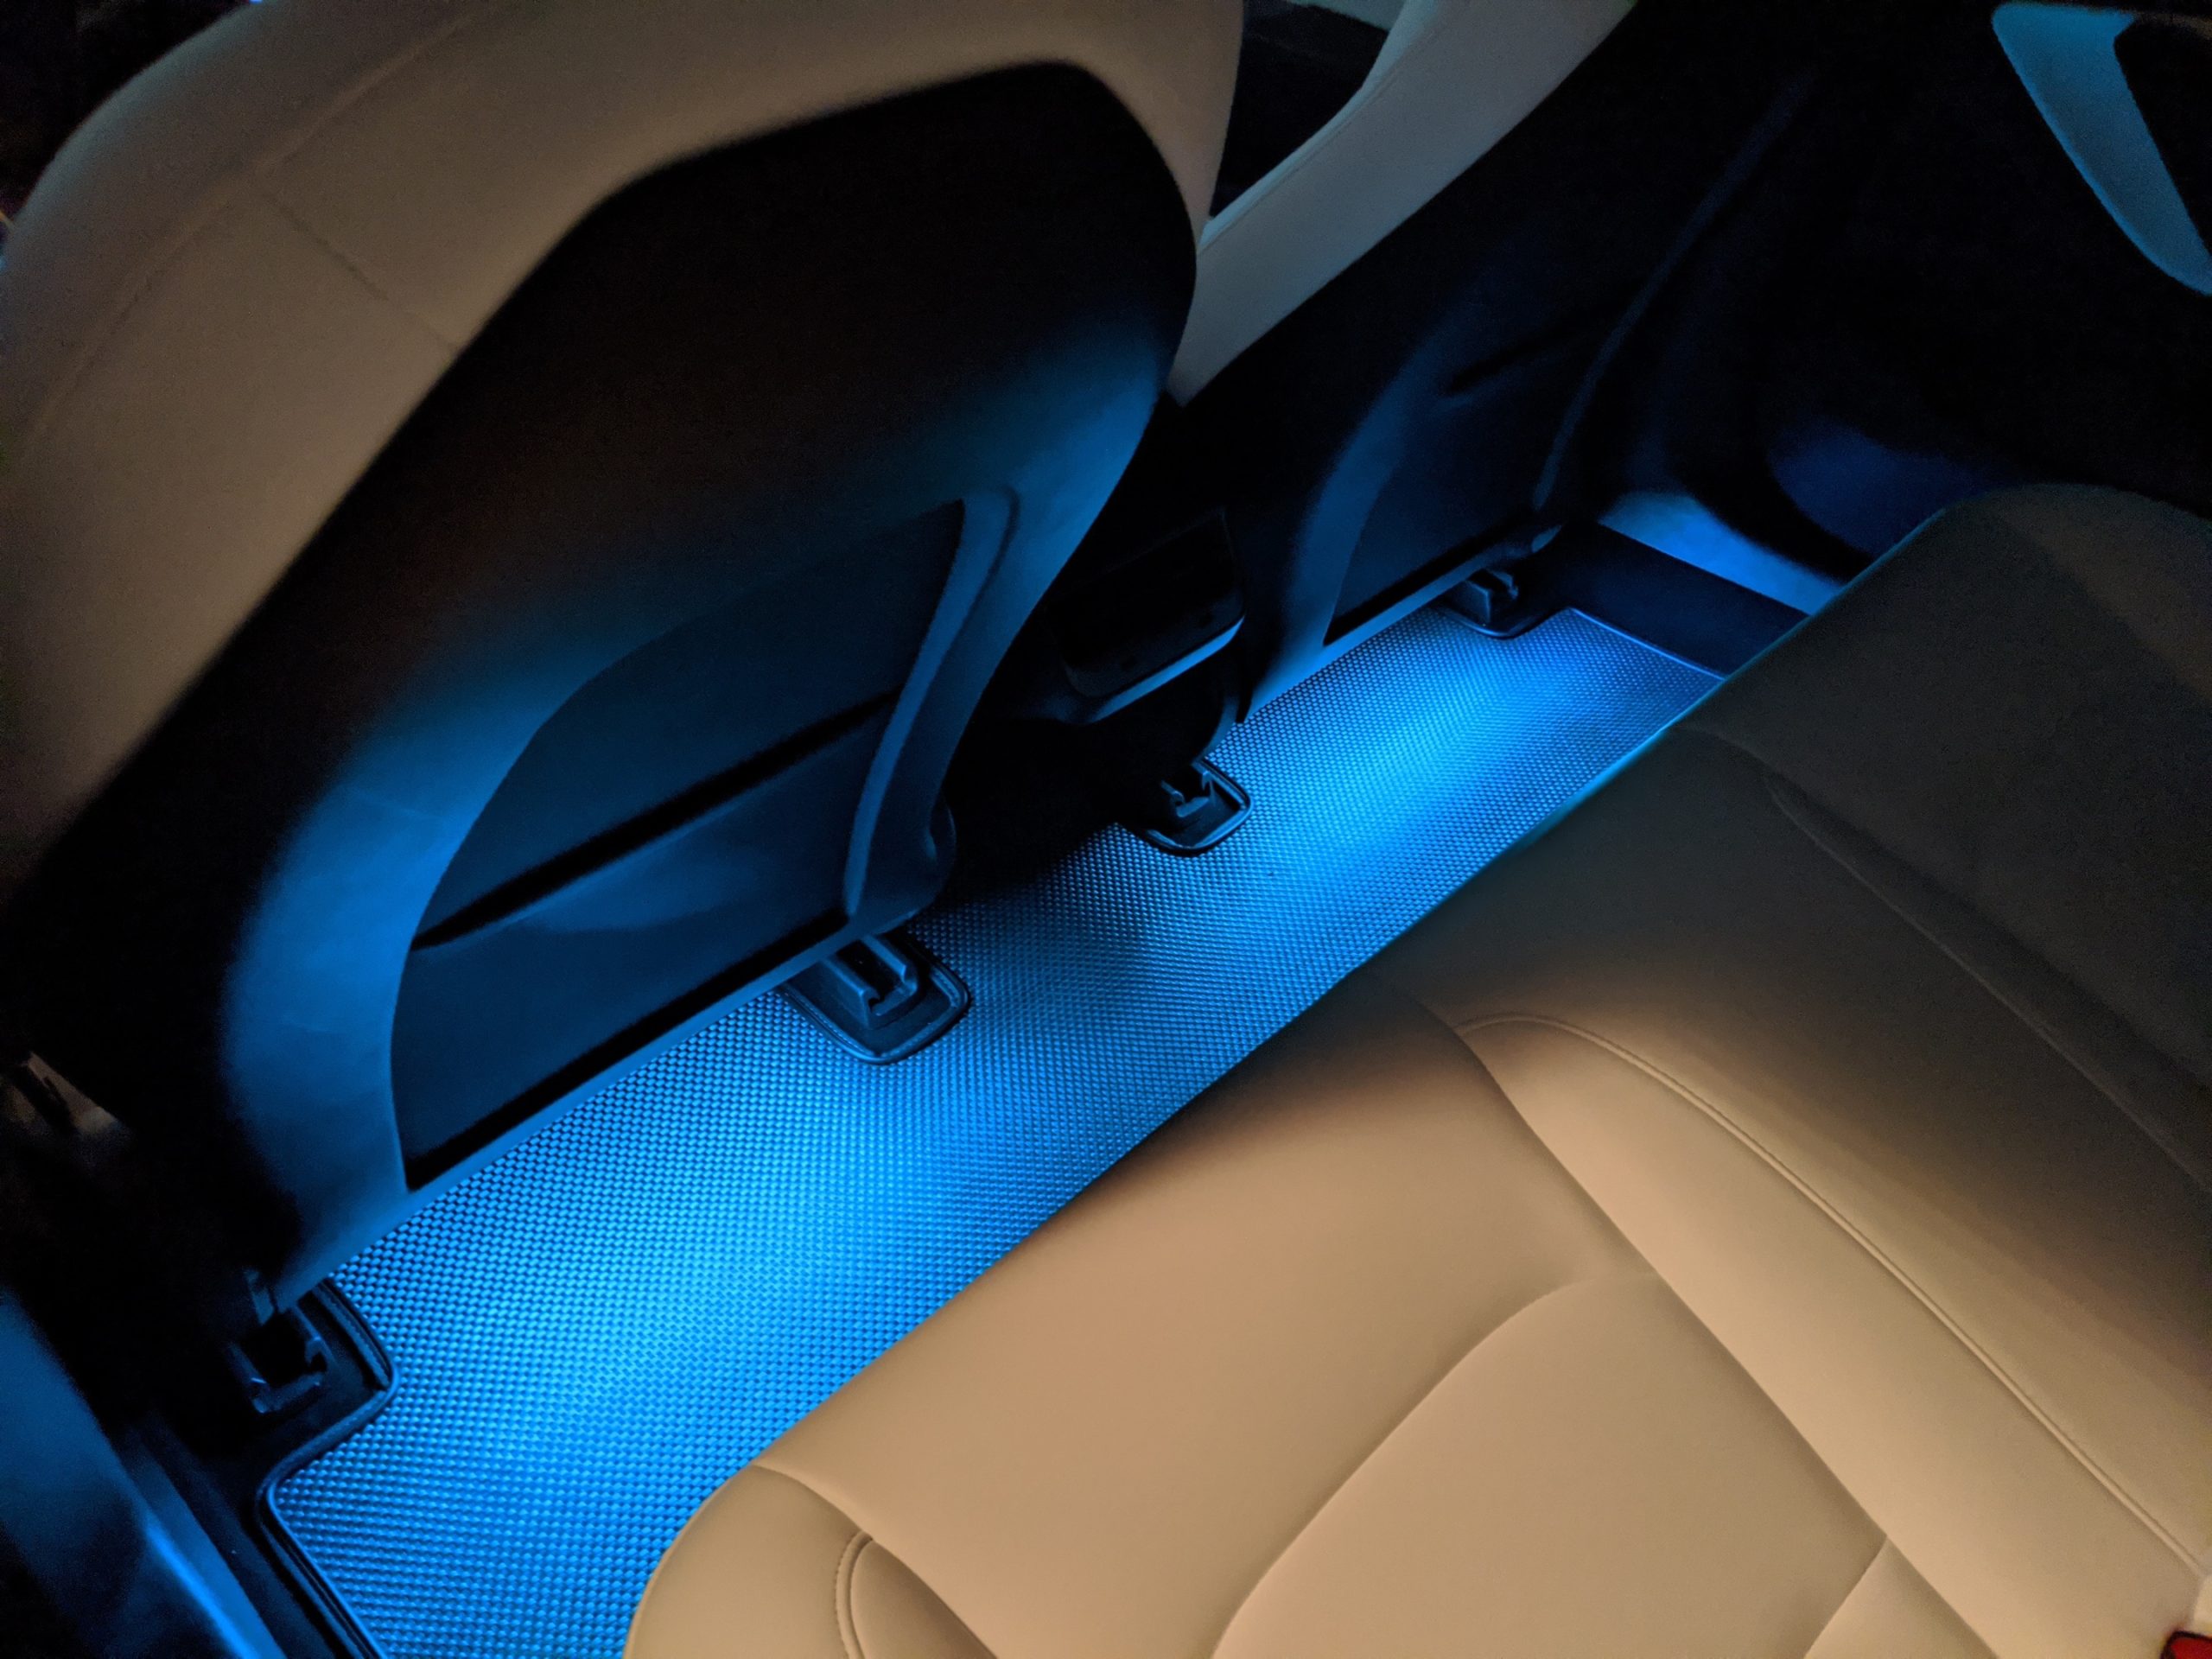
Finally, neither my contact or I have been able to locate a direct replacement for the RGB footwells, but we’ve come close. This listing on Alibaba offers several single color replacements as well as a RGB option. The problem with the RGB option is that it uses it’s own integrated RGB controller. This means it won’t connect to the Bluetooth controller above, and each footwell would be independently controlled. In my personal opinion, I don’t think replacing the original footwell with RGB is the best way to go. When you do this, you lose the ambient light that’s already there stock. I think it’s best to leave the ambient light alone and simply add a RGBW strip using double-sided sticky tape. This is what I did for the back seats, and if I were starting my project over again that’s what I’d do up front too.
Anyway, I hope someone finds this update helpful. If anyone ends up buying these and installing them I’d really love to compare notes and hear how things worked out for you. Don’t hesitate to send me a message if you have any questions. Best of luck with your lighting mods, and don’t forget to post pictures!